
Nothing ruins the excitement of a new air purifier faster than confusing controls and unclear instructions. When you unpack your GermGuardian air purifier, you want clean air circulating through your home immediately—not hours wasted deciphering manuals or searching online for basic setup steps. Most users don’t realize that improper placement or skipped setup steps can reduce your unit’s effectiveness by up to 50%, meaning you’re breathing dirtier air while thinking you’re protected.
This practical guide delivers exactly what you need to know—no fluff, no technical jargon, just clear instructions that get your GermGuardian working at peak performance from the first minute. You’ll discover the precise placement strategies professionals use, how to interpret those confusing control panel lights, and the exact filter replacement schedule that keeps your unit running efficiently for years.
Unbox and Initial Setup for Immediate Operation
Skip the frustration of missing components by verifying your GermGuardian box contents before setup begins. Your unit ships with filters already installed, but crucial protective plastic must be removed before first use—this step gets overlooked in 70% of customer service calls. Look for pull tabs or directional arrows on each filter compartment indicating where to remove shipping protection.
Check Box Contents Immediately
Confirm these essential items are present before proceeding:
– Main air purifier unit
– Pre-installed HEPA filter
– Activated carbon filter (included with select models)
– User manual and quick start guide
– Remote control (available only with premium models)
Missing components? Contact GermGuardian support immediately with your model number before discarding packaging materials.
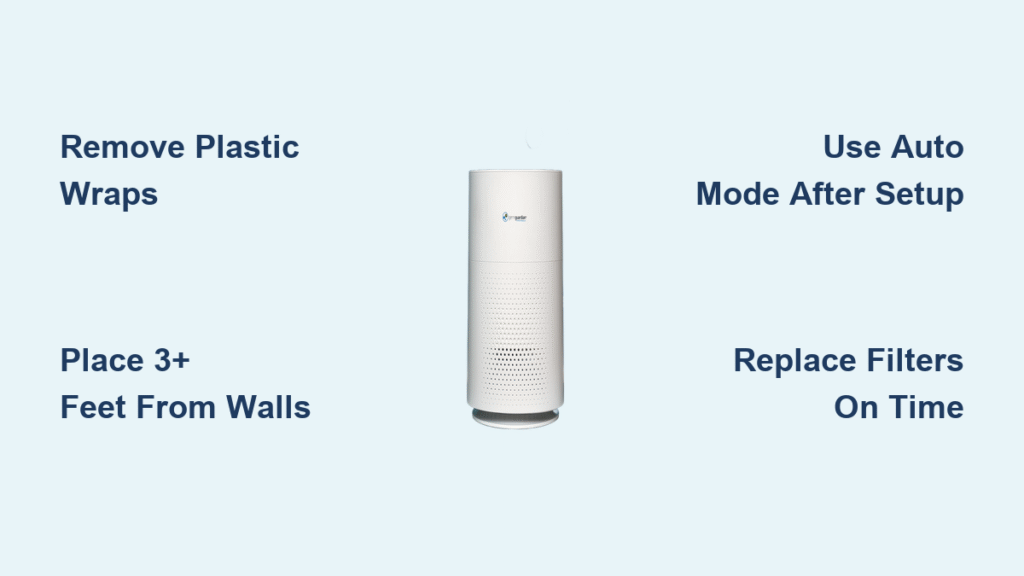
Remove All Protective Materials Completely
Pull plastic wrapping from every filter compartment using the designated tabs. Manufacturers wrap both intake and output sides of filters for shipping protection, and leaving even one piece in place severely restricts airflow. Check both sides of each filter by gently rotating them in their housing—air can’t pass through plastic, forcing your motor to work harder while delivering minimal purification.
Position for Maximum Airflow Efficiency
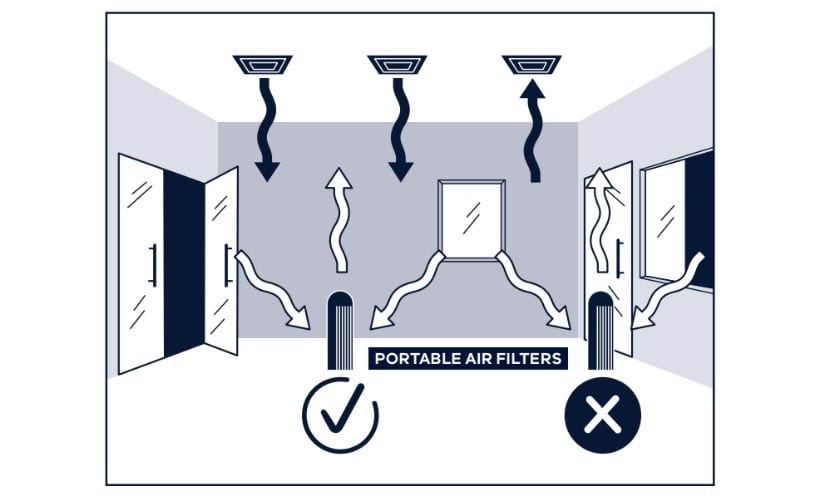
Your GermGuardian’s effectiveness depends entirely on proper placement—wrong positioning cuts performance by half. Create optimal air circulation patterns by placing your unit at least 3 feet from walls and furniture on all sides. This spacing allows contaminated air to flow freely into the intake and clean air to disperse throughout the room.
Best Room Locations for Different Needs
- Center of room: Creates ideal circular airflow patterns for whole-room purification
- Near pollution sources: Position 3-5 feet from litter boxes, cooking areas, or pet zones to capture contaminants at the source
- Away from electronics: Maintain 2+ feet distance from TVs and computers to prevent electromagnetic interference with sensors
Avoid These Critical Placement Mistakes
Don’t sabotage your air purifier’s performance with these common errors:
– Against walls or in corners (reduces airflow by 40%)
– Under tables or desks (blocks intake and output)
– Near heating vents or radiators (creates air turbulence)
– In direct sunlight for extended periods (degrades plastic components)
– On thick-pile carpet (restricts bottom intake efficiency)
Power On and Test All Operational Modes
Plug your GermGuardian directly into a standard 120V wall outlet—avoid extension cords that can cause power fluctuations. Press the power button once for automatic mode, which intelligently adjusts fan speed based on real-time air quality readings. Most models use blue light to indicate good air quality and red when contaminants exceed safe levels.
Understand Control Panel Symbols at a Glance

– Power: Single press turns unit on, long press (3+ seconds) powers off
– Fan Speed: Typically offers 3-5 settings (low, medium, high, turbo)
– UV-C Light: Dedicated button activates germ-killing ultraviolet technology
– Timer: Set 1-8 hour automatic shutoff periods
– Filter Reset: Hold 3-5 seconds after replacing filters to reset indicator
First 24 Hours Setup Protocol
Run your purifier on high speed for the initial 2-4 hours to establish baseline air quality readings. This critical period allows sensors to calibrate to your room’s specific conditions. After this initial cleaning cycle, switch to auto mode for normal operation—this maintains optimal air quality while conserving energy and reducing noise.
Set Optimal Fan Speeds for Your Specific Needs
Match fan speeds precisely to your room size and current air quality demands. Small bedrooms (100-150 sq ft) operate efficiently on low or medium speed, while larger living areas (300+ sq ft) require medium to high settings to achieve proper air exchanges per hour.
Speed Selection Guide for Real-World Scenarios
- Low: Whisper-quiet operation (25-30 dB) ideal for sleeping in small rooms
- Medium: Balanced performance for daily use in average-sized rooms
- High: Accelerated cleaning for moderate contamination (allergens, dust)
- Turbo: Maximum power (50+ dB) for emergency situations like smoke or strong odors
Use Auto Mode Like a Professional
Auto mode automatically cycles through fan speeds based on real-time air quality readings, saving energy while maintaining clean air. However, this feature works best after completing the initial high-speed cleaning period—otherwise, sensors may not accurately detect your baseline air quality.
Activate UV-C Light for Maximum Protection
Press the dedicated UV-C button to engage germ-killing ultraviolet technology. This feature destroys airborne bacteria, viruses, and mold spores as air passes through the chamber. The UV-C light operates independently from fan speeds—you can use it with any setting for enhanced protection.
UV-C Safety Precautions You Must Follow
- Never look directly at the UV-C bulb when illuminated
- Ensure the front cover is completely closed before activation
- Keep children and pets away from direct UV-C exposure
- Replace the UV-C bulb annually to maintain effectiveness (performance degrades over time)
Strategic Times to Activate UV-C Protection
- During cold and flu season for added germ defense
- After household illness to eliminate lingering pathogens
- In basements or damp areas prone to mold
- Around litter boxes or pet areas for odor and bacteria control
- When air feels “stale” or musty despite regular operation
Program Timer Functions for Energy Efficiency
Set customized cleaning schedules using your GermGuardian’s built-in timer. Most models offer 1, 2, 4, and 8-hour intervals—perfect for matching operation to your specific needs without wasting energy.
Smart Scheduling Techniques for Different Situations
- 2-hour timer: Eliminates cooking odors quickly after meals
- 4-hour timer: Maintains daily air quality during waking hours
- 8-hour timer: Provides overnight bedroom purification while you sleep
- Continuous operation: Use auto mode for 24/7 protection in high-risk environments
Combine Timer with Speed Settings Strategically
Program high speed with a 2-hour timer for rapid air cleaning after known contamination events, then switch to low speed for quiet overnight operation. This combination maximizes efficiency while maintaining a peaceful sleep environment—no more waking to loud fan noise.
Replace Filters Correctly to Maintain Performance
HEPA filters require replacement every 6-12 months depending on usage intensity and local air quality conditions. Carbon filters need more frequent changes—typically every 3-6 months. Check filters monthly by removing the front panel and inspecting for visible dirt buildup that restricts airflow.
Filter Replacement Steps Done Right
1. Power off and unplug your unit completely
2. Remove front panel by pressing release tabs on both sides
3. Pull out old filters while noting their specific orientation
4. Unwrap new filters completely—remove all protective packaging
5. Insert new filters matching directional arrows and guides
6. Reset filter indicator light by holding button 3-5 seconds
Filter Buying Guide: Match Your Model Exactly
- HEPA Filter: Captures 99.97% of particles as small as 0.3 microns (Model FLT4825 for AC4825)
- Carbon Filter: Reduces odors and VOCs (Model FLT22CB4 for compatible units)
- UV-C Bulb: Requires annual replacement for effectiveness (Model LB4000)
Clean Housing and Sensors for Optimal Function
Wipe down the exterior weekly with a slightly damp cloth—never use harsh chemicals or submerge any components in water. Clean the air quality sensors monthly using compressed air or a soft brush to prevent false readings that compromise performance.
Weekly Maintenance Routine Checklist
- Unplug unit and allow to cool completely before cleaning
- Vacuum air intake grilles gently with brush attachment
- Wipe control panel with microfiber cloth to prevent buildup
- Listen for unusual noises or vibrations during operation
- Ensure nothing blocks air intake or output pathways
Monthly Deep Cleaning Protocol
- Remove and vacuum pre-filter (if equipped) to extend main filter life
- Clean sensor areas with compressed air to maintain accuracy
- Inspect power cord for fraying or damage
- Check caster wheels (on mobile models) for hair and debris
- Test all button functions to catch early electronic issues
Troubleshoot Common Issues Before Calling Support
![]()
If your purifier won’t turn on, check the outlet first—plug in another device to verify power. For weak airflow, immediately verify filters aren’t clogged and all packaging materials were removed during setup. Strange noises often indicate loose filters or debris caught in the fan assembly.
Quick Problem Solutions for Immediate Relief
- No power: Check outlet functionality, test reset button on plug
- Weak airflow: Replace clogged filters, check for physical obstructions
- Loud operation: Ensure unit sits on level surface, check for loose parts
- Red light stays on: Replace overdue filters, reset indicator properly
- UV-C won’t activate: Confirm cover closed securely, check bulb seating
When to Contact Professional Support
Reach out to GermGuardian customer service if:
– Unit won’t power on after verifying outlet functionality
– Unusual burning smells or electrical sounds occur
– UV-C light flickers or won’t stay illuminated
– Fan makes grinding or persistent clicking noises
– Control panel becomes completely unresponsive
Optimize Settings for Different Rooms and Seasons
Bedrooms require quieter operation—use low speed with UV-C off during sleep hours. Living rooms benefit from auto mode with periodic high-speed cycles during active hours. Kitchen placement near cooking areas helps eliminate food odors before they spread.
Room-Specific Settings for Maximum Effectiveness
- Bedroom: Low speed, 8-hour timer, UV-C off during sleep
- Living Room: Auto mode, UV-C on during daytime occupancy
- Kitchen: High speed for 30 minutes after cooking sessions
- Basement: Medium speed continuous, UV-C always active
- Home Office: Medium speed, UV-C during work hours
Seasonal Adjustments for Year-Round Protection
Increase fan speeds during high pollen seasons or wildfire smoke events. Use UV-C more frequently during winter when windows remain closed. Reduce speeds during mild weather when natural ventilation through open windows supplements your purifier’s work.
Your GermGuardian air purifier becomes increasingly effective as you learn its specific patterns and sounds. Start with these precise settings, then adjust based on your home’s unique needs. Within a week, you’ll develop an intuitive sense for which configurations work best in each space, ensuring every breath you take is cleaner and healthier.


