Your Dyson air purifier remote puts complete control at your fingertips, but mastering every function transforms your air quality experience. From silent night operation to precise air quality monitoring, this guide unlocks your remote’s full potential—no more guessing which button does what. Discover how to optimize your Dyson air purifier remote for cleaner air without constantly getting up to adjust settings.
Remote Layout Decoded: Find Any Button Instantly

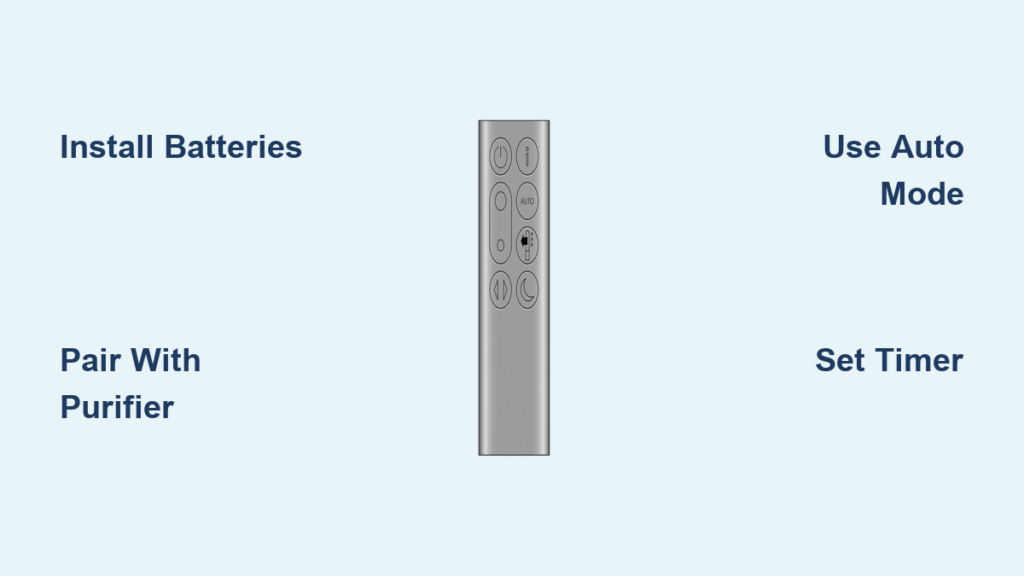
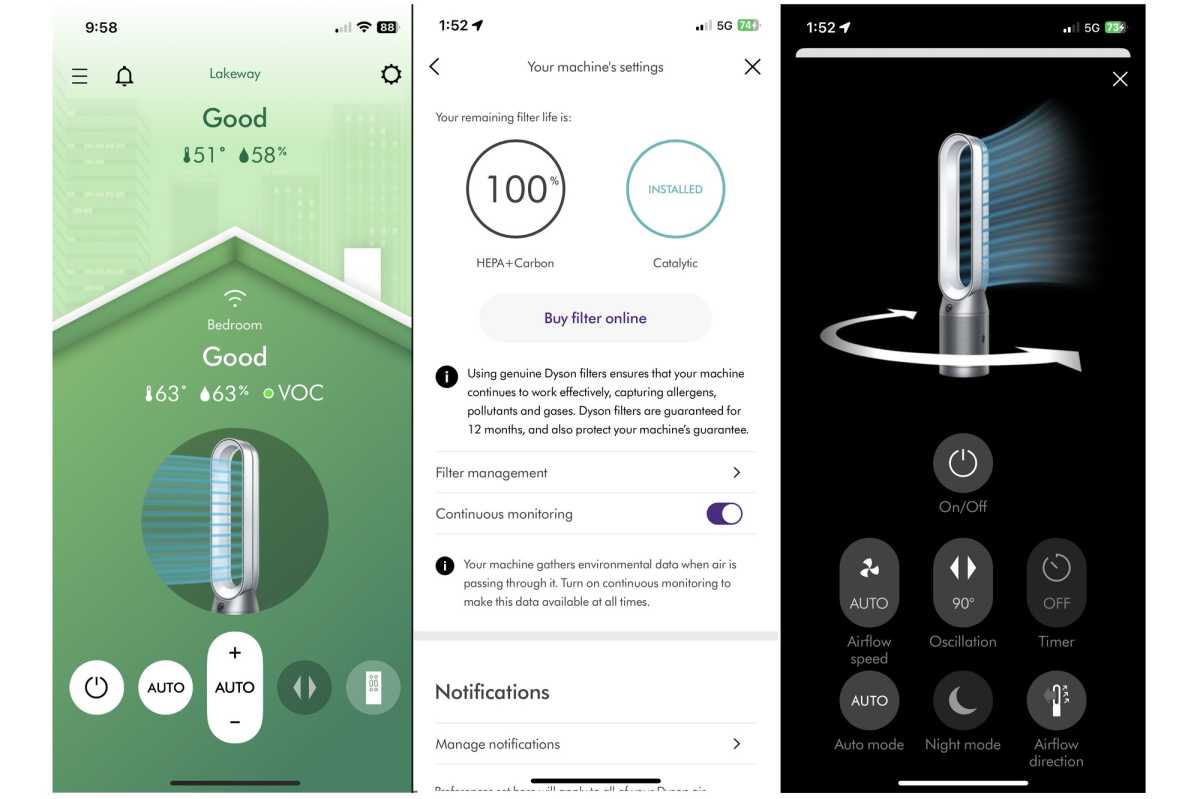
The Dyson remote features a sleek vertical design with strategically placed controls that put everything you need within thumb’s reach. Power sits at the top with the universal symbol, followed by fan speed controls arranged vertically. Below these, oscillation and timer buttons provide specialized functions, while mode selection buttons customize your air purification experience.
Key button locations you’ll use daily:
– Top: Power button (⏻) – your instant on/off solution
– Upper section: Speed increase/decrease – fine-tune airflow precisely
– Middle: Auto and Night mode buttons – automate your air quality management
– Lower section: Oscillation and timer controls – customize air distribution
– Bottom: Info and reset buttons – access diagnostics without bending down
First-Time Setup Without Frustration
Install Batteries Correctly in 4 Steps
- Slide open the battery compartment on the remote’s back with your fingernail
- Insert 2 AAA batteries matching the + and – symbols (included with purchase)
- Close compartment firmly until you hear the distinct click
- Test immediately—if unresponsive, reverse battery positions as polarity matters
Test Remote Connection Like a Pro
Point directly at your air purifier’s front display from 6-10 feet away—no angling required for proper signal. Press any button—you should hear a confirmation beep and see the display respond instantly. If nothing happens, remove obstacles like furniture or plants blocking the signal path. Pro tip: Stand directly in front of your unit for initial setup, then test from your favorite seating position.
Power Control Basics You Need Daily
Turn On and Off Without Guesswork
Single press the power button to activate your air purifier using previous settings—no need to reset preferences each time. Your unit remembers speed, mode, and oscillation preferences automatically. Shutdown works the same way—press once and the fan gradually reduces speed before powering down completely, preventing dust redistribution.
Understand Standby Mode Benefits
Your purifier stays in low-power standby when plugged in, maintaining sensor calibration for instant response. The display shows minimal indicators—no need to unplug between uses. This standby mode ensures your air quality monitoring continues even when the fan isn’t running, so your Dyson is always ready to respond to changing conditions.
Master Fan Speed Controls for Perfect Airflow
Manual Speed Selection Made Simple
Use increase/decrease buttons to select levels 1-10 with precision. Lower numbers (1-3) provide whisper-quiet operation ideal for bedrooms, while higher levels (7-10) tackle heavy pollution quickly. Pro tip: Start at level 5 for balanced performance, then adjust based on your comfort and real-time air quality needs shown on the display.
Auto Mode Operation That Works While You Sleep
Press Auto once for intelligent air quality management that requires zero input from you. Your purifier continuously monitors PM2.5, PM10, VOCs, and NO2 levels, automatically adjusting speed based on detected pollution. Watch the display: green indicates good air, yellow signals moderate pollution, orange warns of unhealthy conditions for sensitive groups, and red demands maximum filtration immediately.
Night Mode Benefits for Undisturbed Sleep
One press activates ultra-quiet operation below 35 dB—quieter than a whisper. The display dims 50%, oscillation stops, and airflow reduces for peaceful sleep without compromising purification. Temperature display remains visible but at half brightness—perfect for nighttime check-ins without disrupting your sleep cycle.
Control Oscillation Like a Seasoned User

Activate 350-Degree Rotation Properly
Press oscillation once to start smooth 360-degree rotation that distributes clean air throughout your entire room evenly. Press again to stop at the current angle—ideal when you want directed airflow toward a specific area like your bed or workspace. Oscillation works independently of fan speed, so you can combine high purification with wide coverage.
Set Custom Angles on Compatible Models
Hold the oscillation button while your unit rotates to program a preferred angle on TP07, TP09, HP07, and HP09 models. Release when positioned correctly for targeted air distribution. This feature eliminates unnecessary movement when you only need purified air in one part of the room, saving energy while maintaining optimal air quality where you need it most.
Timer Programming Without Confusion
Choose Your Duration in Seconds
Press timer repeatedly to cycle through 1, 2, 4, or 8-hour options—perfect for bedtime use or energy savings when you’ll be away. The display shows your selected duration with a clear timer icon, so you always know when your unit will automatically power down.
Cancel Timer Fast When Plans Change
Hold timer for 3 seconds until the icon disappears when you need to override your schedule. Any manual power adjustment also cancels active timers automatically—no complex menu navigation required. This instant cancel feature ensures your air purification continues uninterrupted when your plans change.
Advanced Mode Selection for Special Situations
Diffused Mode Explained for Sensitive Users
Press diffused mode (available on Pure Cool tower and Pure Hot+Cool models) to redirect airflow through rear vents. You get purified air without direct breeze—ideal for sensitive individuals or cold winter months when direct airflow feels uncomfortable. This mode maintains full purification capacity while creating a gentler air circulation pattern.
Backward Airflow Mode for Quiet Operation
Activate this mode to redirect air through the back, reducing noise while maintaining full purification. Perfect for conference calls, quiet reading time, or when you want air purification without the sensation of moving air. Like diffused mode, this maintains complete filtration effectiveness while modifying the airflow experience.
Monitor Filter Life Accurately to Avoid Surprises
Check Remaining Life in 3 Seconds
Hold info for 3 seconds to cycle through essential diagnostic information:
– HEPA filter percentage remaining (critical for particle removal)
– Carbon filter percentage remaining (for odors and gases)
– Total operating hours (helps track usage patterns)
– Software version (verifies you have latest updates)
Reset After Replacement Without Error
Hold reset button (circular arrow symbol) for 5+ seconds after installing new filters. You’ll hear two distinct beeps confirming the reset, and “Filter Reset” displays for 3 seconds. New counter starts at 100% immediately—no waiting period. Skipping this step means your unit won’t track new filter life correctly.
Activate Child Lock to Prevent Accidents
Secure Settings in Households with Kids
Press oscillation + timer simultaneously for 5 seconds to prevent accidental changes. A lock icon appears—now only the power button works normally. Repeat the combination to unlock when you need full control again. This feature saves you from constantly resetting preferences after curious children or pets press buttons.
Fix Common Remote Problems Yourself
No Response Troubleshooting Steps
Replace batteries first—even if they seem fine, as weak batteries cause intermittent issues. Clean the IR sensor on your air purifier’s front with a soft microfiber cloth. Remove interference sources like direct sunlight or certain LED lights that disrupt the IR signal. If problems persist, test the remote with another Dyson unit to isolate the issue.
Intermittent Operation Fixes
Check your angle—stay within 30 degrees of center for reliable operation. Move closer if beyond 15 feet, as IR signals weaken with distance. Replace reflective objects near your purifier that could bounce the signal incorrectly. For frequent users, consider placing your remote on a dedicated stand facing the unit when not in use.
Maintain Your Remote for Longevity
Battery Maintenance Schedule
Replace every 6-12 months depending on usage frequency—don’t wait for complete failure. Keep spare AAA batteries nearby in a labeled container—your remote suddenly dying mid-operation is frustrating but preventable. Always use quality alkaline batteries for consistent performance.
Proper Storage and Cleaning
Store in a dry location away from direct sunlight or heat sources that degrade battery life. Wipe with microfiber cloth weekly to prevent button sticking from dust buildup. Never use liquid cleaners directly on the remote—they can seep inside and cause permanent damage. A quick weekly check ensures your Dyson air purifier remote remains responsive when you need it.
Know Your Model Compatibility Before Buying
Match Remote to Your Specific Unit
- TP04, TP07, TP09: Full-feature remotes with all functions
- HP04, HP07, HP09: Includes heating controls for hot+cool models
- BP series: Simplified remotes without oscillation
- DP series: Compact remotes with basic functions only
Cross-compatibility is limited—using the wrong remote may disable key features or provide incorrect button functions. Check your model number on the purifier’s base before ordering replacement remotes to ensure you get the exact match.
Master these functions and your Dyson air purifier becomes an invisible guardian, automatically maintaining perfect air quality while you focus on what matters. Start with basic power and speed controls, then gradually explore advanced features as your confidence grows—your lungs will thank you for the cleaner air.