
That unmistakable silence from your Alpine air purifier hits differently when you know it should be humming away, cleaning your home’s air. Maybe the fan stopped spinning overnight, or that distinctive ozone scent disappeared without warning. Before you resign yourself to replacing your $300+ Alpine 880 unit, understand this critical fact: 90% of Alpine air purifier repair issues can be resolved with simple component replacements costing less than $35 total. Most homeowners throw working units away simply because they don’t know these straightforward fixes exist.
Your Alpine 880 wasn’t designed to be disposable—it was engineered for decades of service with basic maintenance and occasional part replacements. The good news? You don’t need to be an electrical engineer to perform these repairs. With just a few common tools and the right replacement parts, you can have your air purifier functioning like new again in less time than it takes to order takeout. This guide reveals exactly which components fail most often, how to diagnose them in minutes, and step-by-step instructions to complete your Alpine air purifier repair without professional help.
Why Your Alpine 880 Suddenly Stopped Working
When your Alpine 880 quits unexpectedly, three specific components account for nearly all service calls. These aren’t mysterious failures—they’re predictable wear items that even novice technicians can diagnose and replace. Knowing which component to check first saves you hours of unnecessary troubleshooting and prevents you from replacing parts that still function properly.
Fan Motor Failure: The Silent Unit Culprit
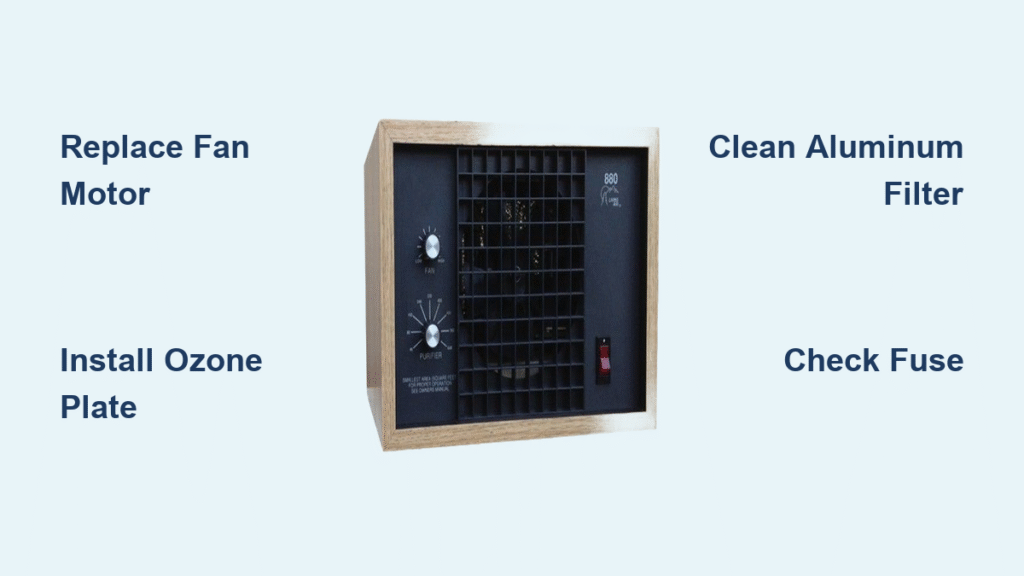
If your Alpine 880 powers on but produces zero airflow and complete silence, your universal fan motor has almost certainly failed. This critical component (part #34.99) drives air movement across all Alpine Ecoquest Living Air models, making it the single most replaced part. Unlike cheaper air purifiers with proprietary motors, Alpine uses a universal design that fits multiple models, keeping replacement costs reasonable at just $34.99. Before panicking, verify the motor isn’t just stuck—gently tap the unit’s side while powered on. If it briefly spins then stops, the motor bearings have seized and require replacement.
No Ozone Smell? Replace Your Ozone Plate Immediately
That crisp, clean scent disappearing is your first warning sign of ozone plate failure. These high-efficiency plates ($19.99 individually) generate the ozone responsible for eliminating stubborn odors and neutralizing airborne contaminants. Under normal household use, expect 12-18 months of service before replacement becomes necessary. Check for visible degradation—failed plates often develop white crystalline buildup or noticeable pitting on the metal surface. Don’t confuse this with normal dust accumulation; true failure means complete loss of ozone production despite the unit otherwise functioning.
Aluminum Filter Clogs: The Hidden Airflow Killer
Your Alpine 880’s aluminum filter assembly ($29.90) traps larger particles before they reach sensitive internal components. When completely blocked, you’ll notice reduced airflow even with a working fan, potential overheating warnings, and increased strain on the motor. Unlike disposable filters in other brands, this aluminum mesh cleans rather than replaces. Look for visible dust buildup across the entire mesh surface—if light can’t pass through easily, it’s time for cleaning. Ignoring this maintenance leads to secondary failures like premature motor burnout.
Essential Tools for Alpine 880 Repairs
Must-Have Tools for Every Repair Job:
– Phillips #2 screwdriver (magnetic tip preferred)
– Small flathead screwdriver for prying clips
– Needle-nose pliers with insulated handles
– Basic multimeter for electrical testing
– Compressed air canister for cleaning vents
Professional Shortcut Tools:
– Magnetic parts tray to prevent lost screws
– LED headlamp for illuminating tight spaces
– Smartphone for documenting disassembly steps
Critical Safety Gear You Should Never Skip:
– Nitrile work gloves (protects against sharp edges)
– ANSI Z87.1 safety glasses (essential when cleaning filters)
– N95 respirator mask (prevents inhaling dislodged particles)
Replace Your Alpine 880 Fan Motor in 20 Minutes
Time Required: 15-20 minutes
Difficulty Level: Beginner (No electrical experience needed)
Remove the Back Housing Safely
Unplug your Alpine 880 and place it on a stable, non-slip surface. Locate the four Phillips screws securing the back panel—two positioned near the top vents and two near the base. Remove these completely before attempting to slide the panel. The housing slides directly backward approximately one inch before releasing—never force it upward or sideways as this can break internal clips.
Disconnect Motor Wiring Without Mistakes
With the housing removed, locate the fan motor mounted centrally within the unit. Two wire connectors attach to the motor terminals using friction-fit connectors. Critical warning: Take a clear smartphone photo before disconnecting anything. Gently squeeze the connector tabs with needle-nose pliers and pull straight off—never yank wires directly. Note that polarity doesn’t matter for this AC motor, but matching your photo ensures correct reinstallation.
Install the Universal Replacement Motor
The new universal fan motor drops directly into the existing mounting bracket without modifications. Align the motor shaft with the fan blade opening and press firmly until it seats completely. Reconnect the wire harness exactly as shown in your reference photo. Before reassembling, perform a critical safety check: ensure no tools or loose screws remain inside the unit that could cause electrical shorts.
Verify Operation Before Final Assembly
Plug in your Alpine 880 for a brief operational test—never skip this step. You should hear immediate airflow within 2 seconds of powering on. If silent, check connections and ensure the fan blade rotates freely. Once confirmed, reinstall the back panel by sliding it forward until it clicks into place, then secure with the original four screws. Over-tightening can strip the plastic threads, so stop when resistance increases noticeably.
Restore Ozone Production with Plate Replacement
Time Required: Under 5 minutes
Difficulty Level: Easiest repair (No tools required)
Access the Ozone Chamber Correctly
Your Alpine 880’s ozone plate resides in a slide-out tray on the unit’s right side (when facing the front). Locate the small black plastic tab near the bottom edge of the tray. Pull this tab straight out approximately 1/2 inch—do not force it—to release the chamber. The entire tray slides smoothly outward when properly unlocked. Forcing it can break the delicate plastic guides.
Remove the Degraded Ozone Plate
The old plate lifts straight out of its housing. Note the orientation of the electrical contacts—typically positioned toward the front of the unit. Failed plates show obvious signs: heavy white crystalline deposits, pitting on the metal surface, or complete discoloration. Never touch the plate surface with bare fingers as skin oils accelerate degradation—handle only by the edges.
Install the New High-Efficiency Plate Properly
Position the replacement ozone plate with contacts facing the same direction as the original. Gently lower it into the housing until it seats completely. Slide the entire tray back into the unit until you hear a distinct click—this confirms proper electrical contact. Your Alpine 880 should immediately resume ozone production, detectable by the characteristic clean-air scent within minutes of operation.
Pro Tip: Always purchase the dual-pack ($34.99) for $5 savings over buying singles. Keep one plate as an emergency spare—you’ll thank yourself when ozone production suddenly stops at 2 AM.
Deep Clean Your Aluminum Filter Assembly Properly
Time Required: 10 minutes active cleaning, 2+ hours drying
Difficulty Level: Beginner (But drying time is critical)
Remove the Filter Without Damage
The aluminum filter assembly slides out from the front grille of your Alpine 880. Release both side clips simultaneously by pressing inward while pulling forward—never yank from one side as this can break the plastic retention clips. The entire assembly should slide out smoothly when both clips are disengaged.
Clean Without Damaging the Mesh
Rinse under lukewarm water to remove loose debris first—never use hot water as it can warp the aluminum mesh. Apply a drop of mild dish soap and scrub gently with a soft-bristled toothbrush, working in the direction of the mesh pattern. Rinse thoroughly until water runs completely clear—any soap residue attracts more dirt. Critical mistake to avoid: Never use compressed air to dry the filter as this forces moisture deeper into the mesh.
Complete Drying Protocol to Prevent Damage
Air dry the filter assembly in direct sunlight for fastest results, or use a hair dryer on the coolest setting held 12+ inches away. Never reinstall a damp filter—this creates electrical hazards and promotes mold growth inside your unit. The mesh must feel completely dry to the touch with no cool spots remaining. When in doubt, wait an extra hour—you can’t rush this critical step.
Replace Your Alpine 880 Fuse in 2 Minutes

Time Required: Under 2 minutes
Difficulty Level: Beginner (But requires caution)
Locate the Fuse Holder Safely
The universal fuse kit ($2.90) fits all Alpine models including your 880. Find the small cylindrical fuse holder on the power input board—typically positioned near where the power cord enters the unit. It resembles a small glass tube about 1/2 inch long. Safety first: Always unplug the unit before attempting fuse replacement.
Remove the Blown Fuse Correctly
Twist the fuse holder counterclockwise approximately 1/4 turn to release it. The blown fuse pulls straight out—never force it. Hold it up to light to check for a broken wire inside the glass tube, which confirms failure. If the fuse appears intact but the unit still won’t power on, test it with a multimeter set to continuity mode.
Install the Universal Replacement Safely
Insert the new fuse from the universal kit with either end first—it functions identically either orientation. Push it firmly into the holder until seated completely. Twist the holder clockwise until snug—you’ll feel resistance indicating proper seating. Critical warning: If the new fuse blows immediately upon powering on, unplug immediately and check for electrical shorts—this indicates deeper problems requiring professional service.
Genuine Alpine Parts: Where to Buy Without Getting Scammed
All listed components represent genuine Alpine replacement parts with verified compatibility. Cross-reference your unit’s serial number before ordering to confirm fitment—Alpine has subtle model variations that affect part compatibility. For the Alpine 880, you need:
- Universal fan motor: $34.99 (fits all Ecoquest Living Air models)
- Ozone plate: $19.99 single or $34.99 dual-pack (specific to 880 series)
- Aluminum filter: $29.90 (model 880 specific assembly)
- Universal fuse kit: $2.90 (fits CLASSIC XL-15, Alpine 150, Alpine 880, and Flair series)
Avoid these costly mistakes:
– Don’t buy “compatible” aftermarket parts—they often fail within months
– Never purchase ozone plates without model-specific verification
– Skip sellers who can’t provide genuine Alpine part numbers
Your Alpine 880 air purifier can deliver decades of reliable service when you perform these simple Alpine air purifier repair procedures correctly. Most critical issues require less than $35 in parts and 20 minutes of your time—significantly cheaper than replacement. Keep a spare ozone plate and fuse kit ($25 total) in your home repair kit to eliminate downtime when components inevitably wear out. By following this guide, you’ve transformed from a frustrated owner into a capable Alpine air purifier technician who saves money while ensuring cleaner, healthier air in your home.


