
Your Samsung air purifier battles dust, pollen, and pet dander daily—but a clogged filter can slash its cleaning power by 30%. When airflow drops, your unit strains harder while delivering less clean air. Master how to clean Samsung air purifier filter components correctly to extend their life, avoid costly replacements, and maintain peak performance.
Whether you own an AX60, Cube series, or AX40 model, this guide delivers precise cleaning steps, model-specific removal techniques, and critical warnings you won’t find in the manual. You’ll learn when cleaning works (and when replacement is non-negotiable), plus pro tips for pet owners and allergy sufferers. Let’s restore your purifier’s breathing room.
Identify Your Samsung Filter Type Before Cleaning
Washable Pre-Filter vs. Non-Washable Filters
Critical Distinction: Only the front mesh pre-filter withstands cleaning. The HEPA and carbon filters must never get wet—water destroys their microscopic structures. The pre-filter captures large debris like pet hair and dust bunnies, while the HEPA traps 99.97% of particles 0.3 microns or smaller (pollen, bacteria), and the carbon filter neutralizes odors through chemical adsorption.
Visual Identification:
– Pre-filter: Metal or plastic mesh directly behind front panel (washable)
– HEPA filter: Pleated white paper-like material (replace every 6-12 months)
– Carbon filter: Black granular layer (replace every 6 months)
Never attempt to clean HEPA or carbon filters—water exposure permanently damages their particle-capturing ability. Replacement is always required when these show reduced performance.
Remove Pre-Filter Without Damaging Your Unit

Model-Specific Access Techniques
AX Series (AX60/AX90): Press bottom panel tabs inward while sliding panel downward—pre-filter lifts straight up from magnetic guides.
Cube Series: Lift top panel vertically; pre-filter integrates into a cartridge requiring full removal.
AX40/AX50: Pull side panel handles outward; pre-filter slides horizontally without full disassembly.
Safe Removal Checklist
- Unplug unit and wait 30+ seconds—prevents electrical feedback during handling
- Confirm cool temperature—touch exterior near vents; warm units need 15-minute cooldown
- Photograph alignment—snap your phone camera before removal to avoid reinstallation errors
- Grip frame edges only—never pull mesh directly to prevent warping
Warning: Forcing panels can crack plastic catches. If resistance occurs, recheck release mechanisms—most Samsung models use intuitive slide or lift motions.
Quick Weekly Pre-Filter Cleaning (3-Minute Method)
Dry Vacuum Technique for Light Dust
Tools Required:
– Vacuum with brush attachment (low suction setting)
– Microfiber cloth
– Flashlight for debris inspection
Step-by-Step Process:
1. Hold filter horizontally over trash can
2. Vacuum both sides using gentle circular motions—focus on corners where dust cakes
3. Shine flashlight through mesh to spot hidden debris
4. Wipe housing interior with barely damp microfiber cloth
5. Reinstall immediately—no drying time needed
Pro Tip: Pet owners should add a lint roller pass before vacuuming to lift embedded fur. This prevents hair from redepositing during suction.
Deep Monthly Pre-Filter Cleaning (Water Rinse Method)
Why Water Works Better Than Vacuuming
When vacuuming fails to remove caked-on grime, a controlled water rinse dissolves stubborn particles without damaging the mesh. Never use soap—chemical residues attract more dust and create airflow blockages.
Correct Water Cleaning Protocol
Step 1: Pre-Rinse
– Hold filter under lukewarm tap water (max 104°F/40°C)
– Rinse 30 seconds with water flowing through mesh (not against it)
– Critical: Water must feel cooler than room temperature—heat warps frames
Step 2: Target Stubborn Spots
– Use soft-bristle toothbrush only on discolored areas
– Brush with the mesh grain in straight lines (no circular scrubbing)
– For pet hair buildup, gently pull strands outward with tweezers
Step 3: Final Rinse & Shake
– Continue until runoff water runs crystal clear (2-3 minutes)
– Shake vertically 5 times to eject trapped water
– Never twist or wring—bending metal frames causes permanent gaps
Air-Drying Pre-Filter Without Mold Risk

24-Hour Drying Setup That Works
Correct Placement:
– Lay flat on clean towel in well-ventilated room (no direct sunlight)
– Flip after 2 hours to dry hidden frame edges
– Elevate on chopsticks for airflow underneath (prevents warping)
Dangerous Shortcuts to Avoid:
– ❌ Hair dryers (melts plastic components)
– ❌ Radiators (causes irreversible frame warping)
– ❌ Microwave/oven (fire hazard from metal mesh)
Moisture Test Before Reinstalling:
1. Press tissue paper against mesh for 10 seconds
2. Check for water spots—if present, dry 6+ additional hours
3. Confirm frame feels room temperature (not cool)
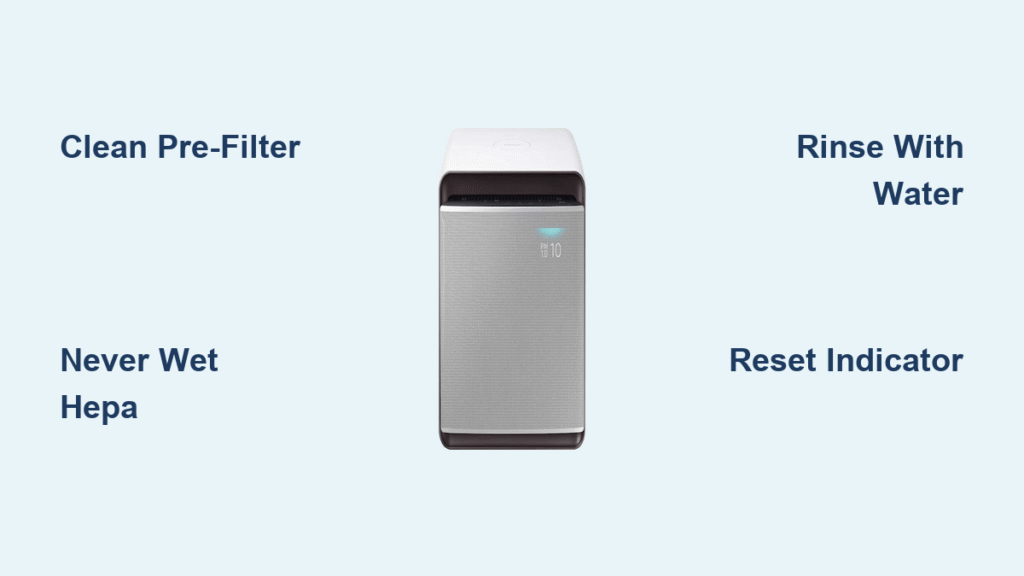
Reinstall Pre-Filter and Reset Indicator Light
Alignment Mistakes That Trigger Error Lights
Correct Positioning:
– Mesh side faces outward toward room (dust-catching side)
– Arrows on frame point toward unit interior
– Frame sits flush in guide rails—no visible gaps
Model-Specific Reset Procedures:
– AX Series: Hold filter button 3 seconds until light turns solid green
– Cube Series: Press power + filter buttons simultaneously for 5 seconds
– AX40/AX50: Navigate menu > Filter > Reset via control panel
Validation Test: Run purifier 10 minutes on high speed. Listen for unusual rattling—this indicates loose installation requiring reseating.
When Replacement Beats Cleaning (Critical Signs)

Pre-Filter Damage You Can’t Fix
Replace immediately if you see:
– Tears larger than 1/4 inch (reduces particle capture by 50%+)
– Rust spots on metal frames (indicates moisture damage)
– Permanent warping from improper drying
– Cracked plastic housing (creates air bypass paths)
HEPA/Carbon Filter Replacement Triggers
- Solid red light: Replace both filters now
- Orange light + weak airflow: Check carbon filter saturation
- Persistent odors after cleaning: Carbon filter needs replacement
Cost Reality: Ignoring replacements strains motors—$80 HEPA filters prevent $400+ repair bills.
Pet Owner Filter Cleaning Protocol
Hair Removal That Prevents Airflow Blockage
Weekly Deep Clean Steps:
1. Wear rubber gloves and dampen slightly
2. Rub gloves over filter surface to lift embedded fur
3. Vacuum debris outdoors to avoid redistributing dander
4. Inspect intake vents for hair clumps using flashlight
Allergy Sufferer Safety:
– Wear N95 mask during handling
– Seal collected debris in ziplock bag immediately
– Shower after cleaning to remove allergens from skin
Troubleshoot Post-Cleaning Problems
Filter Light Won’t Reset? Fix in 60 Seconds
Most Common Causes:
– Filter still contains hidden moisture (dry 6+ extra hours)
– Misaligned frame triggering sensor error
– Reset button timing error (must hold exactly 3 seconds)
Emergency Fix: Unplug unit for 60 seconds, then repeat reset procedure. This clears sensor glitches 90% of the time.
Reduced Airflow After Cleaning? Check These
- Front panel not fully latched (creates air bypass)
- Furniture blocking intake vents (maintain 12-inch clearance)
- Damaged pre-filter frame allowing air leakage
Monthly Filter Maintenance Schedule
5-Minute Weekly Routine
- [ ] Vacuum pre-filter with brush attachment
- [ ] Wipe exterior with damp microfiber cloth
- [ ] Verify indicator light status
30-Minute Monthly Deep Clean
- [ ] Rinse pre-filter using water method
- [ ] Vacuum intake vents and housing interior
- [ ] Document filter condition in maintenance log
Pro Tip: Mark replacement dates on your calendar when installing new HEPA/carbon filters. Samsung’s SmartThings app automates this with filter life tracking.
Smart Monitoring to Optimize Cleaning Frequency
Samsung SmartThings Integration
- Receive push notifications when pre-filter cleaning is due
- Track real-time filter life percentage (0-100%)
- Order genuine replacements with one tap in-app
- View historical air quality data to adjust cleaning schedules
Manual Tracking Alternative: Maintain a log noting:
– Cleaning dates and methods used
– Observed airflow changes
– Filter replacement dates
– Room-specific usage patterns (e.g., “high pet hair weeks”)
Save $100+ Annually With Legit Cost-Saving Tactics
Extend Filter Life Without Risk
- Clean pre-filter weekly during high-pollution seasons (pollen, wildfire smoke)
- Run purifier on medium speed when air quality permits (reduces strain)
- Address odor sources directly (e.g., improve kitchen ventilation) instead of relying solely on carbon filter
Strategic Replacement Purchasing
- Buy complete filter sets during holiday sales (store in original packaging)
- Track actual vs. recommended replacement intervals—many users extend HEPA life to 14 months
- Never buy third-party filters—Samsung’s proprietary seals ensure proper airflow
Key Takeaway: Mastering how to clean Samsung air purifier filter systems correctly—specifically the pre-filter—prevents 90% of performance issues. By dedicating 5 minutes weekly to vacuuming and 30 minutes monthly for deep rinsing, you’ll maintain hospital-grade air quality while avoiding $150+ in unnecessary filter replacements annually. Always remember: water saves your pre-filter but destroys HEPA/carbon filters—know which components you’re handling before starting. Your lungs (and wallet) will thank you.


