
Your GermGuardian air purifier silently battles dust, pet dander, and allergens daily—but when airflow weakens or that persistent filter light flickers, it’s screaming for attention. If you’ve ever wondered how to clean Germ Guardian air purifier filter components properly without damaging delicate systems, you’re not alone. Many owners accidentally shorten their unit’s lifespan by using harsh cleaners or skipping critical drying steps. This guide delivers precise, manufacturer-approved methods to revive your purifier’s performance while protecting your warranty. You’ll master cleaning each filter type safely, recognize when replacement beats cleaning, and avoid costly mistakes that turn a simple maintenance task into an emergency repair.
Pre-Filter Quick Clean Process
Access Pre-Filter Safely
Always begin with power disconnection—your GermGuardian needs a full shutdown to prevent electrical hazards. Press the power button, unplug the unit, and wait five minutes for internal components to stabilize. Locate the release tabs (typically on side panels or near the top grille), press them simultaneously, and gently pull the front panel forward. The foam pre-filter slides out effortlessly once the panel releases. Never force stubborn panels; misaligned tabs often require slight downward pressure while pulling. Skipping this cool-down period risks damaging motor components during disassembly.
Vacuum vs Wash Method
For routine maintenance in low-dust homes, vacuuming preserves foam integrity. Use your vacuum’s soft brush attachment on low suction, gliding across both filter surfaces for 15-20 seconds per side. Focus on visible debris pockets near corners where dust accumulates fastest. When the foam turns dark gray or feels stiff with embedded pet hair, switch to deep cleaning: Rinse under lukewarm water (never hot!), add one drop of fragrance-free dish soap, and gently squeeze—not twist—the filter until runoff clears. Aggressive wringing tears the open-cell structure. After thorough rinsing, lay flat on a clean towel in direct sunlight for 4-6 hours. Reinstalling a damp filter breeds mold and triggers musty odors within hours.
Reinstall Filter Correctly
Check for alignment arrows printed on the filter frame before sliding it into the chassis grooves. The foam must sit flush against internal seals—any gaps let unfiltered air bypass the system. Snap the front panel back by pressing top edges first until you hear a distinct click. If resistance occurs, remove and verify the filter isn’t twisted. A misaligned pre-filter strains the motor and reduces purification efficiency by up to 40%, so take 10 extra seconds to ensure perfect seating.
HEPA Filter Care Rules

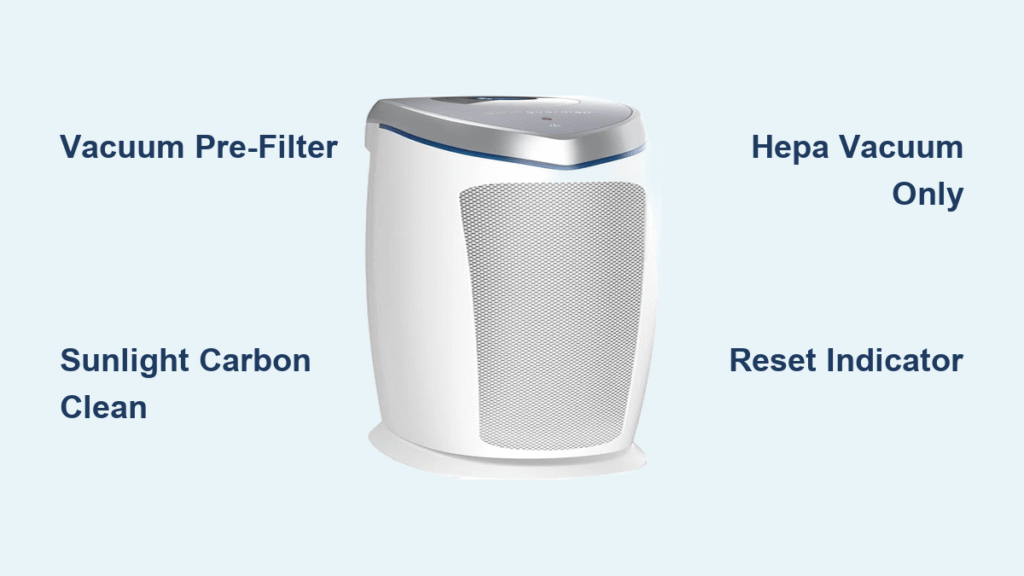
Vacuum-Only Maintenance Protocol
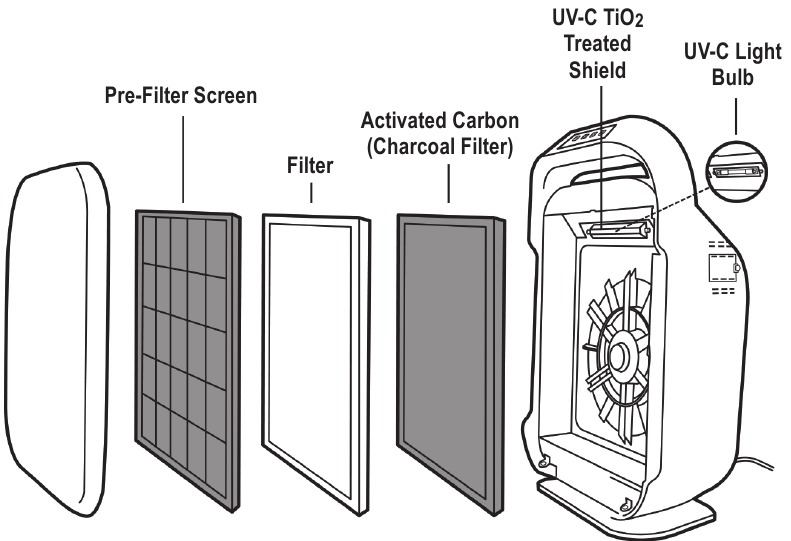
Your True HEPA filter’s microscopic fibers trap 99.97% of particles but disintegrate when wet. Monthly vacuuming extends its life: Remove the filter frame, set your vacuum to lowest suction with a brush attachment, and hover 2 inches above the surface. Move in slow, outward strokes—never press the nozzle against pleats. This lifts surface dust without embedding debris deeper. Skip vacuuming if the filter shows visible tears; compromised fibers release trapped pollutants back into your air. Never shake HEPA filters; this damages the delicate media and creates permanent gaps.
Replacement Warning Signs
Replace rather than clean when you notice persistent gray discoloration across the entire filter (not just edges), reduced airflow after pre-filter cleaning, or increased allergy symptoms in sensitive individuals. The filter change indicator light—standard on AC4825 and AC9200 models—is your most reliable alert. Household with pets or high pollen exposure need replacements every 3-4 months; average homes every 6-8 months. Stretching beyond 12 months risks motor burnout from excessive strain. A clogged HEPA filter forces the fan to work 30% harder, spiking energy costs and shortening unit lifespan.
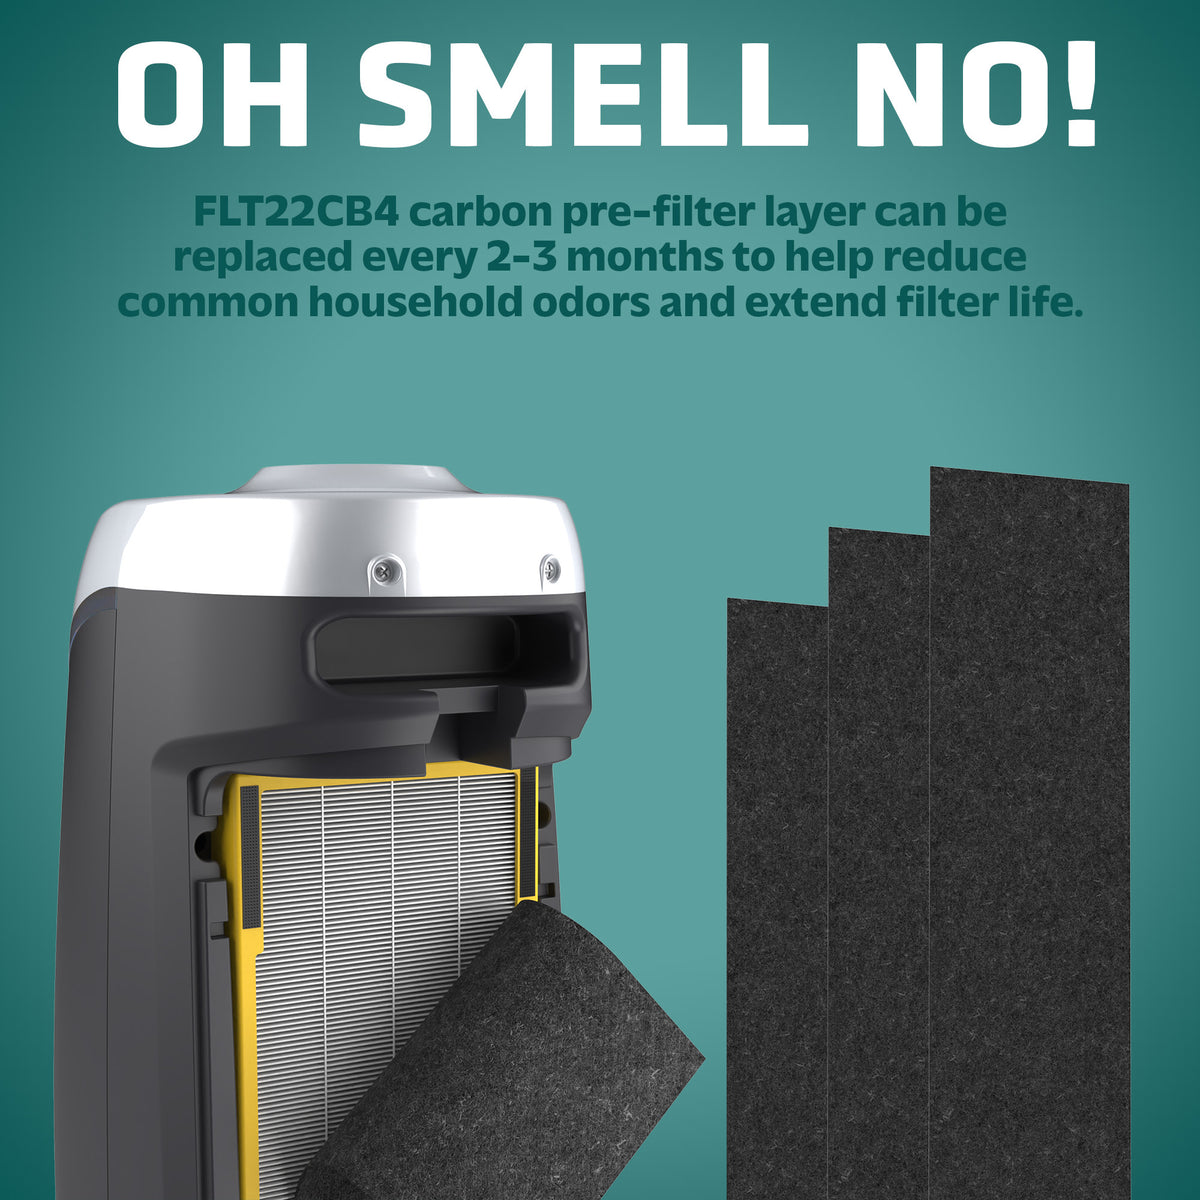
Carbon Filter Refresh Technique
Sunlight Reactivation Method
Activated carbon filters can’t tolerate water or vacuum suction—their odor-trapping particles would crumble. Instead, harness UV rays to rejuvenate absorption capacity monthly: Remove the carbon layer, place it in direct midday sunlight for 2 hours (flip at 60 minutes), and avoid humid days. This thermal reaction releases trapped VOCs and resets the carbon’s porous structure. Never use artificial UV lamps—they overheat filters instantly. If your model includes a carbon-HEPA combo filter, sunlight exposure remains safe since the HEPA layer isn’t moisture-sensitive.
When to Replace Carbon Filters
Odors returning within 24 hours of cleaning signal exhaustion. Standard homes need replacements every 4 months; households with cooking smoke, tobacco, or litter boxes require 2-month changes. Unlike HEPA filters, carbon layers don’t show obvious wear—you’ll notice lingering kitchen smells or pet odors despite UV-C operation. Never attempt to wash carbon filters; moisture permanently clogs the activated pores. Pro tip: Store spare carbon filters in airtight bags to preserve freshness until installation.
UV-C Chamber Deep Clean
Safety First Protocol
UV-C bulbs emit radiation harmful to eyes and skin—always unplug the unit and wait 5 minutes before accessing the chamber. Locate the rear panel secured by thumb screws (no tools needed), remove it, and grasp the cylindrical bulb by its ceramic base. Pull straight out with steady pressure; twisting cracks the quartz glass. If the bulb feels warm, wait another 2 minutes—heat expands metal contacts, increasing breakage risk. Check for dark spots along the tube; these indicate mercury depletion and necessitate replacement.
Clean Chamber Surfaces
Wipe interior surfaces and the bulb with a dry microfiber cloth only—no liquids or sprays. Dust buildup on the chamber walls blocks 20% of germ-killing UV rays. Pay special attention to the bulb’s metal end caps where grime accumulates. After reinserting the bulb, verify it clicks into place without wobbling. UV-C bulbs lose 40% effectiveness after 9 months, so replace annually even if still glowing blue. A dimmed bulb won’t kill airborne pathogens, rendering this critical feature useless.
Reset Filter Change Indicators
Model-Specific Reset Codes
Post-cleaning resets vary by model: For AC4825/AC5000 series, hold the UV-C button for 5 seconds until the indicator flashes green. AC4100 owners press the timer button for 3 seconds, while AC9200 models require a 5-second press of the dedicated filter reset button. Skipping this step leaves the unit “thinking” filters need replacement, triggering premature alerts. If the light won’t reset, unplug the unit for 30 seconds to reboot the control board—this clears false error codes 90% of the time.
Post-Cleaning Test Run
Run your GermGuardian on HIGH for 30 minutes after reassembly to verify performance. Listen for smooth, consistent airflow—not grinding or rattling. Place your hand 6 inches from the vent; airflow should feel strong enough to ruffle papers. Check that the UV-C indicator glows steadily blue. Any weak output or strange noises means rechecking filter alignment—most post-cleaning issues stem from improperly seated components.
Fix Post-Cleaning Problems
Restore Lost Airflow
Weak airflow after cleaning usually means a damp pre-filter or backward HEPA installation. Ensure the foam layer has air-dried 6+ hours—residual moisture creates resistance. Verify the HEPA filter’s airflow arrow points toward the fan (not the intake). If problems persist, remove all filters and run the unit empty; if airflow returns, one filter is misaligned. Never force filters into place; damaged frames cause permanent air leaks.
Eliminate Strange Noises
Rattling often indicates a loose pre-filter snapping against fan blades. Re-seat it firmly until the panel clicks. A high-pitched whine suggests debris in the impeller—use a flashlight to inspect the rear chamber and remove obstructions with tweezers. Grinding sounds mean immediate professional service; this indicates motor bearing failure from water exposure during improper cleaning.
Extend Filter Lifespan
Optimal Operation Settings
Run your GermGuardian continuously on LOW instead of cycling on HIGH—it reduces filter clogging by 60% while maintaining air quality. Position the unit 3+ feet from walls to prevent dust recirculation. During pollen season, pair it with your HVAC fan set to “ON” so both systems share filtration duties. Avoid placing near windows; direct sunlight degrades foam pre-filters 3x faster through UV exposure.
Seasonal Maintenance Adjustments
Spring demands weekly pre-filter vacuuming for pollen management. Summer’s humidity requires triple-checking pre-filter dryness before reinstallation. Fall means inspecting for leaf particles clogging intake grilles. Winter static electricity attracts more dust—run an anti-static spray near the unit (not on it!) to reduce buildup. In humid climates, add silica gel packs near the filter storage area to prevent moisture retention.
Warranty-Safe Practices
Documentation Requirements
Track every cleaning date in a dedicated logbook—GermGuardian requires proof of proper maintenance for warranty claims. Use only genuine replacement filters; aftermarket versions often have incorrect seal dimensions that damage internal sensors. Never use compressed air on filters—it shreds HEPA media. If your unit malfunctions after cleaning, contact customer support before disassembling further; unauthorized repairs void coverage immediately.
Safe Disposal Methods
Discard HEPA filters in regular trash (they’re non-toxic). Carbon filters may be recyclable through municipal programs—check with your waste provider. UV-C bulbs contain trace mercury: Wrap in paper and take to household hazardous waste facilities. Never incinerate filters; burning releases trapped pollutants into the air.
Clean filters are the heartbeat of your GermGuardian’s performance. By following these precise cleaning protocols—vacuuming HEPA filters monthly, sun-reactivating carbon layers, and ensuring absolute dryness before reassembly—you’ll maintain hospital-grade air quality while doubling your unit’s lifespan. Set phone reminders for the 3rd of each month to inspect filters, and always reset indicators after maintenance. Remember: A well-maintained GermGuardian removes 99.9% of airborne threats, but neglected filters become petri dishes for mold and bacteria. Your next breath depends on what you do today—grab that microfiber cloth and give your air purifier the care it deserves.


