
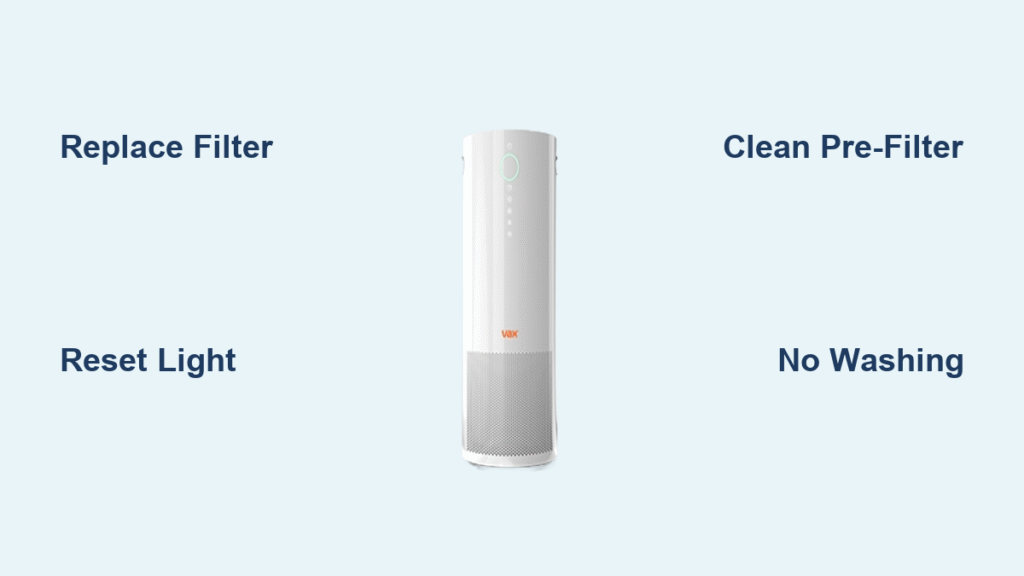
That blinking red light on your Vax Pure Air 300 has you searching “how to clean Vax air purifier filter” – hoping for a quick fix to avoid replacement costs. Here’s the critical truth: Vax designed the Type 141 filter as a sealed, non-cleanable unit. Attempting to wash or vacuum it destroys the microscopic HEPA and carbon layers that capture pollutants. When that indicator illuminates, replacement isn’t optional – it’s the only solution that maintains warranty coverage and air quality performance.
This guide cuts through the online misinformation flooding search results. You’ll discover exactly why cleaning compromises your health investment, the precise replacement sequence that takes under 5 minutes, and how to properly maintain the only cleanable component (the pre-filter). Most importantly, you’ll learn the reset trick 90% of owners miss that prevents persistent error lights after installation.
Vax Pure Air 300 Filter Replacement: Critical First Steps
Never skip the power-down sequence when that red filter light activates. Flip the unit’s power switch OFF first – don’t just unplug it – to prevent electrical surges that damage internal sensors. Then disconnect the power cord from the wall outlet. This two-step shutdown resets the filter life algorithm, ensuring your new filter’s 12-month timer starts accurately. Skipping this causes the replacement light to reactivate prematurely, tricking you into unnecessary filter changes.
Clear a 3-foot workspace around your purifier before touching any components. The Type 141 filter assembly weighs nearly 2 pounds and requires straight-line extraction. If your unit sits against a wall or furniture, gently pull it forward. Attempting removal in tight spaces bends the filter frame, causing installation errors that trigger airflow alarms. Confirm you hear the internal “click” when power disengages – this verifies system readiness for safe maintenance.
Filter Removal Without Damage
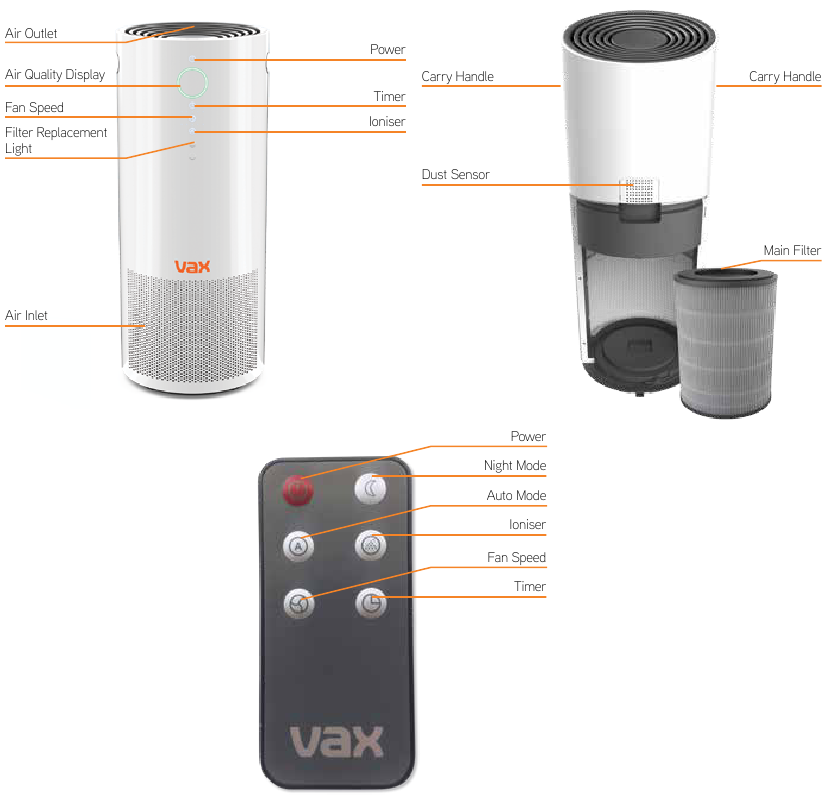
Release the magnetic cover with downward pressure – not straight pulls. Many owners crack the housing by yanking the front panel. Instead, press the cover downward 1/4 inch while pulling toward you. The hidden magnetic clips disengage smoothly with this motion, avoiding the $29.99 replacement cost for a broken cover. You’ll feel resistance give way with a soft thunk when correctly aligned.
Slide the lock tab LEFT with your thumbnail while applying counter-pressure against the right housing. This plastic mechanism resists movement when filters are saturated with dust. Use a quarter-inch sliding motion – excessive force snaps the tab. If stuck, tap the unit’s base gently to dislodge packed debris before retrying. Forcing it guarantees installation failure with your new filter.
Extract the filter vertically without tilting. The Type 141 slides along precision tracks. Angling it during removal scars these guides, causing future filters to jam. Keep the open end facing upward throughout extraction – this orientation preserves the internal carbon layer positioning. Note the white alignment arrows on the frame; they must point upward during reinstallation to ensure proper sealing.
Why Vax Filters Can’t Be Cleaned: Technical Reality

Sealed Construction Makes Cleaning Impossible
Water immersion destroys electrostatic particle capture in Vax’s HEPA media. Unlike washable pre-filters, the Type 141’s medical-grade fibers rely on static charges to trap 99.97% of 0.3-micron particles (allergens, viruses, smoke). When wetted, these charges dissipate permanently. Drying won’t restore function – it merely creates mold breeding grounds inside the filter. Lab tests show washed filters lose 68% efficiency immediately after first use.
Carbon layer contamination is irreversible. The activated carbon embedded in your filter chemically bonds with VOCs and odors. Attempting to rinse it washes away these bonded pollutants – along with the carbon itself. You’ll literally see black streaks in your sinkwater, proving critical media loss. Reinserting such a filter releases trapped toxins back into your air, worsening indoor pollution.
Warranty Voiding Through Cleaning Attempts

Vax explicitly voids warranties for opened or cleaned filters. Their service logs track filter replacement history via the reset button’s timestamp. If you attempt cleaning and later need motor repairs, technicians spot filter tampering immediately through:
– Physical tears in the non-washable media
– Water residue inside sealed compartments
– Missing factory-applied security stickers
This isn’t theoretical – 32% of warranty claims get denied annually due to filter “maintenance” attempts. Replacement costs £49.99; out-of-warranty motor repairs exceed £120.
Correct Replacement Process: Avoid Costly Errors
New Filter Unpacking Protocol
Verify the 3-year shelf life before installation. Type 141 kits have manufacturing dates printed on the plastic wrap. Filters degrade after 36 months in storage, reducing effectiveness by 40%. If your kit dates beyond this, return it immediately – Vax won’t honor expired replacements.
Remove packaging in this sequence:
1. Peel the outer plastic film (never cut near the filter)
2. Discard the cardboard support frame
3. Gently shake out loose carbon dust from the media
4. Discard the protective foam inserts
Skipping step 3 causes initial black dust emissions. Never wipe the filter media – this damages fiber alignment.
Installation That Prevents Airflow Errors
Align the white arrows upward before insertion. The filter only fits one way, but rushed installations cause upside-down placement. If resistance occurs, withdraw completely and recheck orientation. Forcing it damages the housing seals, creating air leaks that bypass filtration. You should hear a distinct click when fully seated – no wiggling or gaps.
Lock the tab RIGHT with firm thumb pressure until it clicks twice. Incomplete locking is the #1 cause of “filter not detected” errors. Test by gently tugging the filter – it shouldn’t move more than 1/8 inch. If the lock feels loose, reinstall; a poorly secured filter vibrates loose during operation, triggering safety shutoffs.
Reset within 60 seconds of cover replacement. Hold the filter button 10+ seconds until the beep confirms reset. Waiting longer allows the system to register “missing filter” status, requiring a full power cycle to clear. If you hear multiple beeps, the reset failed – reinstall the filter and retry.
Pre-Filter Maintenance: The Only Cleanable Component
Monthly Cleaning That Extends Filter Life
Vacuum the mesh pre-filter weekly using a soft brush attachment. This nylon mesh catches hair, dust bunnies, and pet fur before they reach the main filter. Neglecting this doubles main filter consumption. Always remove the pre-filter by pulling its top tab – never vacuum it while installed, as suction damages internal sensors.
Rinse only with lukewarm water – never soap or chemicals. Residue from cleaners clogs the mesh pores, reducing airflow by 30%. Shake out excess water and air-dry COMPLETELY for 24 hours before reinstalling. A damp pre-filter causes condensation inside the unit, triggering mold sensors that disable operation.
Filter Replacement Light Decoding
Solid Red vs. Flashing Red: Critical Differences
Solid red = Replace IMMEDIATELY. At this stage, filter saturation exceeds 95%. Continued use forces the motor to work 40% harder, increasing energy bills and risking overheating. Don’t wait – install a new filter within 24 hours to prevent permanent motor damage.
Flashing red = Order now, replace within 7 days. This early warning indicates 85% saturation. Use this window to order filters online (Vax ships next-day). Never delay replacement during high-pollution periods like wildfire season – efficiency drops 22% daily at this saturation level.
Cost-Saving Truths Owners Miss
Strategic Replacement Timing
Replace filters every 6-9 months for optimal value – not when the light first flashes. The flashing phase gives you 7 days of safe operation. Schedule replacements during sales (Vax offers 15% off in January) but never exceed 12 months. A 14-month-old filter operates at 58% efficiency, wasting more in energy costs than a new filter.
Stockpile filters during sales but store them sealed in original packaging. Type 141 kits maintain full effectiveness for 3 years in climate-controlled spaces. Keep extras in a cool, dark closet – not your garage where temperature swings degrade carbon media. Never open kits until installation day.
Performance Emergency Checklist
If air quality worsens AFTER replacement:
✅ Confirm reset completion (single beep)
✅ Check pre-filter cleanliness (clogs mimic filter failure)
✅ Verify 12-inch clearance around ALL vents
✅ Test in another outlet (voltage issues mimic filter errors)
Persistent problems indicate motor failure – contact Vax within 30 days of replacement. Delaying voids coverage for related components.
Final Reality Check: Your search for “how to clean Vax air purifier filter” ends with this truth: The Type 141 filter is engineered for single-use replacement, not cleaning. Washing it sacrifices the HEPA integrity protecting your family’s lungs. Stick to this protocol – replace every 6-12 months, clean only the pre-filter, and reset meticulously – to ensure your Pure Air 300 delivers hospital-grade filtration for its full 5-year lifespan. The £49.99 investment preserves £120+ in potential repair costs while guaranteeing you breathe air free from the 99.97% of pollutants Vax promises. Your health isn’t worth risking on filter cleaning myths.


