
That persistent red light on your Mooka air purifier isn’t just annoying—it’s a warning your family’s breathing compromised air. When your GL-FS32, GL-2103, or E-300L flashes its filter alert, procrastination risks reduced airflow, higher energy bills, and trapped pollutants recirculating through your home. This how to change Mooka air purifier filter guide delivers model-specific instructions you can trust—no confusing jargon or guesswork required.
Most owners make the critical mistake of waiting until filters look visibly dirty. But by then, your HEPA filter has lost 70% efficiency, letting microscopic dust and allergens slip through. Whether you’re battling pet dander in a city apartment or wildfire smoke in the suburbs, timely filter changes are non-negotiable for clean air. Let’s get your unit back to peak performance in under 15 minutes.
Filter Replacement Schedule Guide
When to Replace Your Filters
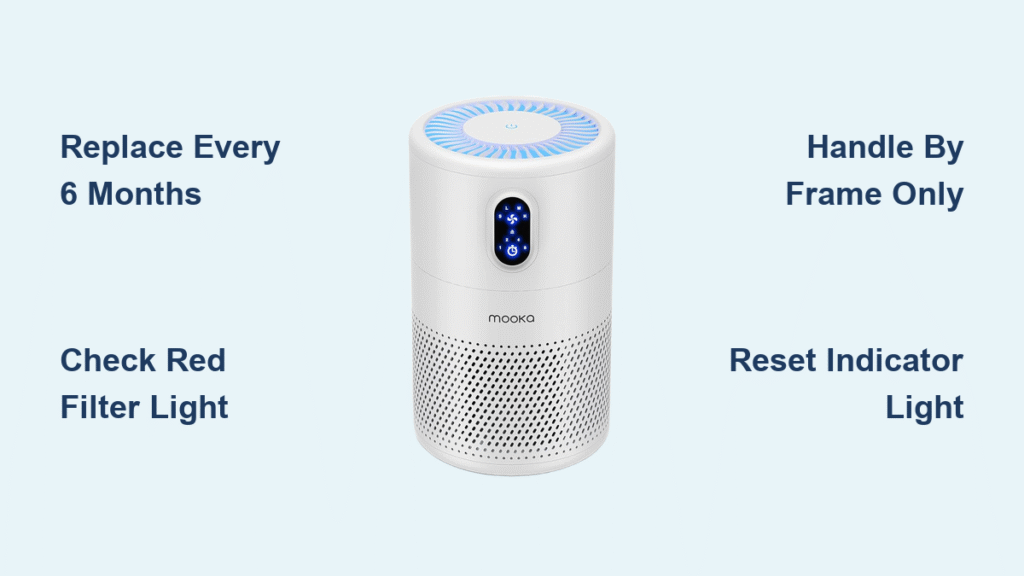
Don’t rely on sight alone—your Mooka’s red indicator light tracks real-time filter saturation. For average households, replace filters every 6 months as the baseline. But if you have shedding pets, smoke indoors, or live near heavy traffic, shorten that to every 3-4 months. Visually inspect filters monthly: when white HEPA media turns distinctly gray or dark, it’s already overdue. The GL-FS32, GL-2103, and E-300L all follow this rule, but your environment dictates urgency—two cats in a 500 sq ft apartment means quarterly changes.
Filter Types You’ll Handle
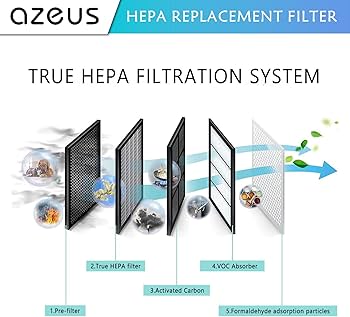
Mooka’s triple-threat system requires replacing three components:
– True HEPA filter: The workhorse capturing 99.97% of particles as small as 0.3 microns (pollen, mold spores)
– Activated carbon filter: The odor-killer absorbing smoke, VOCs, and cooking smells (look for the dark rectangular piece)
– Pre-filter: The washable mesh screen trapping pet hair and dust bunnies
UV-C bulbs in some models last years and won’t interrupt your regular filter routine. Critical reminder: Never touch HEPA media directly—skin oils permanently damage the delicate fibers.
Pre-Replacement Safety Steps
Power down completely and unplug—never just switch “off.” Internal components stay hot for 30 minutes after shutdown, risking burns. Gather these essentials before starting:
– Correct replacement filters (verify model number twice)
– Soft dry cloth and small vacuum with brush attachment
– Stable work surface away from curious pets or kids
Avoid this costly error: Don’t open new filters until installation begins. Activated carbon starts absorbing airborne chemicals the moment packaging is removed, shortening its lifespan. Keep spares sealed in a cool, dry place.
GL-FS32 Filter Replacement Guide
Access Panel Removal
- Hold power button 3 seconds until unit fully powers down
- Unplug immediately—safety isn’t optional
- Locate rear panel with dual side latches (not the top or front)
- Press both latches down while pulling panel straight back
- Set panel aside on a clean towel to prevent scratches
Old Filter Extraction
Pre-filter first: Pull the mesh frame straight toward you—this shields your HEPA filter. HEPA filter next: Grip ONLY the cardboard frame edges and slide out with steady pressure. Carbon filter last: Slide out carefully behind the HEPA; spilled pellets cause permanent stains. Vacuum any escaped carbon immediately with brush attachment.
Installing New Filters Correctly
Carbon Filter First
- Remove packaging only when ready to install
- Align upward arrows—this ensures proper airflow direction
- Slide in fully until seated against the back wall with no gaps
- Verify tight fit—light leaks cripple efficiency
HEPA Filter Second
- Strip ALL plastic wrap—even small remnants restrict airflow
- Handle by frame only—NEVER touch the white filter material
- Align with slot guides and slide until flush (no forcing)
- Check for wrinkles—a smooth, flat surface is critical
Pre-filter Final
- Mesh faces outward to catch large debris first
- Snap into place evenly until you hear/feel both sides secure
- Confirm flat contact with HEPA filter—any gaps let particles bypass
Closing the Unit
Panel alignment is make-or-break. The GL-FS32 requires two distinct clicks when latching. If it won’t seat flush, reopen and check filter positioning—forcing it cracks the housing. Plug in and power on: The red light should vanish instantly if reset properly.
GL-2103 Cartridge System
Quick Filter Change
This model’s “filter in a box” design simplifies swaps:
1. Press both top buttons simultaneously
2. Lift entire top section straight up (it’s heavier than expected)
3. Grab handle on old cartridge and lift out—have a trash bag ready
4. Drop new cartridge in place until it seats with a thud
5. Replace top until both latches click audibly
Pro tip: GL-2103 cartridges weigh 2.5 lbs—don’t set them on furniture to avoid carbon spills.
E-300L Side Access Model
Twist-Lock Method
Right side panel houses the filter—look for the circular lock:
1. Turn lock counterclockwise 90 degrees (lefty-loosey)
2. Pull filter straight out using the fabric tab
3. Insert new filter with tab oriented outward
4. Push until flush with housing—no gaps visible
5. Turn lock clockwise 90 degrees to secure
Common pitfall: Forcing the lock. If it resists, the filter isn’t fully seated—recheck alignment before turning.
Reset Filter Indicator Light
Automatic Reset (GL-FS32)
Hold “Filter Reset” button exactly 5 seconds. Watch for the red light to turn off while green flashes briefly—this confirms timer reset. If it fails, unplug for 30 seconds and retry.
Manual Reset (GL-2103)
- Power on and run 30 seconds
- Hold “Timer” + “Speed” together for 3 seconds
- Watch for 3 blinks—your success signal
- Verify display shows 100% filter life
Battery reset models: Use a paperclip in the pinhole reset near filters for 10 seconds. Replace indicator batteries if this fails.
Troubleshooting Common Problems

Filter Won’t Fit
95% of cases involve wrong parts. GL-FS32 filters won’t fit GL-2103 units despite similar looks. Fix: Compare old and new filters side-by-side—measure for 1/8-inch differences. Verify packaging matches your model: GL-FS32 needs GL-FS32-RF, GL-2103 requires GL-2103-CF.
Red Light Stays On
Incomplete reset is the culprit. Repeat the sequence while counting seconds precisely—some models need exactly 5 seconds, others 3. Nuclear option: Unplug 30 seconds, plug back in, then reset.
Weak Airflow After Change
Reopen immediately and check:
– Carbon filter pushed fully back
– HEPA filter flush against guides (no gaps)
– Pre-filter flat with no wrinkles
– All plastic wrap removed (a frequent oversight)
Maintenance Between Changes
Monthly Quick Clean
Vacuum pre-filter weekly—this 90-second task extends full replacement intervals by 2-3 months. Wipe exterior surfaces with a barely damp cloth to prevent dust ingestion. Never spray cleaners directly on the unit.
Buying Replacement Filters
Authenticity is non-negotiable. Look for these part numbers:
– GL-FS32: GL-FS32-RF
– GL-2103: GL-2103-CF
– E-300L: E-300L-FL
Smart savings: 3-packs cut costs 15%, 6-packs save 25%. For guaranteed freshness, choose Mooka’s subscription service—it ships replacements 5 months after installation so you’re never caught unprepared.
Disposal and Environmental Impact
HEPA filters go in regular trash—they’re not recyclable. Before trashing carbon filters, scatter the pellets in your garden as a natural soil deodorizer. Pre-filters can be vacuumed and reused if undamaged. Check local regulations—some areas prohibit air filters in landfills.
Final tip: Set a phone reminder for 5 months after installation. When the red light flashes at month 6, you’ll have your replacement ready instead of breathing subpar air for weeks. For model-specific videos, visit Mooka’s YouTube channel—your lungs will thank you for this how to change Mooka air purifier filter routine.


