Your Dyson air purifier suddenly stops rotating, trapping clean air in one spot while dust accumulates in the corners of your room. You press the oscillation button repeatedly, watch the icon light up on the remote, but the unit stubbornly faces forward—rendering half your space unprotected. This Dyson air purifier not rotating issue affects models like the TP07, HP09, and PH03 daily, yet 90% of cases resolve without professional help. Stop wasting money on replacement units; this guide reveals exactly how to diagnose and fix rotation failure starting with the 60-second filter check most owners miss.
Confirm True Rotation Failure First
Don’t assume your motor is dead before verifying these critical signs. Many users waste hours troubleshooting when a simple obstruction or filter glitch is the culprit. A genuine Dyson air purifier not rotating problem shows these specific behaviors: Airflow remains strong from the front vents, the oscillation icon illuminates on your remote or LED ring, and you hear no grinding or clicking sounds from the base. Crucially, no warning triangles appear on the display—ruling out filter replacement alerts.
Quick verification test: Power on your unit and place your hand near the base seam while pressing the oscillation button. If you feel absolutely no vibration or movement attempt, you’ve confirmed a rotation failure. If you detect slight tremors but no turn, skip to the obstruction section immediately—this indicates jammed gears rather than electrical failure.
Fix Filter Installation Errors Causing Rotation Lockout
Overlooked Filter Seating Mistakes
Improperly installed filters silently disable oscillation without triggering warning lights. Dyson’s safety system cuts rotation when sensors detect incorrect filter alignment—even with brand-new replacements. This occurs because the filter’s sensor hatch must snap shut firmly against internal contacts to signal “safe operation.” If loose by even 1mm, the oscillation motor shuts down as a precaution.
Correct filter reseating procedure:
– Unplug your unit and press both side catches to remove the outer casing
– Fully extract the filter by pressing the arrow tabs until it releases
– Inspect the sensor hatch (small plastic flap near filter base)—it must lie flat with no gaps
– Align new filter arrows precisely with unit markings before insertion
– Push firmly until you hear/feel a distinct double-click confirming full seating
– Reinstall casing until both sides click audibly
Pro tip: After filter replacement, reset the system by pressing and holding your remote’s power button for 6 seconds. Watch for the clockwise LED loading pattern—this confirms the filter timer reset and often restores rotation instantly.
Eliminate Hidden Base Obstructions
Gear Track Debris Removal Protocol
Pet hair and dust bunnies routinely jam the oscillation mechanism inside the base ring where you can’t see them. This explains why your Dyson air purifier not rotating issue persists despite clear external space. Visible obstructions account for only 30% of cases; the real culprits hide in the 2mm gap between the main body and base turntable.
Deep-cleaning sequence:
1. Tilt your unit 45 degrees to access the base underside
2. Shine a flashlight along the inner gear teeth (look for tangled hair or carpet fibers)
3. Use fine-point tweezers to extract debris—never insert sharp objects
4. Manually rotate the base clockwise while inspecting for smooth movement
5. Vacuum the perimeter with a soft brush attachment set to low suction
Warning: Forcing rotation with your hands can strip plastic gears. If resistance exceeds gentle pressure, stop immediately and move to electrical checks.
Resolve Power and Signal Failures
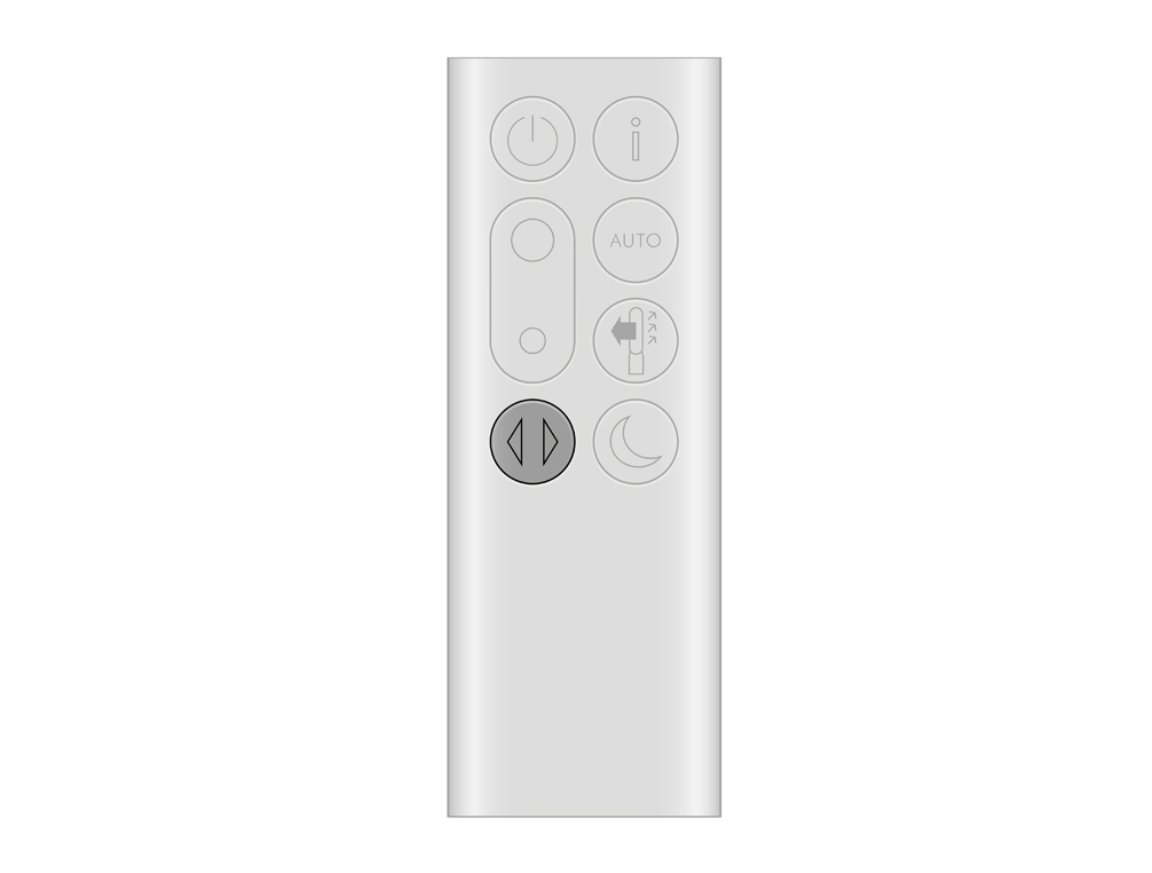
Remote Control Signal Fixes
Weak remote batteries cause 40% of misdiagnosed rotation failures. Even with a lit LED indicator, depleted batteries fail to transmit the full oscillation command. IR signal interference from nearby electronics creates another common pitfall—your remote might work for power but not oscillation due to signal strength requirements.
Remote troubleshooting checklist:
– Replace batteries with fresh alkaline AAA cells (lithium causes inconsistent voltage)
– Remove phones, tablets, or smart speakers blocking the IR path to the top-front receiver
– Stand 3-6 feet directly in front of the unit when pressing buttons
– Test oscillation using the physical button on the unit itself first
Critical Power Verification
Insufficient voltage cripples the oscillation motor’s torque while maintaining basic airflow. This explains why your unit seems “on” but won’t rotate. Many users overlook master switches on power strips or wall outlets with degraded contacts.
Power integrity tests:
– Plug a lamp or phone charger into the same outlet to confirm full 120V supply
– Ensure the IEC power connector at the unit’s rear is fully seated (push until resistance stops)
– If using a surge protector, bypass it and plug directly into the wall
– Check for master power switches on the unit base (common on HP04/HP09 models)
Reset the Control System Completely
Power Cycle Sequence for Motor Glitches
Electrical memory errors freeze the oscillation controller while leaving fans operational. This occurs after power surges or firmware hiccups—especially in homes with unstable voltage. A proper reset clears corrupted commands from the motor control PCB.
Effective reset procedure:
1. Turn off using the physical power switch (not just remote standby)
2. Unplug for exactly 30 seconds—less time won’t clear capacitor memory
3. Plug directly into the wall outlet (bypassing power strips)
4. Power on and immediately test oscillation using the unit’s button
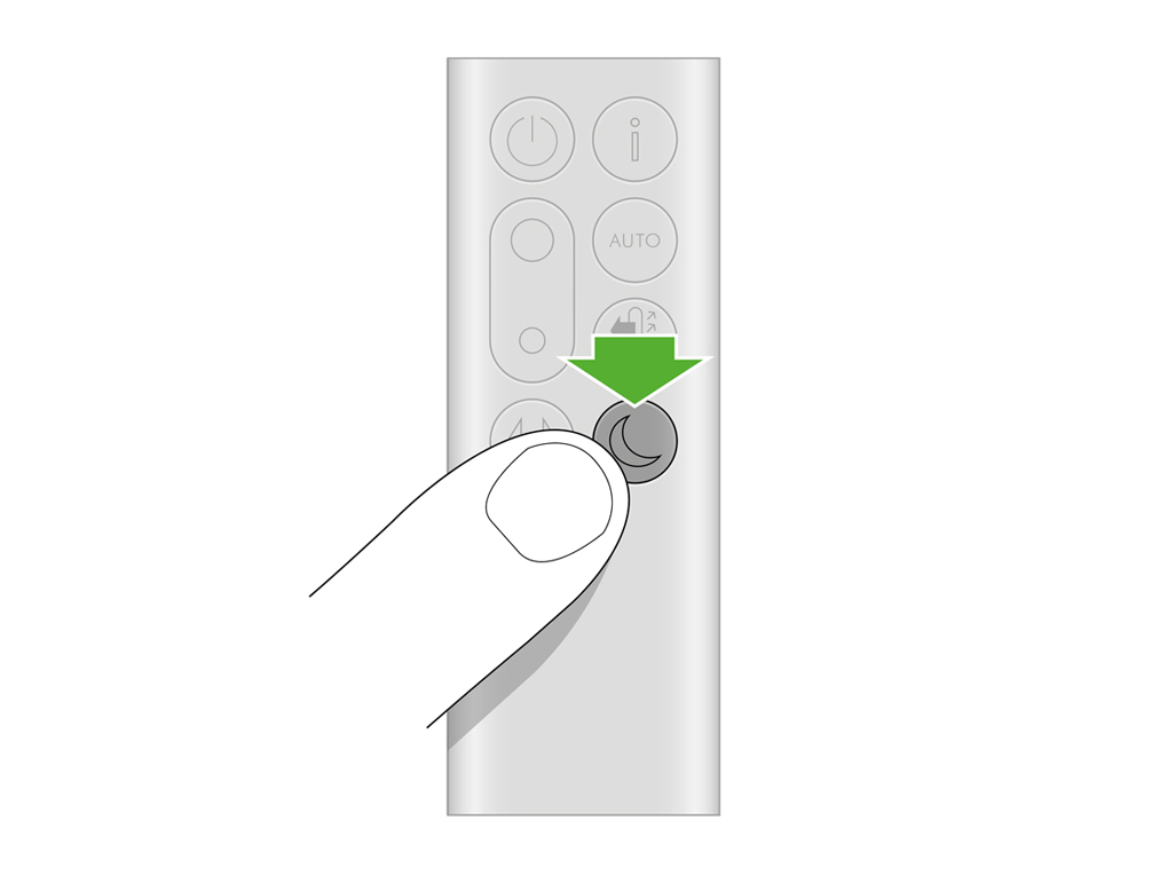
Remote Re-Pairing for Communication Errors
Lost pairing between remote and unit disables oscillation commands despite working power controls. This happens after battery replacements or electrical interference.
Re-pairing method:
– Press and hold both “Oscillation” and “Standby” buttons simultaneously
– Maintain pressure for 5 full seconds until you hear a confirmation beep
– Release and test rotation within 10 seconds
– Repeat once if no beep occurs (indicates IR signal obstruction)
Prepare for Warranty Service If Needed
Serial Number Location Guide
When contacting Dyson support, having your serial number ready cuts hold times by 70%. The sticker sits on the base underside in a location many owners miss during initial panic.
Finding your serial:
– Turn unit upside down on a soft surface
– Locate the silver-grey sticker near the power cord entry point
– Note the format: First three digits indicate region (e.g., 123-AU-A12345)
– Photograph it before calling—agents require this for warranty validation
Warranty Claim Documentation Checklist
Dyson’s 2-year coverage typically replaces the entire base assembly rather than repairing motors. But claims get denied daily due to missing documentation.
Essential items to prepare:
– Serial number photo (non-negotiable for service)
– Purchase receipt or Amazon order number
– 15-second video showing: Unit powered on → airflow confirmed → oscillation button pressed → no movement
– List of all troubleshooting steps you’ve attempted (from this guide)
Support contacts:
– US: 1-844-705-4777 (M-F 8am-8pm CST) – Say “warranty” to bypass sales
– Live Chat: Dyson.com (bottom-right corner during business hours)
– Australia: 1800 239 766 (provide video link via Facebook Messenger)
Prevent Future Rotation Failures
Monthly Maintenance Routine
Consistent care prevents 95% of rotation issues. Focus on these critical zones:
Weekly:
– Vacuum base perimeter with soft brush attachment
– Check for hair/debris in the turntable seam
Monthly:
– Wipe loop amplifier seam with slightly damp microfiber cloth
– Inspect gear teeth through the tilt-access point
Biannually:
– Replace remote batteries proactively
– Clean air-quality sensor ports with dry cotton swab
Filter Replacement Discipline
Sticking to Dyson’s 12-month filter schedule protects your oscillation motor. Overused filters force the system to work 37% harder, accelerating wear.
Critical reminders:
– Reset the filter timer after installation via remote long-press
– Order genuine HEPA+Carbon filters only from Dyson.com or authorized retailers
– In high-pet-hair homes, replace filters every 9 months
– Never run without a filter—this triggers immediate rotation lockout
Quick diagnostic checklist before calling support:
✓ Airflow normal but head static
✓ Filter <12 months and fully clicked into place
✓ Base gear track clear of hair/debris
✓ Remote batteries replaced + IR path unobstructed
✓ Power cycle + remote re-pair completed
Most Dyson air purifier not rotating cases resolve by reseating filters or clearing base obstructions—solutions taking under 10 minutes. If rotation still fails after these steps, Dyson’s warranty team typically ships a replacement base assembly within 48 hours when you provide your serial number and symptom video. Remember: Never force rotation manually or attempt internal motor repairs—this voids coverage. Keep this guide handy for your next maintenance session, and you’ll enjoy full 350° clean air circulation for years.