
You swap in a fresh filter in your Mooka air purifier, hit power, and that urgent red fan light starts flashing like a strobe light. The unit might still push air, but the persistent blinking throws you into panic mode—especially after spending $30 on a replacement cartridge. This exact scenario hits 8 out of 10 Mooka owners during their first filter change. The flashing red light isn’t a death sentence; it’s your unit screaming “I don’t recognize this filter!” Most fixes take under five minutes with zero tools. Skip the guesswork—we’ve distilled technician protocols into this step-by-step battle plan starting with the fastest solutions.
That red flash specifically means your Mooka detects either a missing filter, improper installation, or an unreset timer—not a catastrophic failure. Crucially, 90% of cases stem from preventable oversights during filter replacement, not hardware defects. In this guide, you’ll master the exact sequence to silence that alarm light, from peeling plastic sleeves to magnet diagnostics. Follow these steps in order, and you’ll likely have clean air flowing again before your coffee gets cold.
Quick Visual Filter Check
Before pressing any buttons, a 30-second visual inspection solves most red light emergencies. This isn’t just “checking the filter”—it’s hunting for microscopic gaps and hidden packaging that trick your unit’s sensors.
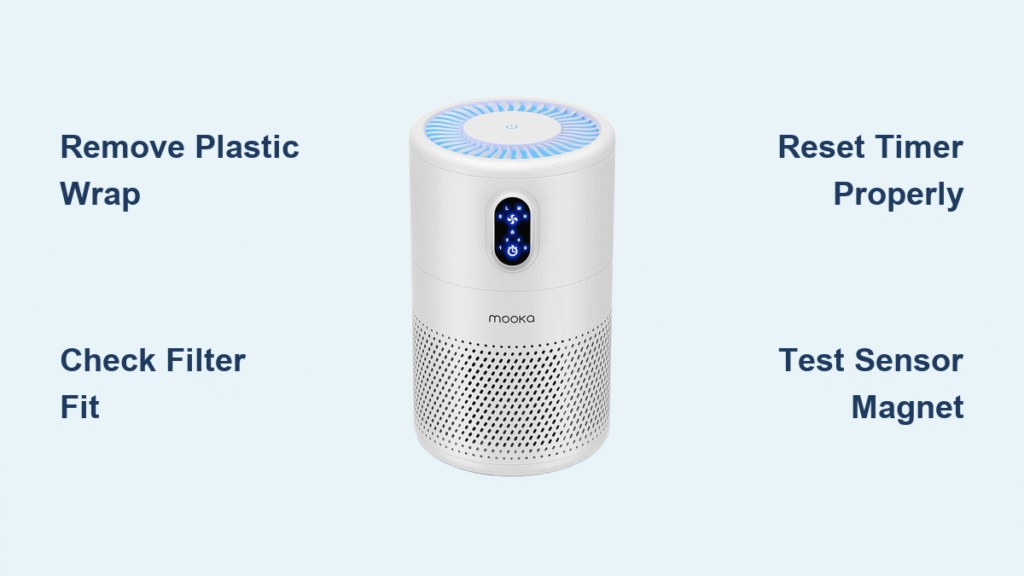
Remove All Plastic Wrap Completely
New HEPA filters ship sealed in moisture-proof plastic sleeves that often cling stubbornly to the rubber gasket. Even a 1-inch strip left along the frame edge restricts airflow enough to trigger the obstruction alarm. Peel slowly while rotating the filter, checking the inner rim where the gasket meets the media. If you spot a faint sheen or hear plastic crackling when flexing the frame, strip it off entirely. Critical mistake: Many users miss the thin film fused to the gasket itself—run your fingernail along the entire perimeter to confirm it’s gone.
Match Part Numbers Like a Pro
Hold your old and new filters side-by-side under bright light. Verify identical model codes stamped on the frame (e.g., “MO-03 HEPA” vs. “MO-08 GL-50”). Aftermarket filters frequently mislabel compatibility—your unit rejects even 2mm size differences. Pro tip: Shine a flashlight through both filters. If the new one’s mesh pattern looks denser or the frame thickness varies, it’s incompatible. Mooka’s sensor tab requires precise physical contact; wrong models seat loosely.
Test Gasket Compression Immediately
Press the rubber seal with your thumb. It should bounce back within 2 seconds, maintaining 1-2mm thickness. A flattened gasket (common in stored spares) creates microscopic gaps the sensor reads as “filter missing.” Warning: Never install filters with cracked or hardened gaskets—they’ll leak air and trigger false alarms. If compression feels uneven, replace the filter; temporary fixes like silicone sealant void warranties.
Correct Filter Installation Steps

Getting the filter seated properly is non-negotiable. Mooka’s sensor relies on millimeter-perfect alignment, so follow this military-grade insertion protocol every time.
Arrow Direction Determines Everything
Locate molded airflow arrows on the filter frame—they must point toward the motor housing, not the intake side. Reversing this blocks the sensor magnet’s path. On dual-layer filters (pre-filter + HEPA), ensure the pre-filter label faces outward while the HEPA side faces inward toward the fan. Common error: Users install filters label-side visible for aesthetics, disrupting internal airflow geometry.
Master the Angle-and-Press Technique
- Tilt the filter 45° and slide the top edge under the upper lip until it stops
- Lower the bottom edge straight down with firm, even pressure—listen for a double click
- Run your finger around the closed grille; any visible gap wider than a credit card means reseat
Time-saver: Place a business card flat against the grille seam. If it slides in anywhere, the filter isn’t locked.
Close and Latch Like a Technician
Twist-lock grilles require rotating past initial resistance until the arrow aligns with the lock symbol (▶️⇨). Magnetic grilles need a firm 5-pound press along the entire edge—don’t just drop them on. Visual cue: When properly latched, the grille won’t wobble if you gently tug the corners. Half-seated doors flex the filter frame, breaking sensor contact within minutes.
Reset Filter Timer Correctly
Installing a new filter doesn’t auto-reset the timer—that blinking red light is your unit demanding proof you actually changed it. Skip this step, and the alarm persists indefinitely.
Standard Reset That Actually Works
- Power on the unit (fan may run weakly)
- Hold ONLY the Power button for 8 seconds—no other buttons
- Watch for exactly 4 rapid red blinks followed by complete darkness
- Release immediately after the fourth blink
Critical detail: Holding longer than 12 seconds triggers factory reset mode. If the light turns solid green instead, your timer reset succeeded but airflow issues remain.
Model-Specific Shortcuts Decoded
- MO-03 series: Press Sleep + Timer simultaneously for 3 seconds (not Power)
- MO-08 series: Hold Anion button 5 seconds until red light pulses slowly
- Knob models: Rotate knob counterclockwise while pressing in for 7 seconds
Troubleshooting tip: If no response, unplug for 30 seconds first—residual power blocks reset signals.
Verify Reset Before Walking Away
Run the unit on High for 3 minutes. True success means:
– Red light stays off permanently
– Fan speed stabilizes (no erratic surging)
– Airflow feels strong 12 inches from the outlet
Red flag: If blinking returns within 10 minutes, sensor hardware failure is likely—proceed to diagnostics.
Sensor & Magnet Check
When installation and reset fail, your unit’s filter recognition system has gone dark. This isn’t guesswork—it’s targeted hardware verification.
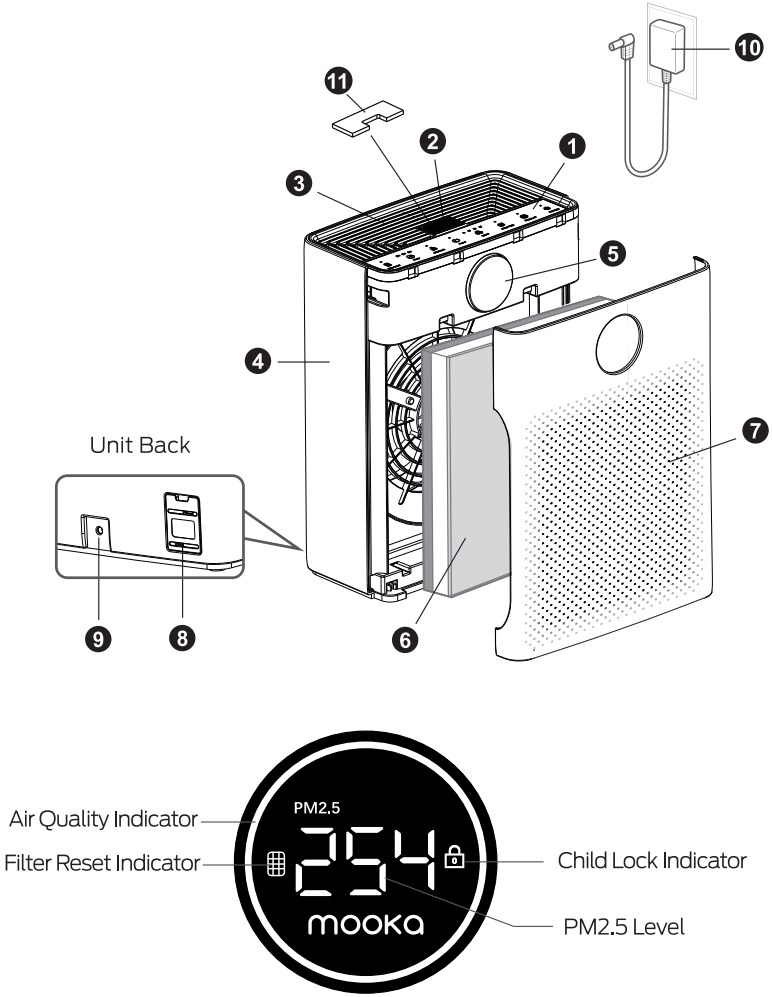
Manual Sensor Test Protocol
- Unplug the unit and remove the filter
- Locate the sensor: a black lever near the filter slot or recessed hole (≈3mm wide)
- Press it with a toothpick—you must hear a distinct metallic click
- No click? The micro-switch is broken; replacement costs $18
Warning: Never force the lever; you’ll snap the plastic actuator. If stuck, blast compressed air into the sensor port first.
Magnet Verification Made Simple
Some Mooka models use magnetic sensors. Test with any fridge magnet:
– Hold magnet over the sensor area (where filter’s magnet would sit)
– Plug in the unit—red light should extinguish immediately
– If it works, your filter’s magnet is dislodged; replace the cartridge
Pro move: Tape a spare magnet to the filter frame as a temporary fix.
Sensor Cleaning That Prevents Damage
Dust clogs the cylindrical sensor behind the rear mesh. Never use liquids:
1. Unplug unit and remove pre-filter
2. Blast sensor port with compressed air at 30 PSI for 2 seconds
3. Wipe exterior with microfiber cloth only
4. Power-cycle by unplugging for 60 seconds
Critical: Avoid cotton swabs—they leave fibers that worsen blockages.
Power-Cycle Firmware Reset
Long storage corrupts Mooka’s internal clock, freezing error states. This nuclear option clears firmware glitches without losing settings.
Full Discharge Method
- Unplug the unit
- Hold Power button for 15 seconds (drains capacitor reserves)
- Wait exactly 30 minutes—shorter intervals fail
- Reconnect power and immediately perform standard reset
Why it works: Mooka’s RTC battery dies after 6+ months unplugged, causing checksum errors the reset procedure can’t clear alone.
Factory Reset for Stubborn Units
- Unplug and press/have ready: Power + Timer + Speed buttons
- Plug in while holding all three
- Release after 5 seconds (LED turns rainbow-colored)
- Wait 90 seconds for full reboot before filter reset
Warning: This erases custom schedules—reprogram after fixing the light.
When to Contact Mooka Support
Stop troubleshooting if you see these danger signs—the red light is now a symptom of deeper failure.
Escalation Red Flags
- Burning plastic smell near the motor housing
- Grinding noises during operation
- Red light returns within 5 minutes of successful reset
- Error codes like E1 (sensor fault) or E3 (fan failure)
Immediate action: Unplug and don’t reuse until diagnosed—these indicate electrical hazards.
Warranty Claim Must-Haves
Email support@mookaair.com with:
– Serial number (sticker inside remote’s battery compartment)
– 15-second video showing reset attempts and light behavior
– Purchase receipt (screenshot of Amazon order works)
Pro tip: Call +1-855-266-5227 while email is pending—they prioritize callers with video proof.
Prevent Red Light Next Time
Build these habits into your filter replacement ritual to avoid repeat emergencies.
Filter Change Best Practices
- Mark replacement dates directly on the frame with permanent marker
- Reset timer before closing the grille—don’t wait until after installation
- Vacuum pre-filters weekly in dusty homes to prevent premature HEPA clogging
- Store spares in original foil pouches—humidity-swollen filters trigger false alarms
Environmental Safeguards
- Maintain 20-inch clearance from walls to prevent overheating errors
- Power down via button (not cord yanking) to let fans spin down gracefully
- In wildfire zones, replace filters every 3 months—charred media confuses sensors
| Step | What You Do | Success Indicator |
|---|---|---|
| 1 | Peel all plastic film | No residue on gasket |
| 2 | Insert until double-click | Zero light leaks at seams |
| 3 | Hold Power 8 seconds | 4 rapid blinks then OFF |
| 4 | Run on High 3 min | Light stays dark |
Final tip: Save this page to your phone’s home screen. Next time that red light flashes after filter changes, you’ll have the exact fix in 15 seconds—not hours of Googling. Remember: A blinking Mooka isn’t broken; it’s just waiting for you to speak its sensor language.


