
That musty smell creeping from your Midea dehumidifier isn’t just unpleasant—it’s a warning sign. When your dehumidifier starts emitting odors or collecting less water than usual, it’s time for a thorough cleaning. Left unattended, mold and bacteria thrive in the damp interior, turning your moisture-fighting appliance into a contamination source rather than a solution.
Regular maintenance ensures your Midea dehumidifier continues protecting your home from moisture damage while preventing health hazards like respiratory irritations and allergies. This guide provides the exact cleaning sequence professionals use, tailored specifically for Midea models.
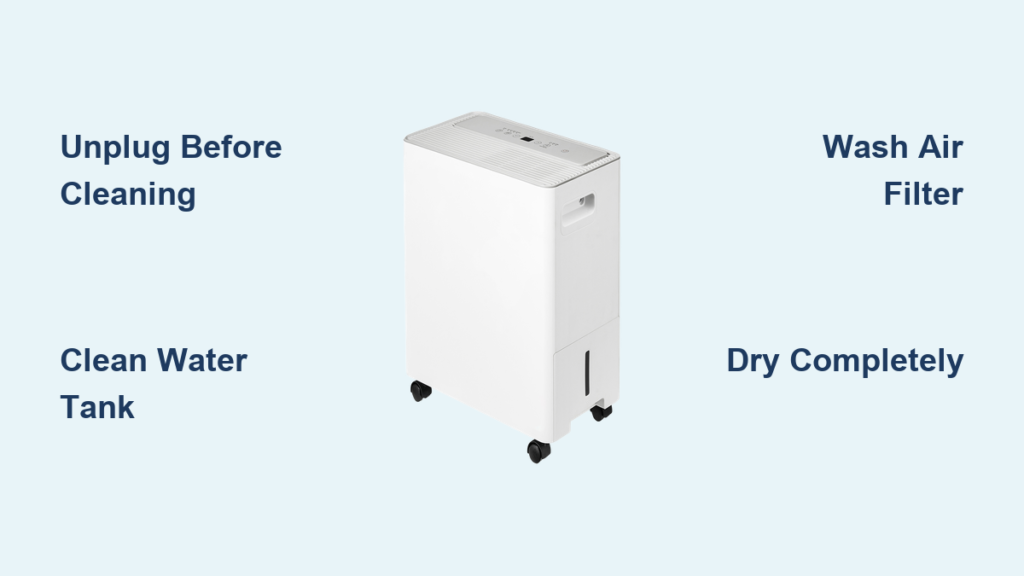
Power Disconnection Safety Protocol
Before touching any component of your dehumidifier, complete electrical isolation is non-negotiable. Turn off the unit using the main power button first, then physically unplug the cord from the wall outlet. This dual-step safety measure prevents electrical shock during cleaning, especially critical when handling water components.
Never skip this step—even basic exterior wiping requires full power disconnection. A plugged-in unit can cause serious injury when accessing internal parts or water tanks. Wait at least 10 minutes after unplugging before beginning your cleaning process to allow internal components to discharge fully.
Water Tank Sanitization Procedure

Remove and Empty Completely
Pull the water collection tank straight out from the dehumidifier base, checking for debris buildup at the bottom. Empty all contents into a sink or drain, observing the water’s color and clarity—dark or cloudy water indicates significant contamination requiring thorough cleaning.
Soap and Warm Water Method
Fill your sink with warm water and add a few drops of liquid dish soap. Submerge the tank completely, using a soft sponge to scrub all interior surfaces. Focus special attention on corners and the area around the float mechanism where mold commonly develops and hardens over time.
Rinse and Dry Thoroughly
Rinse the tank multiple times until water runs completely clear—residual soap creates problematic foam during operation. Place the tank upside-down on a clean towel in a well-ventilated area. Allow 2-3 hours for complete air drying before reinstalling to prevent musty odors from trapped moisture.
Air Filter Cleaning Process
Locate and Remove Filter
The air filter typically sits behind a front panel or grille—consult your model’s manual for exact positioning. Gently pull the filter straight out without bending or forcing it. Most Midea models use washable mesh filters that slide out easily but require careful handling to avoid damaging the delicate mesh structure.
Wash Using Mild Soap Solution
Submerge the filter in warm, soapy water and gently agitate. Use your fingers or a soft brush to remove dust buildup between mesh layers. Avoid harsh scrubbing that could tear the filter material or compromise its particle-trapping effectiveness.
Complete Drying Before Reinstall
Rinse until water runs clear, then shake excess water gently. Stand the filter vertically against a wall or prop it open to air-dry completely. A damp filter can harbor mold and reduce airflow—ensure it’s bone dry before sliding back into place, which typically takes 4-6 hours.
Exterior Surface Maintenance
Dry Dust Removal Technique
Start with a completely dry microfiber cloth, wiping all external surfaces including the top, sides, and control panel. Work in straight lines to lift dust rather than spreading it around. This prevents scratches while removing everyday buildup that blocks ventilation slots.
Damp Cloth for Stubborn Spots
For stuck-on grime, lightly dampen your cloth with plain water—never use cleaning sprays or chemicals directly on the unit. Wipe gently and immediately follow with a dry cloth to prevent moisture entering vents or electrical components.
Pro tip: Never pour water directly on any part of your dehumidifier. Moisture entering electrical areas can cause permanent damage and create electrical hazards.
Internal Dust Elimination

Vacuum Access Areas
Use a vacuum with a crevice tool attachment to reach visible dust inside the main unit. Focus on areas around the coils and fan blades visible through the air intake. Work methodically without forcing attachments into restricted spaces to avoid damaging delicate components.
Soft Brush for Delicate Components
A clean, soft-bristled paintbrush helps dislodge dust from sensitive areas the vacuum can’t reach. Brush gently in the direction of airflow, collecting debris on a paper towel for disposal. Pay special attention to the cooling coils where dust accumulation significantly reduces efficiency.
Container Filter Care
Identify the Thimble Filter
This small, cylindrical filter sits inside the water tank area—often resembling a tiny thimble or cap. Check your manual for exact location as placement varies by model. This secondary filter traps impurities before water enters the tank and prevents clogs in the drainage system.
Rinse and Reinstall Procedure
Remove the thimble filter carefully and rinse under warm running water. No soap needed—just thorough water flow to remove trapped particles. Shake gently and allow 10-15 minutes air-drying time. Ensure proper seating when reinstalling to maintain filtration effectiveness and prevent water leakage.
Maintenance Schedule That Works
Weekly Tasks
- Empty water tank when full (don’t wait for automatic shutoff)
- Wipe exterior surfaces with dry cloth
- Check for unusual odors or sounds indicating early contamination
Bi-Weekly Deep Cleaning
- Complete water tank wash and dry
- Clean air filter thoroughly
- Inspect container filter condition
Monthly Comprehensive
- Full unit dust removal
- Check all filters for wear
- Verify proper drainage and operation
Note: Increase frequency during heavy use periods or high-dust environments. Homes with pets or construction nearby may need weekly filter attention.
Avoid These Common Cleaning Mistakes
Skipping Complete Drying
Reassembling components while damp creates ideal mold conditions. Always allow complete air drying—even if it adds an extra hour to your maintenance routine. Rushing this step guarantees you’ll face the same odor problems within days.
Using Chemical Cleaners
Bleach, ammonia, or harsh cleaning products can damage plastic components and leave harmful residues. Stick to mild dish soap and water for all washable parts—your Midea dehumidifier wasn’t designed to handle industrial-strength cleaners.
Forcing Components
If filters or tanks don’t slide easily, check alignment rather than applying force. Forcing parts can crack plastic or damage sealing surfaces, leading to water leaks and reduced efficiency that require professional repair.
Performance Verification After Cleaning

Once reassembled, run your dehumidifier for 30 minutes and observe:
– Smooth operation without unusual noises
– Proper water collection in the clean tank
– No musty odors from air output
– Appropriate humidity reduction in the room
If problems persist after cleaning, consult your model-specific manual for additional troubleshooting steps. Persistent issues may indicate component failure rather than simple dirt accumulation.
Long-Term Benefits of Regular Dehumidifier Cleaning
Regular cleaning every 2-4 weeks prevents the gradual efficiency loss that affects most dehumidifiers. Clean units operate more quietly, use less electricity, and provide healthier air output. Most importantly, consistent maintenance prevents the costly repairs or premature replacement that neglect inevitably causes.
Your Midea dehumidifier represents an investment in home comfort and health. Following this systematic cleaning approach ensures it continues protecting your space from moisture damage while delivering the clean, dry air your family deserves. A few minutes of regular maintenance saves hours of dealing with mold remediation and appliance replacement down the line.


