
That persistent musty odor creeping into your basement? Your Aprilaire dehumidifier’s struggling because its filter’s choked with dust and grime. A clogged filter slashes moisture removal by 30% and hikes energy bills by 25%—but the fix takes just 15 minutes with basic household items. When you learn how to clean Aprilaire dehumidifier filter properly, you’ll restore airflow, slash operating costs, and extend your unit’s lifespan by years.
This guide delivers model-specific instructions for every Aprilaire unit—from the compact 1770A to the powerhouse 1872. You’ll discover exactly when to clean, avoid costly mistakes like using bleach, and recognize when replacement is unavoidable. No fluff, no guesswork—just actionable steps verified by Aprilaire’s engineering specs.
Locate Your Filter Fast
Find Filter Position by Model
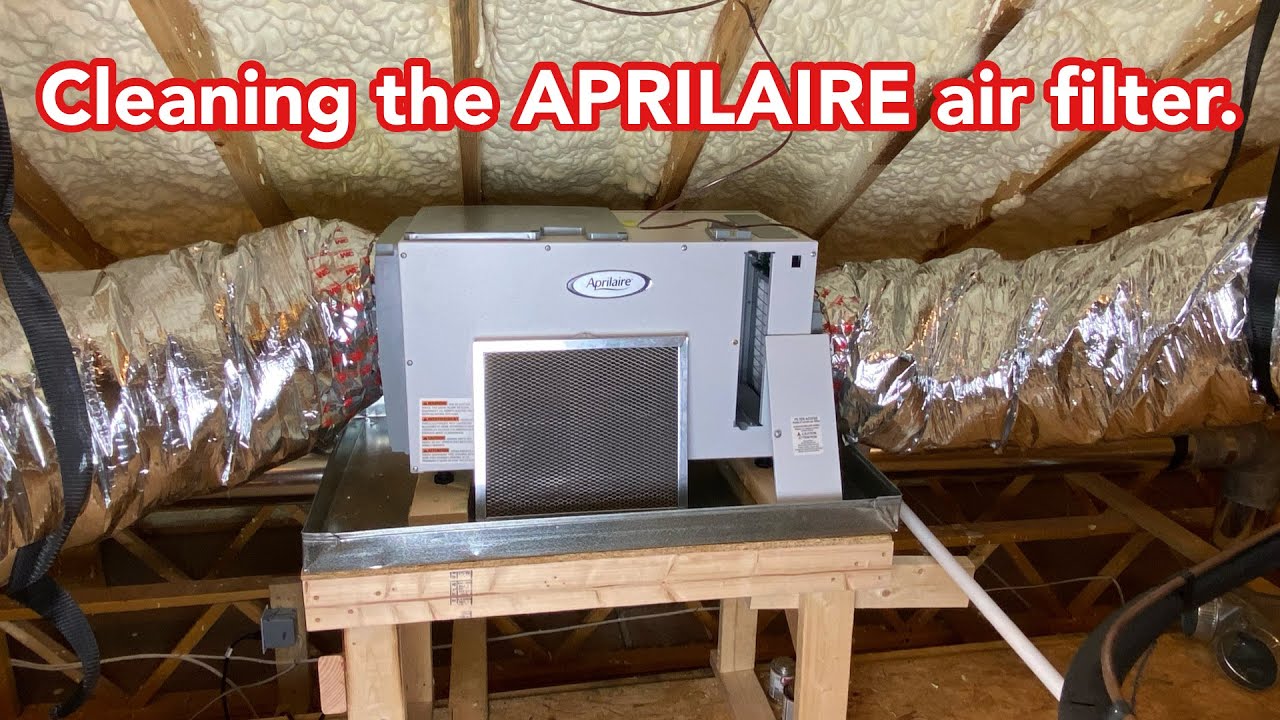
Your Aprilaire’s filter hides in one of three spots depending on the model. Front-access units (1820, 1830, 1850, 1852) feature a grille below the control panel with visible release tabs. Slide-panel models (1870, 1872, 1770A) require pressing side latches to pull out the filter. For F-series units (1850F, 1870F), open the front drawer by gripping the recessed handle. Look for the rectangular frame—it slides out smoothly with zero tools.
Filter Size Check
Grab a tape measure before removing your filter. The 1770A exclusively uses a 10″ x 12″ filter, while most standard models (1820-1872) share a 12″ x 16″ size. F-series units demand the largest 14″ x 18″ filters. Installing the wrong size causes gaps where unfiltered air bypasses the system. If your filter frame feels cramped during reinstallation, double-check measurements against Aprilaire’s part numbers before proceeding.
Essential Cleaning Tools

Must-Have Items
Skip expensive specialty cleaners—effective filter washing requires only a handheld vacuum, mild dish soap like Dawn, warm water, soft toothbrush, and clean towel. The vacuum’s brush attachment lifts surface debris without damaging delicate pleats. Warm (not hot) water prevents synthetic mesh warping, while the toothbrush’s soft bristles scrub deep into folds. Always rinse with clean water to remove soap residue that attracts more dirt.
Pro Tools Worth Having
For stubborn basement grime, add baking soda to your arsenal—it neutralizes odors and dissolves oily buildup. A compressed air canister cuts drying time by blowing moisture from pleats, while rubber gloves protect hands from sharp frame edges. Never substitute bleach or ammonia; these corrode filter fibers permanently. If mold appears, use only Aprilaire-approved sanitizers to avoid voiding your warranty.
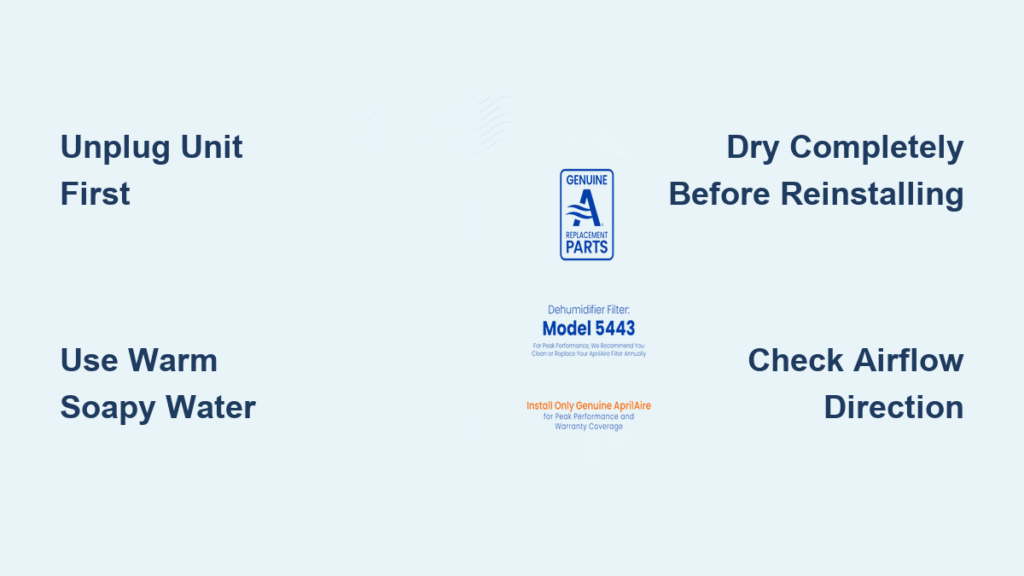
Power Down Safely
Unplug your unit and press the power button off—never skip this step. Wait 15 minutes for internal condensation to drain completely, then empty the water bucket if your model has one. Attempting filter removal while the unit is plugged in risks electrical shock and compressor damage. This isn’t just cautionary advice; Aprilaire’s service manuals cite improper power-down as the #1 cause of accidental warranty voids during maintenance.
Remove Filter Correctly
Step-by-Step Removal
Press both release tabs simultaneously while gripping the plastic frame—not the mesh—to pull the filter straight out. Note the airflow direction arrow etched into the frame; snap a photo with your phone for correct reinstallation. If you spot tears, holes, or warped frames during removal, stop immediately—damaged filters can’t be cleaned effectively and must be replaced. Never force a stuck filter; check for debris jamming the tracks first.
Pre-Clean Debris Removal
Dry Cleaning Methods
Take the filter outside and vacuum both sides using the brush attachment, moving in one direction along the pleats. Start from the cleaner side (facing the room) to push debris outward. For heavy dust, gently tap the frame against a wooden surface—wear a mask since basement dust contains allergens. This dry step removes 80% of particles before water contact, preventing mud from clogging the pleats during washing. Skip this, and you’ll battle stubborn residue later.
Wash Filter Thoroughly

Quick Wash (Most Cases)
Mix 3 drops of dish soap into a sink of warm water. Submerge your filter for exactly 5 minutes—longer soaks weaken adhesive bonds. Gently scrub pleats with a toothbrush using downward strokes, then rinse under running water until it runs crystal clear (usually 30 seconds). Never twist or wring the filter; hold it horizontally under the faucet while rotating to flush all soap residue.
Deep Clean for Neglected Filters
For filters caked with construction dust or pollen, soak in a baking soda solution (2 tbsp per quart of water) for 30 minutes max. Rinse with a garden hose on gentle spray, directing water from clean side to dirty side to eject trapped particles. If black mold appears, use a 1:10 bleach-to-water solution ONLY as a last resort, followed by triple-rinsing. Persistent grime means replacement time—don’t risk contaminating your air.
Dry Filter Completely
Air Drying Method
Shake the filter gently over a drain—never twist—to shed excess water. Lay it flat on a towel in a well-ventilated area, flipping after 60 minutes. Bone-dry filters feel uniformly warm to the touch with zero cool spots. Rushing this step invites mold growth; 2-4 hours is non-negotiable for full pleat drying.
Speed Drying Tips
Position a box fan 2 feet from the filter, blowing across (not through) the surface. For faster results, use compressed air to blast each pleat from the clean side outward. Never use hair dryers, radiators, or direct sunlight—the heat deforms synthetic mesh within minutes. Test dryness by pressing a tissue against the filter; if it sticks, wait another 30 minutes.
Reinstall Filter Properly
Final Checks Before Installation
Verify the filter is 100% dry and the frame has no dents. Align the airflow arrow toward the unit’s interior—reversed installation cuts efficiency by 40%. Bent edges prevent proper seating, so straighten minor warps with pliers before inserting.
Snap-Back Process
Slide the filter into tracks until it clicks, then press the center firmly. Close the access panel with audible snaps on all sides. For models with filter indicators (1850+), hold the reset button 3 seconds until the light turns green. Start the unit and listen for steady airflow—grinding noises mean improper seating.
Maintenance Schedule That Works
Standard Homes
Clean filters every 30 days during humid months or after 250 operating hours. Always clean before winter storage and after spring reactivation. Set phone reminders for the 1st and 15th of each month—you’ll never miss a cycle.
Dusty or High-Use Environments
In workshops or construction zones, clean every 10-14 days. Check filters weekly during pollen season; a grayish tint means immediate washing. High-dust environments demand filter replacements every 8 months instead of 12.
When Replacement Beats Cleaning
Clear Replacement Signs
Replace filters showing permanent yellowing after washing, any mesh tears (even hairline cracks), or frames that won’t sit flush. If airflow remains weak after two thorough cleanings, internal damage is irreversible.
Genuine Filter Part Numbers
Use only Aprilaire OEM parts: #4236 for standard models (1820-1872), #4237 for 1770A, and #4238 for F-series. Third-party filters often have incorrect density ratings that strain compressors. Budget $15-$25 annually—cheaper than emergency repairs.
Troubleshoot Common Problems
Filter Won’t Fit After Cleaning
Straighten bent frame corners with needle-nose pliers. Confirm you’re using the correct size—many homeowners mistakenly install 12×16 filters in 14×18 F-series units. Ensure the filter is bone-dry; moisture-swollen mesh won’t seat properly.
Unit Won’t Start Post-Cleaning
Check if the access panel latches fully—most Aprilaires have safety switches that disable operation if panels are loose. Verify the filter reset button was held 3+ seconds. If issues persist, unplug for 10 minutes to reset internal circuitry.
Reduced Airflow After Cleaning
90% of cases stem from reversed installation—reposition so arrows point inward. Leftover moisture in pleats also restricts airflow; dry for 2 extra hours. Finally, vacuum the filter compartment tracks to remove dislodged debris.
Boost Performance & Save Money
Efficiency Gains
A clean filter slashes energy use by 20%, saving $50+ annually on average. It also maximizes moisture extraction—critical during flood season—and adds 3-5 years to compressor life by preventing overheating.
Air Quality Bonus
Aprilaire filters trap pollen, dust mites, and pet dander while dehumidifying. Clean filters reduce airborne allergens by 60%, making this maintenance task a dual defense against humidity and respiratory irritants.
Safety Checklist
Electrical
Always unplug before touching filters. Water exposure while powered causes fatal shocks—Aprilaire’s warranty explicitly excludes such damage.
Chemical
Rinse until water runs perfectly clear. Soap residue becomes a dirt magnet, accelerating clogs. Never mix cleaning agents; baking soda and vinegar create ineffective foam.
Physical
Wear gloves—filter frames have sharp edges from manufacturing. Lift wall-mounted units with a partner to avoid back strain during access.
Bottom line: Clean your Aprilaire filter every 30 days during active use. Mark it on your calendar or set phone alerts—this tiny habit prevents 80% of service calls. Replace filters annually even if they look clean, as microscopic damage cripples efficiency. When in doubt, consult Aprilaire’s model-specific manual online. Your dry basement and lower energy bills will thank you for 10+ years of reliable operation.


