
That quiet hum in the corner of your room? Your Dyson air purifier fan is working overtime to trap dust, pollen, and pet dander. But when dust coats the base vents and airflow weakens, it’s screaming for attention. Neglecting this critical maintenance slashes performance by up to 40%—turning your air purifier into little more than a fancy fan. This guide delivers the exact steps to revive your unit, based on Dyson’s engineering specifications. You’ll learn to safely clean both external vents and internal filters without damaging delicate components, restoring hospital-grade air purification to your home.
If your Dyson struggles to clear cooking odors or leaves visible dust rings on furniture, it’s time for intervention. Proper cleaning extends filter life by 6-12 months and prevents mold growth inside the unit. Let’s transform your struggling appliance back into the air-scrubbing powerhouse you paid for.
Confirm You Own an Air Purifier Model
Spot the Critical Difference
Standard tower fans merely circulate air through base vents with zero filtration—no cleaning beyond surface wiping required. True air purifier models (like Pure Cool, Pure Hot+Cool, or Pure Humidify+Cool) contain dual HEPA and carbon filters plus air quality sensors. Check for these telltale signs:
– Model name includes “Pure” (e.g., TP09)
– Digital display showing PM2.5 or VOC levels
– Filter replacement indicator lights
– Removable panels revealing filter compartments
Forcing a standard fan’s cleaning process on an air purifier risks filter damage. If unsure, locate the model number on the base—air purifiers always list filter types in their specifications.
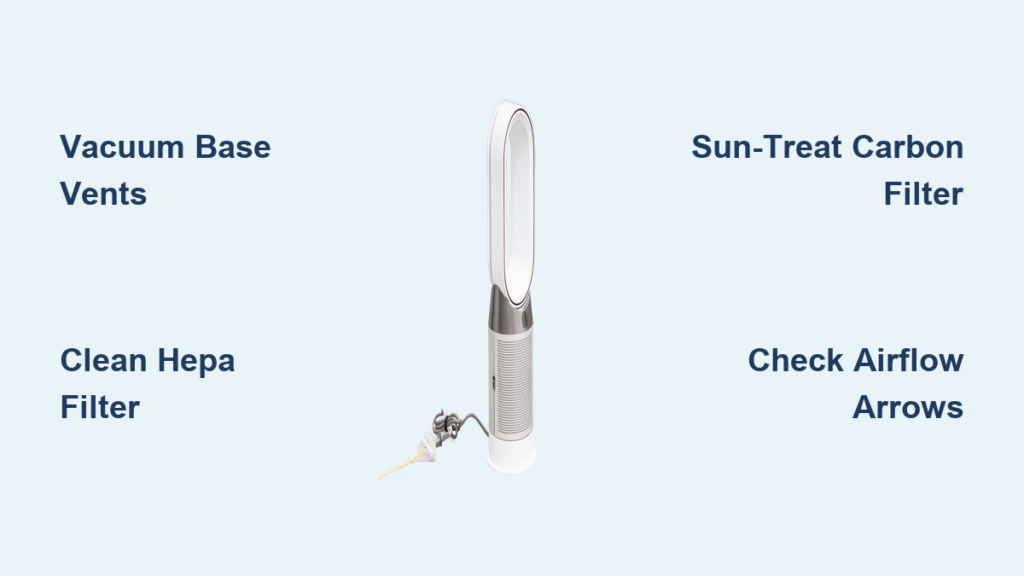
Deep-Clean Base Intake Vents Weekly
Vacuum Hidden Dust Traps
Those hair-thin holes around your Dyson’s base collect dust faster than your bookshelves. Use your vacuum’s soft brush attachment on low suction to avoid scratching plastic. Hold the nozzle 1 inch from vents while slowly rotating the unit. Focus on the 2-inch gap between the base and floor—this zone traps 70% of debris. For stubborn buildup, wrap a microfiber cloth around a chopstick to dislodge clumps before vacuuming.
Blast Stubborn Particles with Compressed Air
When vacuuming fails, grab a can of compressed air. Critical safety step: Hold the can upright 6 inches from vents and use 2-second bursts. Tilting the can releases freezing liquid that cracks plastic housings. Rotate the unit quarter-turns after each burst—the dust clouds you see are proof you’re clearing airflow blockages. Never use canned air near electrical components.
Pro Tip: Do this over a trash can—expect 3-5 visible dust puffs per session. Skip this step, and your filters work overtime capturing what should’ve been blocked at the source.
Identify Your Filter System Configuration
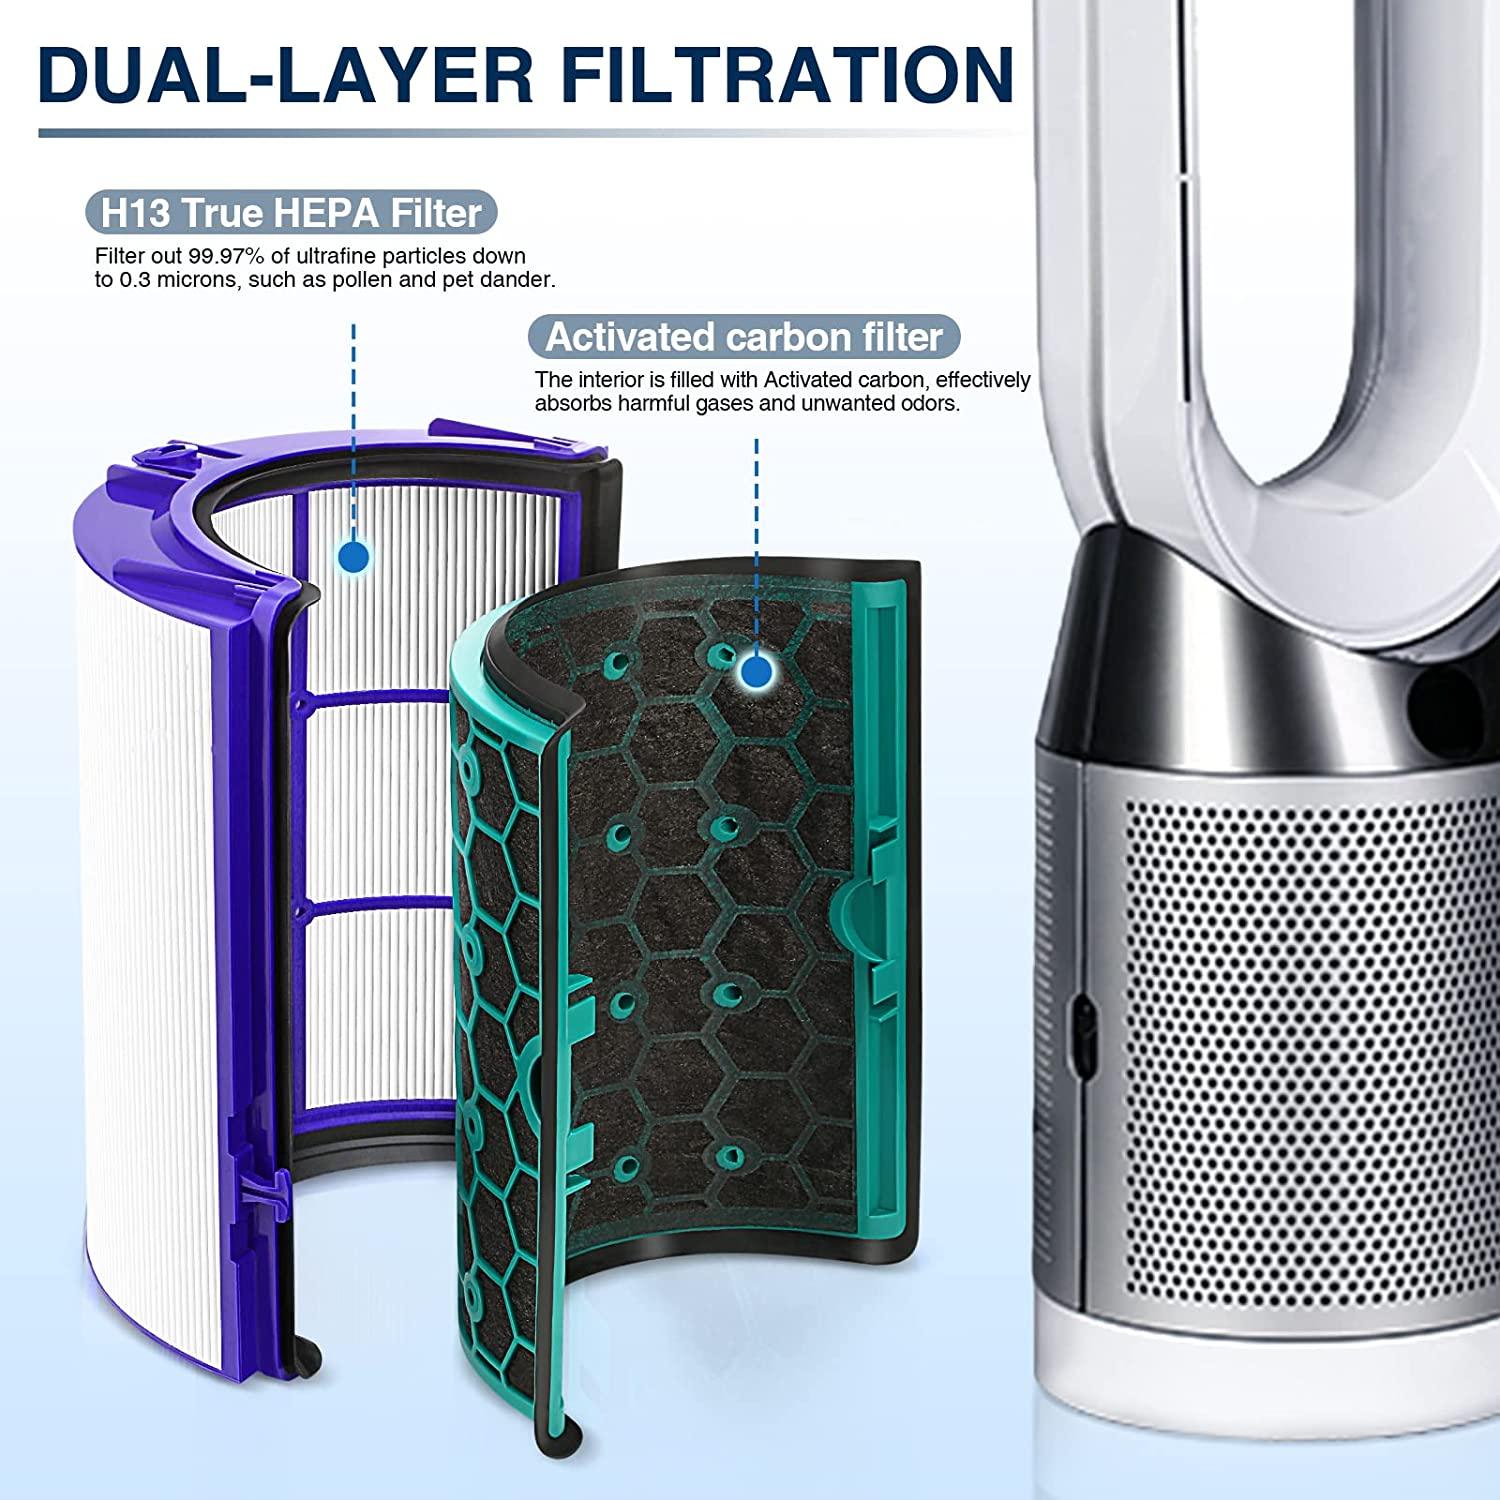
HEPA Filter: Your Invisible Particle Shield
This pleated filter captures 99.97% of particles down to 0.3 microns—including pollen, mold spores, and even some viruses. It’s easily spotted by its white or off-white color and accordion-like folds. Never wash it with hot water or chemicals, as this melts the electrostatic charge that traps microscopic debris.
Carbon Filter: The Odor Assassin
The black or charcoal-colored filter uses activated carbon’s million-pore structure to neutralize cooking smells, pet odors, and VOCs. Unlike HEPA, this can’t be washed—sunlight is its only refresh method. Saturation is permanent; replacement is inevitable after 6-12 months.
Key Insight: Most Dysons use a combined filter block (HEPA + carbon fused in one unit). Separating them risks tearing the seals—handle as a single unit unless your manual specifies otherwise.
Extract Filters Without Damage
Power-Down Protocol
Unplug the unit and wait 15 minutes—this cools internal electronics and prevents static discharge that attracts dust to filters. Never skip this; residual current can fry sensors during reassembly.
Unlock Filter Compartments Correctly
Compartments hide on the base underside (TP-series) or rear housing (HP-series). Press latches firmly inward while lifting the panel—never pry. If stuck, check for hidden screws (common in older models). Forcing panels cracks plastic tabs, requiring expensive repairs.
Handle Filters Like Fragile Art
Grip only the plastic frame edges. Note the airflow arrow stamped on the frame—this must point toward the fan during reinstallation. Lay filters on a clean towel immediately; contact with dirty surfaces recontaminates them.
Revive HEPA Filters Safely
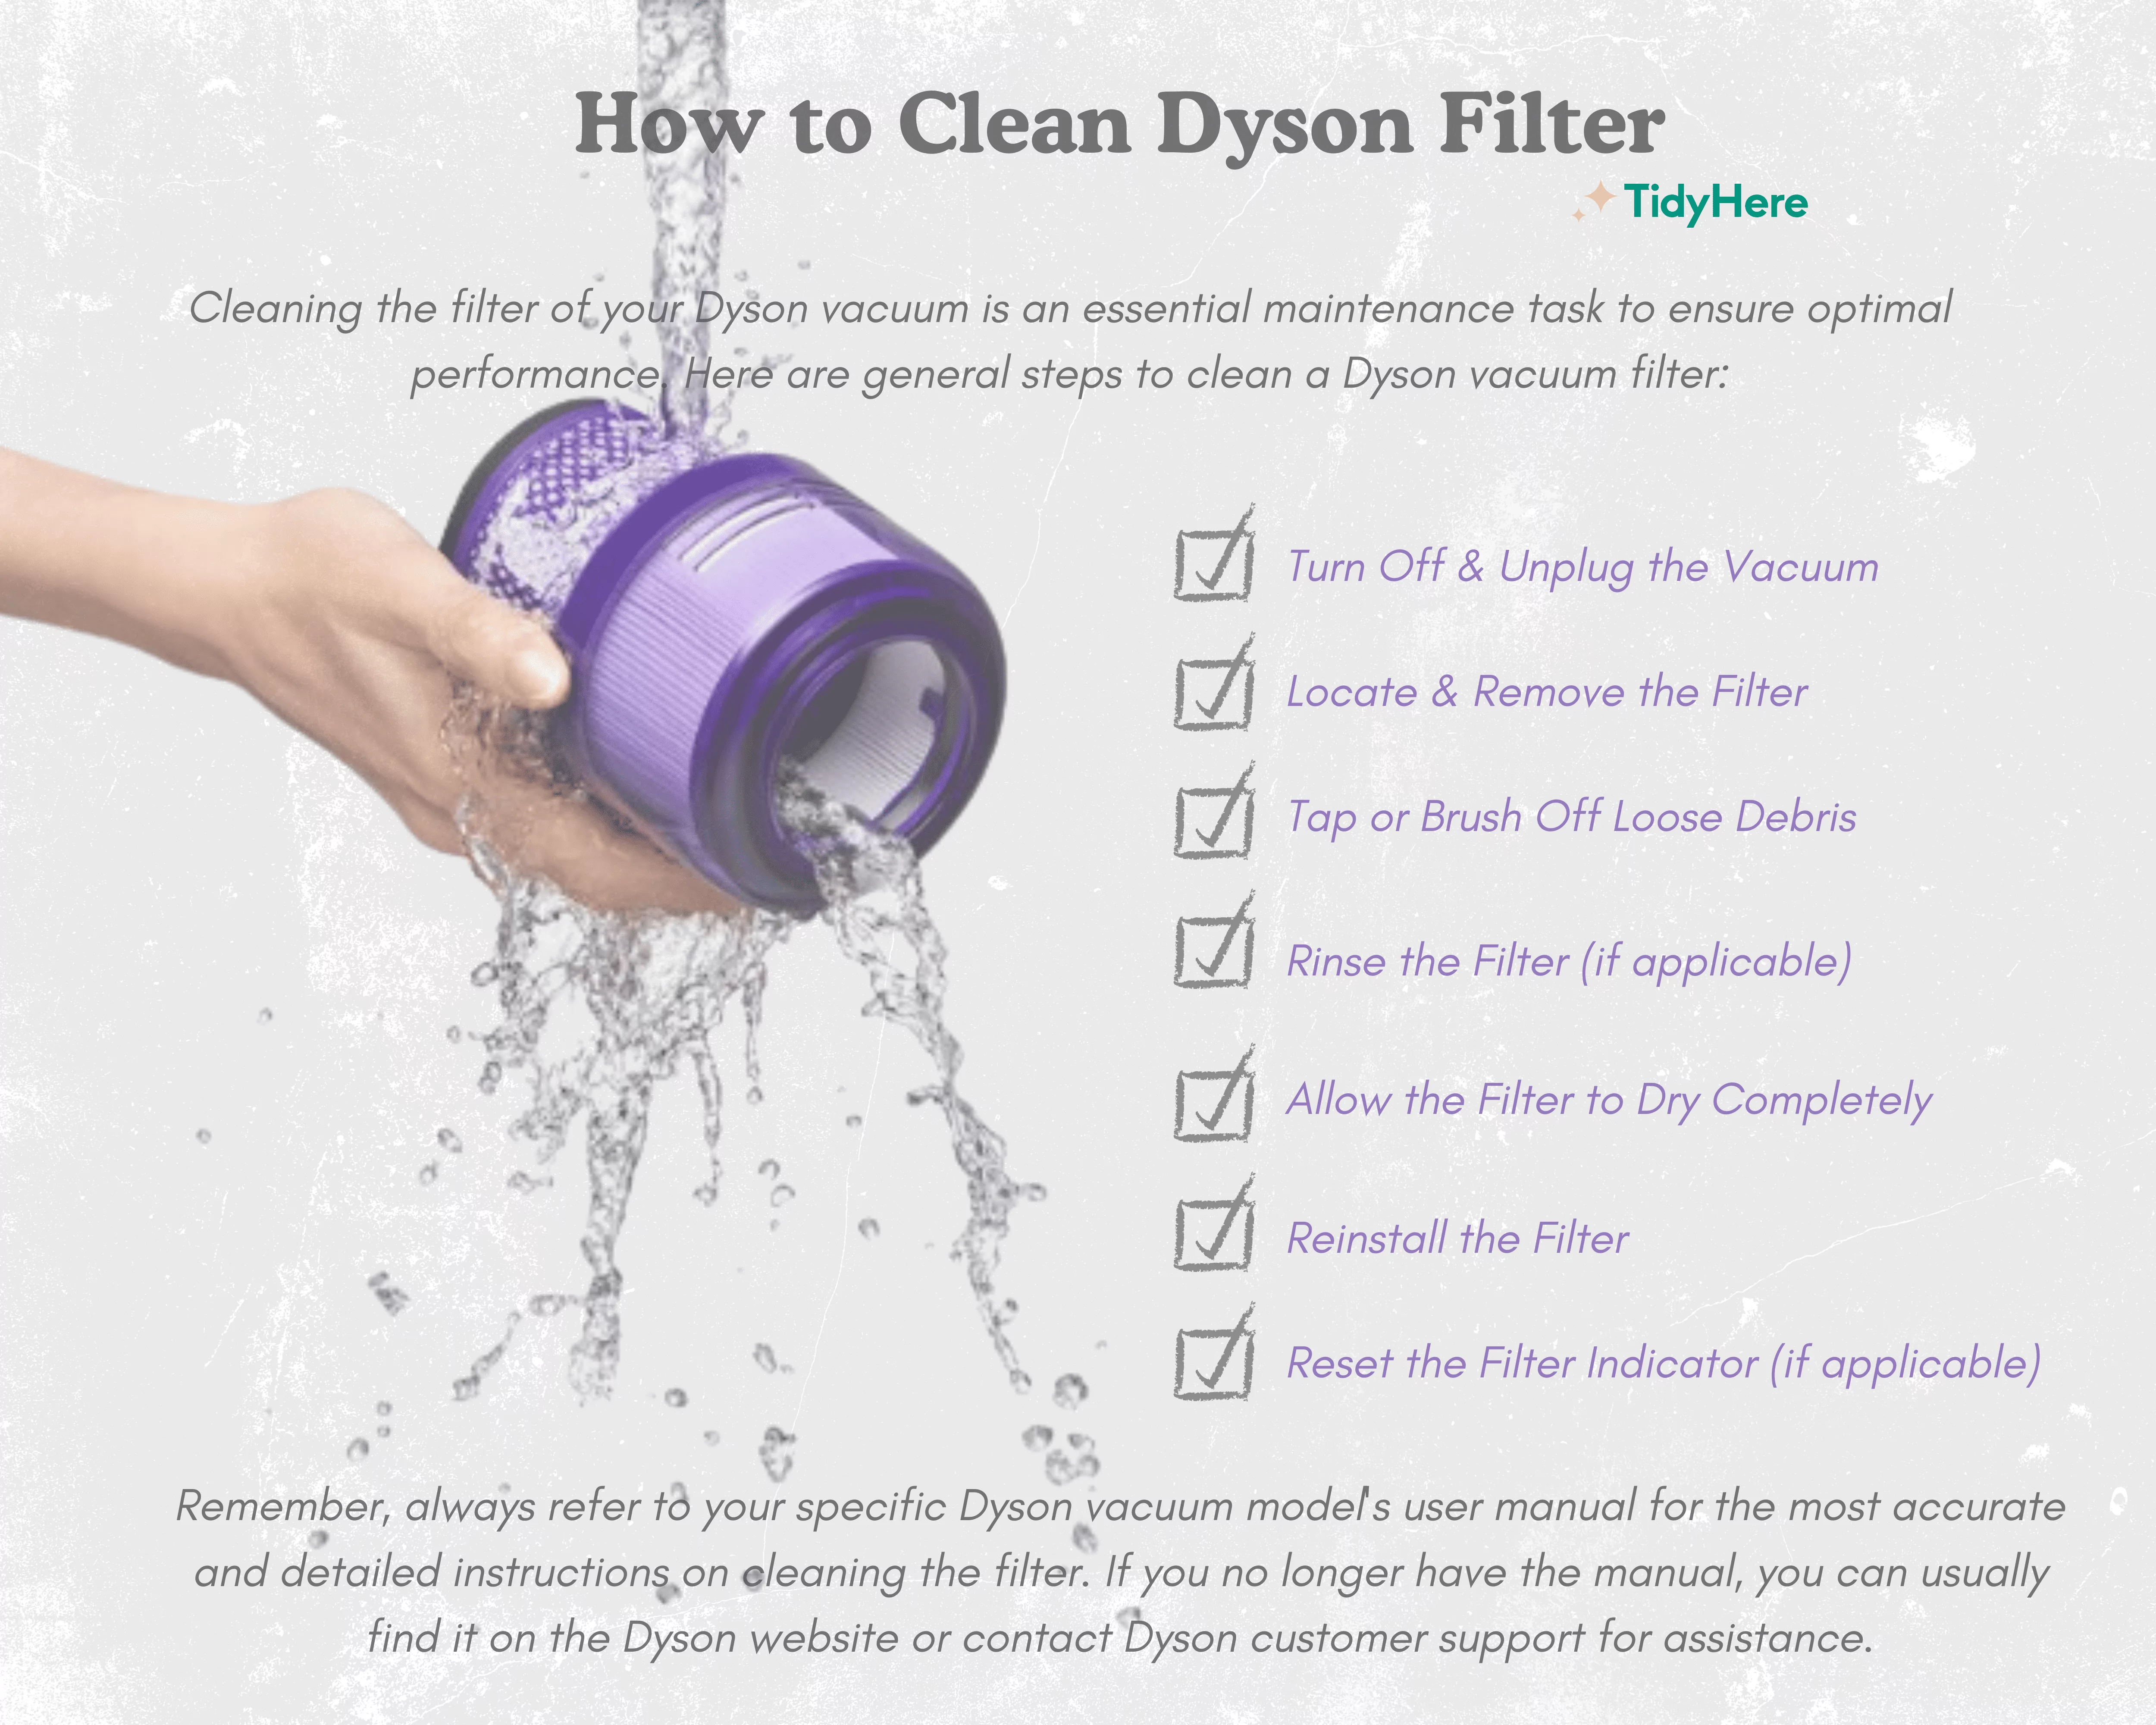
The Tap-and-Rinse Sequence
Over a trash can, tap the frame 10-15 times to dislodge loose dust. Then, hold the filter under cool running water flowing against the airflow arrow direction. This flushes particles outward instead of embedding them deeper. Never soak filters—waterlogging destroys filtration efficiency.
Detergent Only When Essential
If water alone fails, rub one drop of fragrance-free dish soap between damp fingers across the filter surface. Never scrub—this shreds fibers. Rinse under slow-flowing water for 90 seconds minimum until runoff is crystal clear. Residual soap attracts more dust.
Air-Dry Like a Pro
Shake gently to remove excess water, then lay flat on a dry towel in a warm, shaded room. Rotate every 2 hours. Critical rule: Filters must dry 24+ hours before reinstallation. A single damp spot breeds mold inside your unit. Test dryness by pressing a tissue against the filter—it should show zero moisture.
Extend Carbon Filter Life
Surface Cleaning Only
Use a dry microfiber cloth or soft-bristle brush to wipe the carbon filter’s exterior. Never submerge it—water floods the pores, permanently killing odor-absorbing capacity. For pet hair, wrap tape around your fingers (sticky side out) to lift strands without damaging granules.
Sunlight Reactivation
Place the filter in direct sunlight for 3 hours (max). UV rays break down odor molecules trapped in the carbon. Warning: Beyond 4 hours, UV degrades the filter structure. If odors return within days after sun treatment, replacement is unavoidable.
Pro Tip: Store carbon filters in sealed bags between cleanings—this prevents premature saturation from ambient odors.
Reassemble for Peak Performance
Dryness Verification Test
Before reinserting, press a paper towel against all filter surfaces. Any dampness means 12 more hours of drying. Installing damp filters causes musty smells and reduces airflow by 25%.
Precision Installation
Align filters so airflow arrows point toward the fan outlet. HEPA goes in first, followed by carbon. Listen for the click as tabs engage—forced installation misaligns seals, letting dirty air bypass filters.
Post-Cleaning Calibration
Run the unit on “Auto” mode for 10 minutes. Airflow should feel strong and cool within 2 minutes. If filter lights stay red, press and hold the reset button (consult your manual for location) for 5 seconds. Persistent weak airflow means filters aren’t seated correctly.
Build a Foolproof Maintenance Schedule
Monthly Quick Clean (5 Minutes)
- Vacuum base vents
- Wipe exterior with damp cloth
- Check filter indicator lights
Quarterly Deep Clean (30 Minutes)
- Clean HEPA filter
- Sun-treat carbon filter
- Inspect for housing cracks
Critical Adjustment: Pet owners or urban dwellers must deep-clean every 6 weeks. High pollen seasons? Drop to 4-week intervals. Ignoring this cuts filter life in half.
Fix These 3 Emergency Scenarios
Airflow Drops After Cleaning
Cause: HEPA filter installed backward or damp
Fix: Recheck airflow arrows and dryness. Reverse the filter if arrows face outward.
Musty Smell Persists Post-Clean
Cause: Carbon filter saturated or mold in housing
Fix: Replace carbon filter immediately. Wipe interior housing with 70% isopropyl alcohol on a cotton swab.
Filter Won’t Seat Properly
Cause: Debris in housing channel
Fix: Use a flashlight to spot obstructions. Remove with tweezers—never force filters.
Non-Negotiable Safety Rules
Electrical Protection
- Always unplug before cleaning
- Never spray liquids near vents
- Wait 24 hours after moisture exposure before powering on
Filter Preservation Laws
- Cold water only (hot water melts fibers)
- Zero chemicals (bleach destroys filtration)
- No squeezing (distorts pleats permanently)
Final Reality Check: Skipping deep cleans forces your Dyson to work 30% harder, hiking energy bills and shortening its lifespan. A well-maintained unit delivers hospital-grade air for 5+ years—neglect turns it into a dust distributor. Commit to monthly vent vacuums and quarterly deep cleans, and your Dyson will repay you with silent, powerful air purification. When filters lose effectiveness despite proper care, it’s time for genuine Dyson replacements—your lungs deserve nothing less.


