
Nothing ruins the promise of fresh indoor air faster than a clogged air purifier filter. If your LG unit runs constantly yet the air still feels stale, or you notice increased noise levels, dirty filters are almost certainly the hidden culprit. The good news? Mastering how to clean LG air purifier filter properly restores peak performance in under 30 minutes—and it’s far simpler than most owners realize.
Many LG air purifier users make the critical mistake of waiting for the filter indicator light to blink before taking action. In reality, optimal filter maintenance requires attention every 2-4 weeks, not just when alarms trigger. Neglecting this simple routine forces your purifier to work harder, slashing its lifespan and compromising your indoor air quality. This guide delivers the exact, step-by-step process for cleaning every filter type in your LG unit while avoiding costly mistakes that damage components.
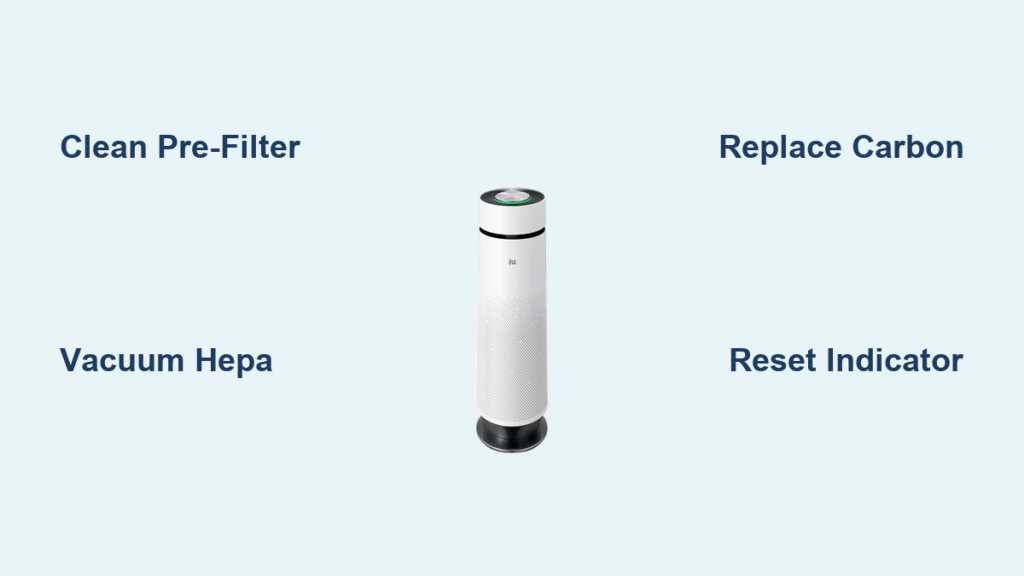
Identify Your LG Filter Types Immediately

LG air purifiers use three distinct filter layers, each demanding specific care protocols. Before touching anything, locate your model number (typically on the back panel) to confirm which filters you’re handling—this prevents accidental damage during cleaning.
Pre-Filter Location and Critical Function
Your pre-filter sits directly behind the front grille, acting as the first defense against large airborne debris. This durable mesh screen traps pet hair, lint, and visible dust bunnies before they reach sensitive internal components. Because it handles the bulk of visible contaminants, this washable component needs weekly attention in homes with shedding pets or high foot traffic. Ignoring it creates immediate airflow restrictions that strain the entire system.
HEPA Filter Identification and Limitations
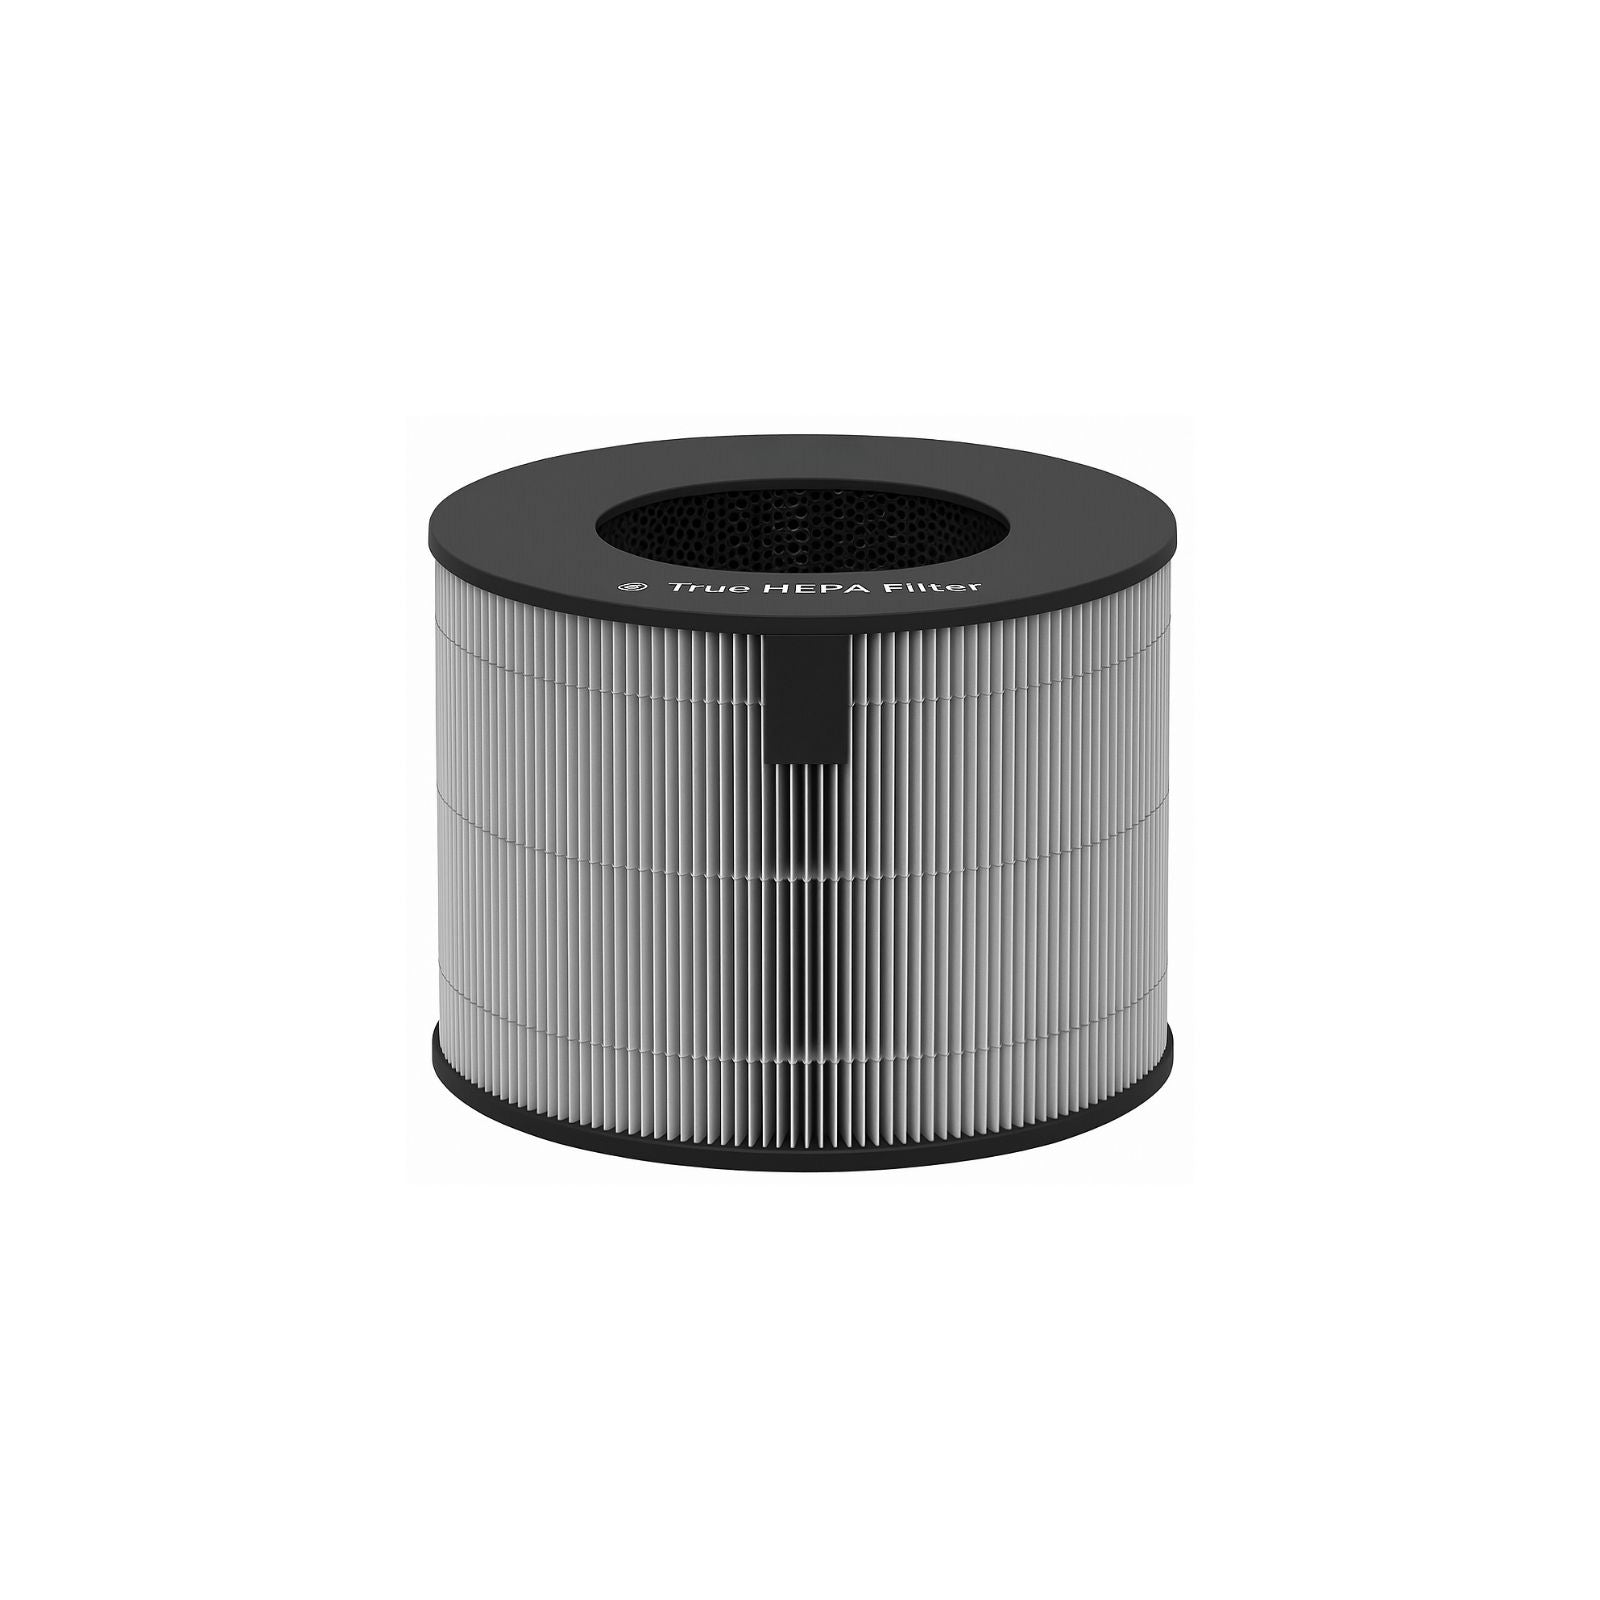
The HEPA filter appears as a folded white paper-like material housed in a rigid plastic frame. LG specifically labels these as “True HEPA” or “HEPA 13” filters on packaging and documentation. Crucially, HEPA filters must never be submerged in water—moisture permanently damages the delicate fiber structure. These require vacuum-only maintenance and replacement when visibly damaged or after 12 months of use.
Carbon Filter Visual Characteristics
Your carbon filter looks like a black honeycomb panel, often with a slightly gritty texture. Designed to absorb cooking odors, VOCs, and chemical fumes, this component loses effectiveness if exposed to moisture. Never rinse it with water, as dampness destroys the activated carbon’s absorption capacity. Instead, rely on gentle dry cleaning methods to preserve its odor-neutralizing power.
Pre-Cleaning Safety Steps You Can’t Skip
Power down your LG air purifier completely and unplug it from the wall outlet before starting. Even brief electrical contact during filter removal risks damaging internal sensors or motors—a costly mistake easily avoided with this single step.
Essential Cleaning Tools Checklist
- Soft-bristled vacuum attachment (upholstery brush setting)
- 3-4 microfiber cloths (lint-free is critical)
- Mild dish soap (fragrance-free formula only)
- Bowl of warm water (never hot)
- Dry towel for immediate moisture control
- Old toothbrush with soft bristles
Optimal Workspace Setup
Choose a well-lit, ventilated area like a kitchen counter near your sink. Lay down an old towel to catch falling debris—carbon granules and dust will scatter during cleaning. Photograph your filter configuration with your phone before removal; this prevents reassembly errors that cause air leaks. Keep replacement filters nearby in case damage is discovered.
Remove Filters Without Causing Damage
Front Panel Removal Techniques
Most LG models use either push-button releases or pull-tabs. For button-release units, press firmly while supporting the panel’s full weight with your other hand. Pull-tab models require gripping both sides simultaneously and pulling straight toward you—never tilt or twist, as this cracks plastic hinges. If resistance occurs, double-check for hidden latches along the bottom edge.
Correct Filter Extraction Sequence
Remove components in this exact order: pre-filter first, then carbon filter, finally HEPA filter. Note the directional arrows printed on each frame—these indicate airflow direction and must face identically during reinstallation. Skipping this sequence risks dropping debris onto clean filters below.
Proper Filter Handling Techniques
Always support HEPA and carbon filters by their plastic frames only. Touching the filter media directly creates compressed spots or micro-tears that become air bypass channels. Hold pre-filters by the outer edges while transferring them to your cleaning station to avoid stretching the mesh.
Deep Clean Pre-Filter in 15 Minutes
Run lukewarm water over the pre-filter in your sink, using gentle finger pressure to dislodge embedded hair and dust. For stubborn grime like pet dander, add one drop of mild dish soap and swirl carefully—but rinse thoroughly under running water until suds disappear. Soap residue attracts more dirt, defeating your cleaning efforts.
Foolproof Drying Method
Shake the pre-filter vigorously over the sink to remove excess water, then lay it flat on a clean towel. Blot both sides firmly with a second towel—never wring or twist the mesh. Never use hairdryers, radiators, or direct sunlight, as heat warps the material. Allow 2-3 hours of air drying time before reinstallation; residual moisture breeds mold inside your unit.
Emergency Weekly Maintenance Shortcut
When full cleaning isn’t possible, vacuum the pre-filter while still installed using your vacuum’s upholstery attachment on low suction. Move in slow, straight lines from top to bottom—never circular motions that push debris deeper into the mesh. This quick fix buys extra days between deep cleans.
HEPA Filter Cleaning Limits Explained

Safe Vacuum Technique for HEPA
Use your vacuum’s soft brush attachment on the lowest suction setting. Work in straight, downward strokes following the filter’s pleat direction—side-to-side motions tear delicate fibers. Stop immediately if you spot dark spots that won’t lift, visible holes, or brittle material. Never tap or shake HEPA filters; this collapses their critical micro-pores.
When Replacement Is Mandatory
Replace your HEPA filter if vacuuming reveals persistent dark discoloration, visible tears, or if it’s exceeded 12 months of use. Most LG models use filter number ADQ56656401—verify this matches your unit’s documentation before purchasing. Note: HEPA filters don’t “look dirty” when exhausted; reduced airflow and lingering odors signal replacement time.
Proper Spare Filter Storage
Store unused HEPA filters in their original sealed packaging in a cool, dry place. Never stack heavy items on top—compression permanently damages the filtration media. For long-term storage, add silica gel packets to the box to prevent moisture absorption.
Carbon Filter Care Essentials
Effective Vacuum Method
Hold the carbon filter vertically over a trash can and vacuum from top to bottom using light pressure. This dislodges surface dust while preventing carbon granules from breaking loose. If you hear a gritty sound during cleaning, stop immediately—this indicates granule loss that compromises odor absorption.
Non-Negotiable Replacement Timeline
Carbon filters lose 90% of effectiveness after 6 months regardless of appearance. Mark your calendar on the installation date—odors lingering longer than before signal exhaustion, even if the filter looks pristine. Never attempt to “refresh” them with baking soda or other DIY methods.
Real-World Performance Test
Run your LG purifier in a room after cooking fish or frying bacon. If strong odors persist beyond 30 minutes, your carbon filter has reached capacity. This test works even when the filter appears clean since absorption capability isn’t visually measurable.
Reinstall Filters to Prevent Air Leaks
Critical Arrow Alignment
Each filter has printed airflow arrows that must point toward the unit’s interior when reinstalled. Misalignment forces air backward through the system, reducing filtration efficiency by up to 50%. Double-check all arrows face identically before closing the panel.
Secure Seating Verification
Push each filter firmly until you hear a distinct click. A properly seated filter sits perfectly flush with no gaps—run your finger around all edges to confirm. Gaps as small as 1/8 inch allow 40% of air to bypass filtration, circulating uncleaned particles.
Front Panel Security Test
After reassembly, tug gently on both sides of the front panel. It should resist movement without wobbling. If it feels loose, reopen and reseat the filters—many users miss that carbon filters often require the most precise positioning to lock correctly.
Reset Filter Indicator Light Correctly
Universal Reset Method
For 95% of LG models, press and hold the “Filter Reset” button for 3-5 seconds until the indicator light turns off. If your model lacks this dedicated button (check near the control panel), simultaneously hold “Speed” and “Timer” buttons for 5 seconds. Never skip this step—unreset lights trigger premature replacement reminders.
Troubleshooting Unresponsive Indicators
If the light won’t reset after 30 seconds, unplug the unit for 60 seconds to reset internal electronics, then retry. Persistent blinking usually means a filter isn’t fully seated—reopen and recheck alignment. Never force the reset; this often masks underlying installation errors.
Proactive Maintenance Reminders
Set monthly phone alerts for pre-filter cleaning and mark carbon filter replacement dates 6 months ahead. Smart LG models sync with the ThinQ app for automatic notifications, but manual reminders work reliably for all units—critical for non-connected models.
Avoid These Costly Cleaning Mistakes
Water Damage Prevention
Never operate your LG purifier without all filters installed. Missing filters allow moisture to contact internal fans and motors, causing corrosion that voids warranties. One user reported $180 in repair costs after running the unit sans carbon filter during cleaning.
Frequency Error Consequences
Over-cleaning HEPA filters (more than monthly) weakens fibers, while neglecting pre-filters for over 4 weeks strains the motor. Stick to the 2-4 week pre-filter schedule—high-pollen seasons or pet homes need weekly attention.
Dangerous Cleaning Products
Bleach, vinegar, or scented cleaners leave chemical residues that either degrade filter materials or release toxins into your air. A recent study showed scented cleaners on carbon filters increased formaldehyde levels by 22%—use water only for pre-filters.
Extend Filter Life by 50% With These Tactics
Smart Speed Management
Run your LG purifier on auto or low speeds during clean-air periods. High speeds pull particles through filters 3x faster, shortening lifespan. Close windows during pollen season to reduce contaminant load—this single habit extends filter life by 2-3 months.
Pre-Filter Upgrade Strategy
Add an aftermarket washable pre-filter screen (like Filtrete FAP01) for homes with pets. This $15 upgrade catches 70% of hair and dander before it reaches main filters, extending their life by 30-50%. Replace every 3 months for ongoing protection.
Surrounding Area Maintenance
Vacuum the floor and walls around your purifier weekly, especially near intake vents. Dust buildup here gets pulled back into the system, making filters work 25% harder. Keep 12 inches of clearance on all sides for optimal airflow.
Filter Maintenance Schedule Cheat Sheet
Weekly: Vacuum pre-filter (installed) + surrounding area
Bi-weekly: Remove pre-filter and shake debris outside
Monthly: Deep clean pre-filter with water + dry thoroughly
6 months: Replace carbon filter (set calendar alert!)
12 months: Replace HEPA filter (or sooner if damaged)
Mark these dates immediately—LG’s official data shows users who follow this schedule save $200+ annually on premature replacements while maintaining hospital-grade air quality.
Clean filters transform your LG air purifier from a noisy decoration into a life-saving air-cleaning machine. Most users report noticeably fresher air within hours of proper maintenance—no more “stale room” odors or constant humming. That monthly 30-minute investment saves hundreds in replacement costs while ensuring your family breathes genuinely clean air year-round. Start today: unplug your unit, locate those filters, and reclaim the crisp, healthy environment you paid for. Your lungs will thank you before the week ends.


