
Your MIKO air purifier silently battles dust, allergens, and pollutants daily, but when performance dips, the solution is often simple: cleaning. After months of trapping microscopic particles, even the most advanced air purifier needs maintenance to maintain that crisp, clean airflow you rely on. The good news? Proper MIKO air purifier cleaning takes less than an hour monthly and prevents costly premature replacements.
Most MIKO owners notice reduced air quality within months of purchase without realizing their unit desperately needs cleaning. This guide delivers precise, model-specific instructions for every MIKO purifier component, transforming your machine from struggling to stellar. Whether you own the compact AP-001 or smart-enabled AP-002, these proven techniques restore maximum efficiency and extend your investment significantly.
Unplug and Prepare Your Workspace Before Cleaning
Never skip this critical safety step: Always disconnect your MIKO purifier from power before any maintenance. Water and electricity create dangerous combinations, so ensure your hands stay completely dry throughout the process. Wait 30 minutes after operation before starting—hot components can cause burns and sudden temperature changes might damage sensitive plastic parts.
Set up your cleaning station on a stable table with good lighting. Spread a clean towel to protect both your purifier and surface from scratches. Keep a small container nearby to organize screws and clips in removal order—this prevents the frustrating search for tiny parts during reassembly. Have replacement filters ready if scheduled for change to minimize downtime in air purification.
Essential Cleaning Supplies Checklist
Gather these items before starting:
– Soft microfiber cloths (2-3)
– Mild dish soap solution (1 tsp per quart of water)
– Distilled white vinegar for stubborn stains
– Cotton swabs for detailed areas
– Soft brush (toothbrush works well)
– Compressed air (max 30 PSI)
– Small container for soaking
Critical warning: Never spray liquids directly onto the unit. Always apply cleaning solutions to cloths first to prevent water damage to internal components.
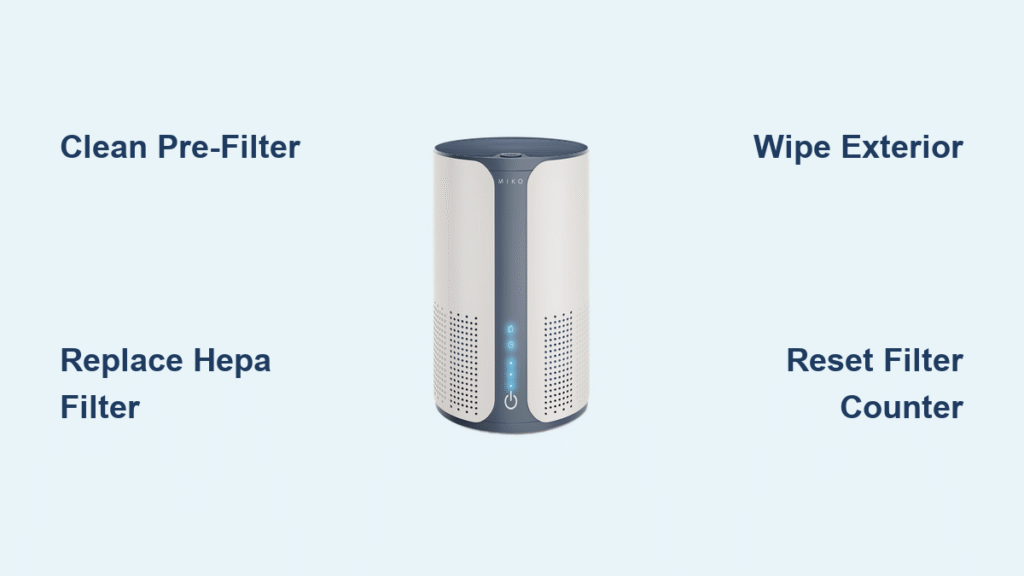
Deep Clean Your Washable Pre-Filter in 6 Minutes

Your MIKO’s pre-filter catches large particles first, protecting your expensive HEPA filter from premature clogging. Clean this every 2-4 weeks based on your air quality—pet owners and smokers should stick to the 2-week schedule. A clogged pre-filter forces your purifier to work harder, increasing noise and energy consumption.
Effective pre-filter cleaning method:
1. Slide out pre-filter from back compartment
2. Vacuum both sides with brush attachment
3. Rinse under lukewarm water (max 40°C/104°F)
4. Scrub gently with soft brush and mild soap
5. Rinse thoroughly until water runs clear
6. Air dry 24-48 hours—100% dry prevents mold
Pro tip: Keep a spare pre-filter in rotation. While one dries, use the backup to maintain continuous purification without interruption. Never reinstall a damp pre-filter—moisture breeds mold inside your unit.
Replace HEPA and Carbon Filters Without Compromising Performance
Your H13-grade HEPA filter lasts 6-12 months with average use, but visual inspection tells the real story. Monitor the inspection window monthly—gray or black discoloration means immediate replacement is needed. Increased noise or reduced airflow also signal replacement time, costing less than $50 compared to a new unit.
HEPA filter replacement steps:
1. Unplug unit and remove back panel
2. Slide out old filter carefully
3. Seal in plastic bag for disposal
4. Insert new filter with arrows pointing correct direction
5. Press firmly until fully seated
6. Close compartment until latches click
Activated carbon filters eliminate odors but cannot be cleaned. Replace every 3-6 months when smells persist despite operation. The filter darkens significantly when saturated—visual inspection tells the story. Never skip carbon filter replacement—a saturated filter actually releases trapped odors back into your air.
Revive Exterior Surfaces Without Damaging Electronics

Housing and grill deep cleaning pattern:
1. Dampen microfiber cloth with soap solution (not soaking)
2. Wipe in circular motions from top to bottom
3. Focus heavily on air intake and output areas
4. Attack stubborn spots with vinegar solution (5-minute dwell time)
5. Rinse cloth and remove all soap residue
6. Dry immediately to prevent water spots
Control panels require extra caution. Use only slightly damp cloths for buttons and screens. Alcohol-based cleaners damage plastic displays permanently. Clean buttons gently—underlying switches break easily under pressure. Warning: Never immerse any electronic component in water or allow moisture to seep into seams.
Why Your MIKO’s Fan Needs Quarterly Cleaning
Dust accumulation on fan blades causes imbalance, increased noise, and reduced airflow. Access requires removing the back panel with appropriate screwdrivers. Document screw locations before removal—the AP-002 uses different screw sizes in specific positions.
Safe fan cleaning process:
– Use compressed air (max 30 PSI) to blow dust from blades
– Wipe blades with dry microfiber only
– Clean fan housing with soft brush attachment
– Check for debris causing imbalance
– Ensure smooth, wobble-free rotation
Clean Sensors Properly for Accurate Air Quality Readings

PM2.5 Sensor Maintenance That Matters
Located behind small side grill, clean monthly for accurate readings. Dust buildup causes false air quality reports, making your purifier work inefficiently. Quick sensor clean:
– Power down completely
– Remove sensor cover carefully
– Blow compressed air across sensor
– Clean window with cotton swab only
– Never touch sensor elements directly
– Replace cover ensuring proper seal
VOC sensors cannot be cleaned—replace when malfunctioning. Test monthly using known VOC sources like rubbing alcohol. No response indicates sensor failure requiring professional replacement. Pro tip: Reset filter life counter after cleaning to maintain accurate tracking.
Follow This Model-Specific Cleaning Schedule
Weekly Quick Tasks (5 minutes)
- Wipe exterior surfaces with dry microfiber
- Empty pre-filter debris cup
- Check air intake for visible obstructions
- Verify all indicator lights function properly
Monthly Deep Clean (30 minutes)
- Complete pre-filter washing and drying
- Vacuum internal accessible areas
- Clean all grills and intake vents thoroughly
- Inspect power cord for damage or wear
- Test all operational modes and speeds
Quarterly Overhaul (60 minutes)
- Full filter inspection and replacement as needed
- Complete exterior deep clean
- Clean sensor windows and check calibration
- Verify fan balance and operation
- Update filter life tracking system
Critical note: Annual professional inspection extends MIKO purifier lifespan significantly. Even with perfect home maintenance, internal components accumulate hidden debris affecting efficiency.
Fix Common Post-Cleaning Problems Immediately
Reduced Airflow After Maintenance
This usually means improper filter installation. Verify filter orientation—arrows must point in airflow direction. Check for forgotten packaging materials inside compartments. Ensure pre-filter is 100% dry before reinstallation. If problems persist, reset filter counter and power cycle unit for 30 seconds.
Error Codes After Filter Replacement
Most error codes stem from improper compartment closure. Ensure all latches click securely. Reset filter life counter per model instructions:
– AP-001: Hold Timer + Speed buttons 3 seconds
– AP-002: Press Mode button 5 seconds
– Smart models: Use app filter reset function
Pro tip: Run unit on high speed for 2 hours after deep cleaning to stabilize performance and eliminate any residual odors from maintenance.
Store Your MIKO Purifier Properly During Off-Seasons
Clean all components thoroughly before storage. Include desiccant packets in original packaging to prevent moisture damage. Store in climate-controlled spaces—garages and attics cause plastic degradation. Replace filters stored over 6 months regardless of appearance. Run diagnostic cycle if available—many issues surface immediately when powered up.
Environmental responsibility: HEPA/carbon filters go in standard trash, but UV bulbs require hazardous waste disposal. Choose biodegradable soaps over harsh chemicals and use microfiber cloths instead of disposable wipes.
Clean your MIKO air purifier regularly and it rewards you with years of reliable service. Most performance issues trace back to neglected maintenance rather than actual equipment failure. Mark your calendar for monthly filter checks and quarterly deep cleans—the 30 minutes invested monthly saves hundreds in premature replacements.
Your lungs and wallet will thank you for the consistent effort. A well-maintained MIKO purifier operates 25% more efficiently, uses less energy, and delivers noticeably cleaner air—proving that proper cleaning isn’t just maintenance, it’s an investment in your health.


