
Your Morento air purifier silently battles dust, allergens, and pollutants—until it doesn’t. When airflow slows, odors linger, or warning lights flash, you need to know exactly how to clean Morento air purifier components properly. Improper cleaning can damage filters, void warranties, or even create mold problems. This guide delivers model-specific instructions, step-by-step cleaning sequences, and critical maintenance schedules so you can restore peak performance without costly mistakes.
Identify Your Morento Model Before Cleaning
Your cleaning approach depends entirely on which Morento model you own. Flip your unit over and locate the model number near the power cord entry point—this determines your filter configuration and access method. The HY4866 large-room model requires dual-side access, while the compact HY1200 uses top-mounted filters. Smart H21 models have app-connected filter indicators that reset only after proper replacement. Keep your model number visible while cleaning to avoid forcing panels or damaging delicate components.
Essential Safety Steps Before Cleaning
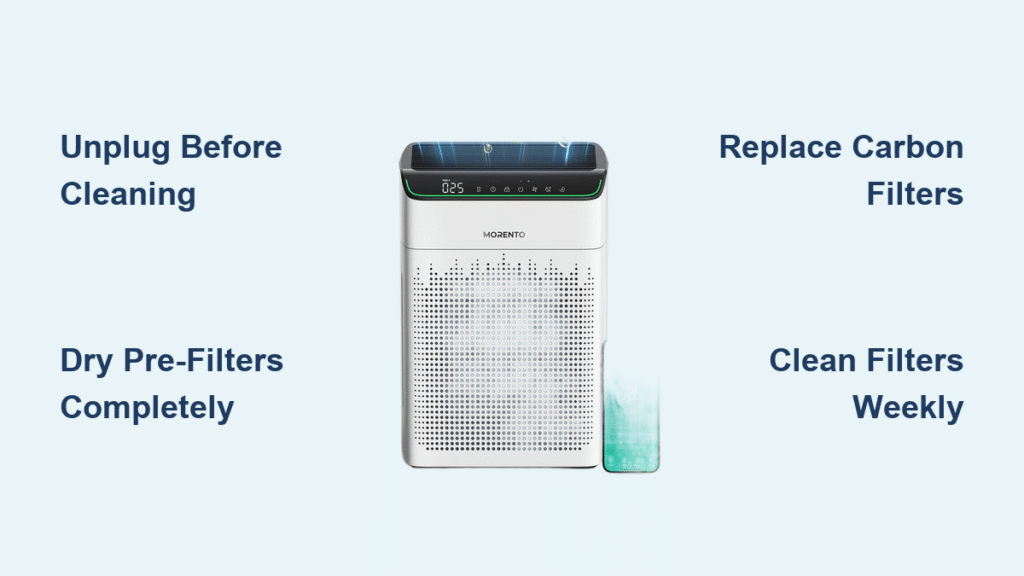
Skipping safety protocols risks electrical damage or filter destruction. Always unplug your unit completely and wait 5 minutes for internal components to discharge. Work in a well-lit, ventilated space with your cleaning kit ready: two microfiber cloths, mild dish soap, vacuum with brush attachment, soft toothbrush, and compressed air can. Never spray liquids directly onto surfaces—dampen cloths instead. If you’re sensitive to dust, wear gloves during filter handling to prevent skin irritation from accumulated particles.
Clean Exterior Surfaces Weekly Without Damage
Dust-clogged grills force your Morento to work 30% harder. Start with the unit unplugged and positioned for full access. Dry-wipe all surfaces using a microfiber cloth, focusing on air intake and output grills where debris accumulates fastest. For stubborn spots, moisten a cloth corner with water and one drop of soap—never saturate. Clean control panels with barely damp fabric, avoiding crevices. Finish with a dry pass and verify no moisture remains before plugging back in. Pro tip: Clean the 6-inch perimeter around your purifier too—this prevents immediate recontamination.
Deep Clean Pre-Filters Every 2-4 Weeks Properly

Your pre-filter catches hair and large particles that would destroy the HEPA filter. Access methods vary: HY4866 slides side panels up, HY1800 pops front grill clips, HY1200 lifts top grill. Vacuum both sides with brush attachment on low power first. Rinse under lukewarm water until runoff clears, using fingers for gentle scrubbing if needed. Never twist or wring the filter—shake excess water and air dry 24-48 hours on a clean towel. Critical: Install only when 100% dry. Even slight moisture creates mold that releases spores into your air stream.
HEPA Filter Maintenance Rules You Must Follow

HEPA filters trap microscopic particles but cannot be washed—water destroys their electrostatic charge. Remove gently by pulling straight out without bending. Vacuum lightly following pleat direction using brush attachment on lowest setting. Check for tears or complete gray/black discoloration indicating replacement need. Replace every 6-8 months in standard homes, or 3-4 months with pets. Never use compressed air—it blows particles through the filter media. If your unit has a filter replacement light, address it immediately—it measures actual particle capture efficiency, not just time elapsed.
Carbon Filter Replacement Only—No Cleaning Possible
Activated carbon filters absorb odors chemically, becoming saturated over time. Unlike pre-filters, they cannot be refreshed. Replace every 3-6 months depending on smoke or cooking odors in your environment. When smells persist despite clean pre-filters, check carbon filter darkness—if uniformly black throughout, replace immediately. Installation is simple: note airflow arrows on old filter, vacuum the slot to remove carbon dust, insert new filter matching arrow direction, then reset indicator by holding button 3 seconds. Stock replacements since odor protection stops once saturated.
Quarterly Internal Component Cleaning Steps
Beyond filters, internal surfaces collect efficiency-killing dust. For UV-C models (like HY4866), remove all filters first to access the bulb compartment. Wipe bulbs only with dry microfiber cloth—never use liquids near electrical components. Replace annually or when visible dimming occurs. Vacuum internal cavities using brush attachment on low suction, focusing on air pathway corners. Use compressed air sparingly at lowest pressure to dislodge stubborn debris. Pay special attention to air quality sensors—they need gentle brushing monthly to prevent false readings that affect auto-mode performance.
Model-Specific Access Methods Detailed

HY4866 large-room models require dual pre-filter cleaning: slide both side panels upward, then remove front grill for main filters. HY1800 medium units have one front grill—release bottom clips, remove filter stack, and reset indicator via control panel button. Compact HY1200 lifts entire top off for vertical filter access—its smaller pre-filter needs bi-weekly cleaning. Smart H21 models have swing-open fronts but require app verification after filter changes. Always handle clips gently—forcing them causes breakage requiring costly repairs.
Fix Common Post-Cleaning Issues Immediately
Unit won’t restart? Check filters are fully seated—safety switches prevent operation if misaligned. Reduced airflow often means pre-filter moisture—dry 24 hours longer next time. Persistent odors indicate carbon filter saturation—replace even if timeline suggests otherwise. Strange noises after cleaning usually mean a filter isn’t flat in its slot—reseat all components. Never force grills closed; if resistance occurs, recheck filter positioning. For recurring issues, unplug 30 seconds to reset internal electronics before calling support.
Replacement Filter Guide with Part Numbers
Use exact part numbers to avoid compatibility issues: HY4866 needs MR-H13-4866 HEPA and MR-CARB-4866 carbon filters; HY1800 uses MR-H13-1800 and MR-CARB-1800; HY1200 requires MR-H13-1200 and MR-CARB-1200. All models share universal pre-filter MR-PRE-UNI. Buy carbon filters in 3-month supplies since they deplete fastest. HEPA filters can be purchased when replacement light first activates. Never use aftermarket filters—Morento’s warranty requires genuine parts, and knockoffs often lack proper sealing.
Extend Filter Life with These Pro Techniques
Run your Morento on lower speeds when air quality permits—this reduces particle load by 40%. Position units away from direct contamination sources like kitchens or pet beds. Vacuum pre-filters every 2 weeks to minimize HEPA strain. Most importantly, trust filter indicators over calendar schedules—they measure actual usage. During storage, clean all components, use original packaging, and run the unit monthly for 30 minutes to prevent electrical component degradation.
Warranty Protection During Cleaning
Morento’s 2-year warranty covers defects but voids if improper cleaning causes damage. Always use genuine replacement filters—aftermarket versions void coverage. Document every maintenance session with dates and filter lot numbers. Register your unit within 30 days of purchase for full protection. Call professionals for electrical issues, unusual noises after proper cleaning, or sensor malfunctions affecting auto modes—DIY repairs on these components typically void warranties.
Key Takeaway: Properly learning how to clean Morento air purifier components extends its life by years while maintaining peak air quality. Focus on weekly exterior maintenance, strict pre-filter drying protocols, and timely carbon filter replacements. Your consistent care ensures the unit keeps delivering hospital-grade air purification without costly repairs or premature replacement.


