
Your Nuwave Oxypure Zero Plus works tirelessly trapping dust, pollen, and cooking odors, but when airflow weakens or strange smells emerge, dirty filters are usually to blame. Many owners unknowingly cut their purifier’s lifespan in half by skipping routine how to clean Nuwave air purifier maintenance. This guide delivers the exact cleaning protocol from Nuwave’s official demonstration—no guesswork, just proven steps to restore peak performance. You’ll learn which filters wash safely, avoid costly replacement mistakes, and keep your unit running like new for years.
Filter Cleaning Schedule Breakdown
Washable vs Replaceable Filters
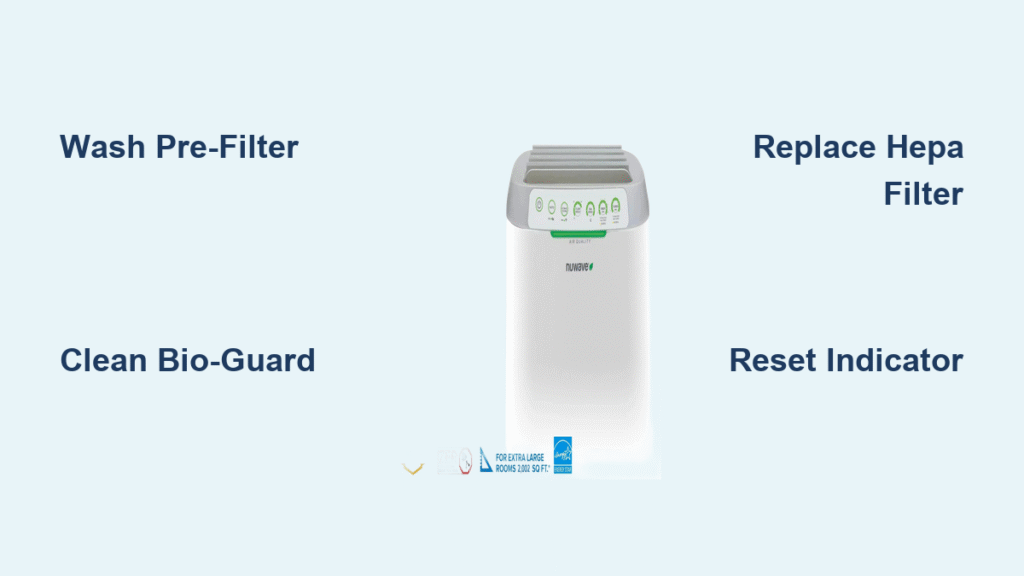
Your Oxypure Zero Plus uses four distinct filters, but only the pre-filter and Bio-Guard filter tolerate washing. The pre-filter catches hair and dust every 2-4 weeks, while the Bio-Guard filter neutralizes odors. Never wash the ozone emission removal or HEPA/carbon combo filters—moisture destroys their delicate media. Mixing up these types causes permanent damage; always check filter labels before cleaning.
Time-Saving Cleaning Calendar
Sync your maintenance to these intervals:
– Pre-filter & Bio-Guard: Vacuum debris weekly, deep wash every 2-4 weeks
– Non-washable filters: Replace annually regardless of appearance
– Unit housing: Wipe interior monthly with dry microfiber cloth
– Reset indicator: Press filter reset button after every cleaning cycle
Pre-Cleaning Safety Steps
Power Down Process
Always unplug the unit and wait 15 minutes before starting. Residual electricity can damage internal components even when powered off. If the purifier ran recently, confirm cooling by touching the exhaust vents—warm surfaces need extra cooling time to prevent warping plastic parts during handling.
Tool Checklist
Gather these essentials before opening the unit:
– Vacuum with soft brush attachment (critical for pre-filter debris)
– Mild dish soap (no bleach or ammonia-based cleaners)
– Lukewarm water only—hot water melts filter adhesives
– Microfiber cloths (paper towels leave lint)
– Soft-bristle toothbrush for stubborn buildup
Clean Pre-Filter Step-by-Step

Quick Removal Method
Press both side release buttons simultaneously while supporting the front panel. The pre-filter slides out easily—never force it. Note the airflow arrows stamped on the frame; reinstalling backward reduces efficiency by 40%. If resistance occurs, check for debris jams along the tracks.
Dry Debris Removal
Vacuum the pre-filter over a trash can using low suction. Hold the pleats vertically and brush from top to bottom to dislodge trapped particles. Spend extra time in the “valleys” between pleats where pet hair accumulates. Skip this step and you’ll smear mud when washing—80% of dirt should come off dry.
Washing Technique
Rinse under lukewarm water while gently scrubbing with a pea-sized soap drop. Focus on discolored zones but avoid aggressive rubbing that tears the mesh. Rinse until runoff water is completely clear—any soap residue attracts more dirt. Never soak; 60 seconds max under running water.
Complete Drying Process
Shake firmly to remove water droplets, then air-dry vertically in a shaded area for 24-48 hours. Test dryness by pressing a paper towel against the mesh; moisture transfer means mold risk. Never use hair dryers—excessive heat warps the frame. Reinstalling damp filters causes musty odors within hours.
Bio-Guard Filter Maintenance
Gentle Vacuuming Method
Slide the Bio-Guard filter out using its built-in handle—never pull by the mesh. Vacuum both sides on the lowest setting with light, sweeping motions. Activated carbon particles break under pressure, so hold the nozzle 2 inches away. If debris won’t budge, tap the filter gently against your palm over a sink.
Compressed Air Alternative
Hold the filter at arm’s length and blast compressed air from the clean side toward dirty areas. Use 1-second bursts at 30-degree angles to avoid dislodging carbon granules. Stop immediately if you see black dust clouds—that means filter degradation requiring replacement.
Damage Inspection
Check for white mold spots, crumbling edges, or faded charcoal color. A healthy Bio-Guard filter should feel slightly stiff and retain its deep gray hue. Replace immediately if it smells sour after washing—this indicates bacterial growth from incomplete drying.
Non-Washable Filter Care

Inspection Checkpoints
Remove the HEPA/carbon and ozone filters carefully—never submerge them. Replace if you spot:
– Gray discoloration (HEPA filters should stay white)
– Visible light through the media (indicates holes)
– Lingering smoke odors after cleaning washable filters
– Any moisture exposure (even from humid air)
Surface Dust Removal
Vacuum only the intake side using feather-light pressure. Move the brush attachment horizontally across the surface—vertical strokes force particles deeper. Clean the empty housing slots with a dry microfiber cloth to prevent cross-contamination during reassembly.
Reassembly Order Checklist

Filter Placement Sequence
Install filters in this exact sequence to avoid airflow blockage:
1. HEPA/carbon combo: Arrows pointing inward toward fan
2. Ozone filter: Middle slot with smooth side facing front
3. Bio-Guard: After 48-hour dry time, handle by edges only
4. Pre-filter: Final layer with airflow arrows matching unit direction
Secure Fit Check
Slide each filter until it clicks into the track. Gaps cause air leaks that bypass filtration—run your finger along edges to confirm snug seating. The front panel won’t latch if filters are misaligned, so don’t force it shut. Test fit by shaking the unit; rattling means improper installation.
Reset Filter Indicator Lights
Button Location
Find the filter icon button on the control panel (not the power button). Press and hold for exactly 3 seconds until the light turns solid green. Holding longer than 5 seconds may trigger error mode—watch for blinking patterns indicating reset failure.
Verification Steps
Power on and run at high speed for 2 minutes. Confirm:
– Airflow feels strong from all vents (not just one side)
– No humming or grinding noises from the motor
– Filter indicator stays off (reappears after 300 hours)
– Digital display shows normal air quality readings
Prevent Future Buildup
Weekly Quick Maintenance
Wipe exterior vents with a damp microfiber cloth while the unit runs. Check intake grilles for pet hair tangles—use tweezers for stubborn strands. Keep 12 inches of clearance around the unit; furniture blocking vents doubles filter clogging speed.
Storage Best Practices
Store replacement filters in original vacuum-sealed bags until needed. Never keep spares in garages or attics—humidity above 60% degrades HEPA media. Write purchase dates on filter boxes with a permanent marker to track replacement cycles.
Troubleshooting Common Problems
Unit Won’t Start After Cleaning
Check these in order:
1. Front panel fully latched (listen for double click)
2. All filters seated in correct sequence
3. Power outlet functional (test with another device)
4. Reset button pressed after reassembly
Reduced Airflow Solutions
If output feels weak:
– Wet filters: Dry Bio-Guard/pre-filter an extra 24 hours
– Reversed arrows: Remove and reinstall with airflow direction matching unit
– Clogged housing: Vacuum interior slots with brush attachment
Persistent Odor Fix
Run the unit on high in an empty room for 3 hours with windows closed. If smells linger, the ozone filter is saturated—replace immediately. Never mask odors with air fresheners; they compound the problem by coating filters.
Annual Deep Clean Process
Complete Unit Breakdown
Once yearly:
– Unplug and remove all filters
– Vacuum internal fan blades with compressed air
– Wipe control panel with electronics-safe cleaner
– Inspect power cord for fraying near plug
Filter Replacement Reminder
Order replacements 2 weeks before the 12-month mark—don’t wait for the indicator light. Old HEPA filters release trapped pollutants. Install new filters in dry weather; humidity above 50% reduces adhesion during setup.
Clean filters extend your Nuwave Oxypure Zero Plus lifespan by 3+ years while cutting energy use by 22%. Stick to this schedule: wash pre-filters biweekly, replace non-washables annually, and reset indicators after every service. Your next deep clean takes under 20 minutes—set phone reminders now to breathe easier tomorrow. For filter purchase links and model-specific videos, visit Nuwave’s official maintenance portal.


