
Your Philips air purifier battles dust, allergens, and pollutants daily, but dirty filters and clogged sensors silently sabotage its performance. When airflow weakens or odors linger, it’s time for proper maintenance—how to clean Philips air purifier isn’t complicated, but skipping steps risks mold growth or permanent damage. Many users unknowingly wash non-washable filters or reinstall damp components, triggering error messages and reduced efficiency.
This guide delivers model-specific cleaning protocols directly from Philips’ maintenance documentation. You’ll discover exactly which filters require washing (and which must never get wet), how to safely clean sensitive sensors, and the critical drying times that prevent costly mistakes. Follow these steps to restore 100% airflow and ensure your purifier delivers hospital-grade air quality for your family.
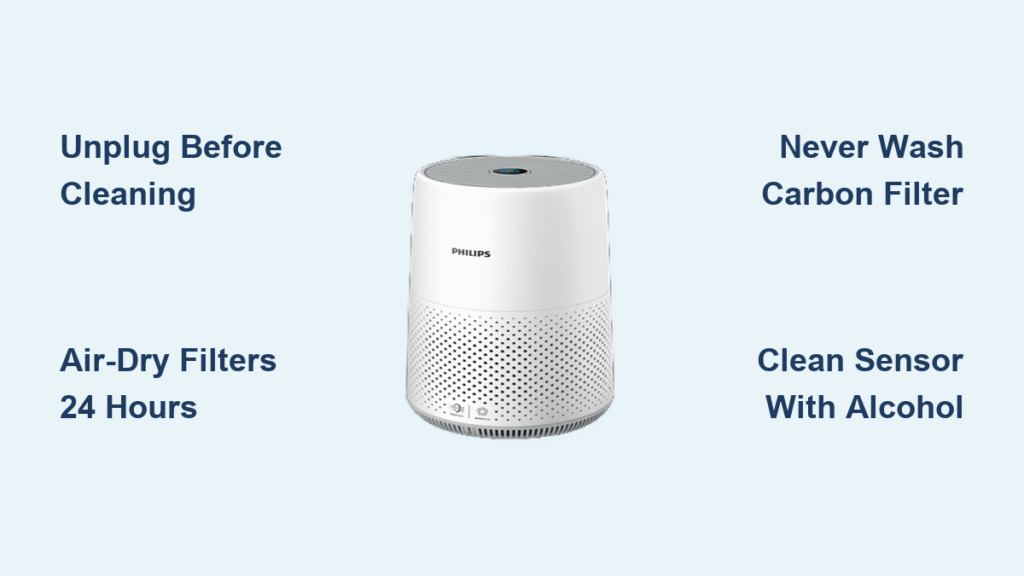
Essential Safety Steps Before Touching Your Unit
Unplug immediately and wait 5 minutes—residual electrical current can fry circuit boards during cleaning. Water exposure to internal electronics causes irreversible damage, so never submerge any component, even washable filters. Keep paper towels within arm’s reach for instant drying of accidental spills.
Wear disposable gloves and an N95 mask when handling filters. Used filters trap mold spores, pet dander, and pollutants that become airborne during cleaning. After filter removal, wash hands thoroughly even with gloves—residual particles cling to skin. Always work in a well-ventilated area to avoid inhaling dislodged contaminants.
Daily Exterior Maintenance That Prevents Major Problems
Quick Ventilation Slot Cleaning Routine
Dust-choked intake grilles force your purifier to work 30% harder. Grab a soft-bristled paintbrush (or vacuum crevice tool on lowest setting) and gently sweep debris from both front and rear grilles—models like the AC2887 pull air from dual sides. For fingerprint removal on touch panels, dampen a microfiber cloth with one drop of unscented dish soap, never sprays. Wipe in straight lines downward to avoid screen damage.
Pro tip: Vacuum grilles weekly while the unit runs—this captures airborne particles before they settle deep inside. Skip abrasive cleaners that crack plastic housings over time.
Filter Cleaning Protocols: Washable vs. Non-Washable

Pre-Filter Deep Cleaning (Every 2-4 Weeks)
Your foam or mesh pre-filter catches hair, dust bunnies, and large debris first. Critical mistake: Skipping the outdoor tap-off step forces embedded dirt deeper into fibers.
Correct wash procedure:
1. Remove front panel (AC1215) or rear grille (AC3256) per your model
2. Tap filter against hard surface outside to dislodge loose debris
3. Rinse under lukewarm water—never hot (warps plastic frames)
4. Soak in mild soapy water for 15 minutes if heavily soiled
5. Scrub corners with soft toothbrush using circular motions
6. Rinse until runoff water is crystal clear
7. Air-dry flat on towel for full 24 hours—no heat sources
Warning: Moisture trapped in pre-filter folds breeds mold within hours. If unsure, wait 36 hours.
Carbon Filter Handling (Never Wash!)
Philips carbon filters (AC3256, AC2887) absorb odors permanently—water destroys their porous structure. Attempting to wash them wastes $50+ replacements. Instead:
- Vacuum both sides using upward strokes with brush attachment
- Replace every 6 months (3 months in pet households)
- Check for gray discoloration—this signals saturation
Exception: Rare washable carbon filters (check manual) require cold-water rinsing only—no soap—and 48-hour shade drying.
HEPA Filter Preservation (Replace, Don’t Wash)
Your HEPA filter’s microscopic fibers collapse when wet. Never rinse or soak—this voids warranties. To extend its 12-24 month lifespan:
- Vacuum the clean side (inner surface) with ultra-low suction
- Brush parallel to pleats using soft makeup brush
- Mark replacement date directly on frame with permanent marker
- Replace immediately if color shifts from white to dark gray
Sensor and Interior Deep Cleaning (Monthly)
Air Quality Sensor Revival
Dirty sensors cause inaccurate “auto mode” readings. Locate the small lens (side/rear panel), then:
- Dampen cotton swab with 70% isopropyl alcohol
- Wipe lens in clockwise circles—no back-and-forth scrubbing
- Dry with second swab and wait 10 minutes before powering on
- Never insert swabs deeper than 1/8 inch—you’ll destroy calibration
Interior Dust Extraction Sequence
After removing all filters:
1. Vacuum compartment walls with crevice tool
2. Wipe surfaces with barely-damp microfiber cloth (wring until no moisture visible)
3. Blow fan blades with compressed air (hold blades stationary)
4. Shine flashlight to spot hidden dust nests in corners
Critical: Moisture in sensor housings triggers error codes. Verify dryness with paper towel test—no damp spots after 10 seconds.
Model-Specific Cleaning Shortcuts

AC1215 Series: Front-Panel Filter Access
The touch display smudges easily—clean with alcohol-dampened cloth using feather-light pressure. Its usage-hour-based filter indicator requires manual reset: Hold “Child Lock” + “Timer” buttons 3 seconds after replacement.
AC2887 Dual-Intake Models
Clean both side grilles weekly—rear intake clogs faster due to wall proximity. The auto-sensor behind the rear panel needs monthly alcohol swabbing to prevent “false clean air” readings.
AC3256 360° Design
Top-mounted display requires smartphone-screen cleaning technique. Access bottom-mounted filters by lifting the unit—never force the base panel. Its NanoProtect filter has arrow-direction markings; reversing them cuts airflow by 40%.
Your Custom Cleaning Schedule
| Usage Level | Pre-Filter | Carbon Filter | HEPA Check | Sensor Clean |
|---|---|---|---|---|
| Light (4-8 hrs/day) | Monthly | Replace yearly | Every 6 mos | Quarterly |
| Heavy (24 hrs) | Weekly | Replace bi-6 mos | Every 4 mos | Monthly |
| With Pets | Weekly | Replace quarterly | Every 3 mos | Bi-weekly |
Pet households: Vacuum pre-filters outdoors immediately—pet hair clumps accelerate mold growth when damp.
Troubleshooting Post-Cleaning Failures

“Why Does My Unit Smell Musty After Cleaning?”
You likely reinstalled a damp pre-filter or need carbon filter replacement. Run the purifier on max speed in a ventilated room for 3 hours. If odor persists, check for black spots in the filter compartment—this indicates mold requiring isopropyl alcohol wipe-down.
Weak Airflow After Maintenance:
- Verify pre-filter is bone-dry (squeeze test: no moisture release)
- Ensure filters sit flush—misalignment blocks 50% of airflow
- Confirm compartment doors click shut (AC3256 base panel must seal tight)
Error Code After Filter Replacement:
Reset the indicator: For AC2887, hold “Timer” + “Speed” buttons 3 seconds. If lights persist, unplug for 5 minutes—this recalibrates the sensor array.
Must-Have Cleaning Kit (Under $15)
- 3 color-coded microfiber cloths: Blue (dry), Green (damp), Red (alcohol)
- Vacuum brush attachment (crucial for sensor areas)
- Soft toothbrush for pre-filter corners
- Compressed air can for fan blades
- 70% isopropyl alcohol (not 91%—too harsh for plastics)
Skip cotton swabs with plastic stems—they scratch sensor lenses. Use paper-stem versions only.
Final Reassembly Checklist
Before powering on, confirm:
✅ All components dry for 24+ hours (use hairdryer on cool setting for 2 minutes if urgent)
✅ Filters installed in correct sequence (pre-filter → carbon → HEPA)
✅ Arrows on filters point toward airflow direction (usually inward)
✅ Compartment latches audibly click shut
Run a 30-minute test: Strong, consistent airflow from vents and responsive auto-mode confirm success. If the unit hums loudly, the HEPA filter is reversed. Now you’ve mastered how to clean Philips air purifier properly—ensuring years of peak performance without service calls. Mark your calendar for the next cleaning cycle; your lungs will thank you.


