

That sticky film on your skin when you wake up. The fogged-up bathroom mirror that won’t clear. The unsettling musty smell no air freshener can mask. If your indoor humidity has crept above 50%, you’re battling invisible threats: mold spores triggering asthma attacks, dust mites multiplying in damp bedding, and hidden condensation rotting your walls from within. Before you invest in expensive equipment, know this—you can effectively dehumidify a room without a dehumidifier using everyday items and smart habits. These science-backed methods slash moisture levels using what’s already in your home, often for under $10. Let’s transform your clammy space into a healthy, comfortable environment starting today.
Most people don’t realize their daily routines actively worsen humidity. Cooking without lids, indoor laundry drying, and even breathing while sleeping release gallons of moisture weekly. The EPA confirms indoor humidity above 50% creates ideal conditions for mold and dust mites—yet a $200 dehumidifier isn’t your only solution. By strategically combining ventilation, moisture absorbers, and behavior tweaks, you’ll see measurable results in 48 hours. This guide reveals exactly how to dehumidify a room without a dehumidifier using proven, budget-friendly tactics that target humidity at its source.
Why Your Walls Are Sweating and How to Stop It
That damp patch behind your dresser isn’t just annoying—it’s actively damaging your home. When warm indoor air hits cold surfaces like exterior walls or windows, condensation forms, creating perfect breeding grounds for black mold. Visible water droplets on windowpanes, peeling paint on baseboards, or warped hardwood floors are urgent red flags. In basements, musty odors often indicate moisture seeping through foundation cracks. Medical experts warn humidity above 50% significantly increases asthma triggers and dust mite populations, while below 30% dries out your sinuses. Your target zone? A steady 30-50% relative humidity—achievable without specialized equipment through targeted interventions.
Stop Adding Moisture Before You Remove It
Close Bathroom Doors During Showers
Contain steam at ground zero. Keeping the bathroom door shut while showering traps 70% of humidity within one room, preventing it from spreading through your entire home. Pair this with shorter, cooler showers (10-15 minutes max) to slash steam production by 40%. Always run your bathroom exhaust fan during showers and for 30 minutes afterward—this single habit eliminates most moisture before it settles. If your fan vents into an attic instead of outdoors, seal it immediately; recirculating humid air defeats the purpose.
Ban Indoor Laundry Drying in Living Spaces
Each load of wet clothes releases 2-3 gallons of water vapor. Never dry clothes in bedrooms or living rooms. If outdoor drying isn’t possible, isolate laundry to one room with an open window and box fan pointed outside. For basements, place drying racks near exhaust vents. Pro tip: Wring clothes thoroughly first—centrifugal spin cycles reduce drying time by 50%, cutting moisture release dramatically.
Seal Plumbing Leaks Within 24 Hours
A pinhole pipe leak dripping 1 drop/second wastes 1,664 gallons yearly. Check under sinks, behind toilets, and near water heaters weekly with a flashlight. Even minor condensation on cold pipes indicates heat transfer issues—wrap sweating pipes with foam insulation sleeves ($3 at hardware stores). In basements, inspect foundation walls for weeping cracks; seal hairline fractures with hydraulic cement before moisture wicks into drywall. Ignoring these leaks makes other dehumidifying efforts futile.
Strategic Ventilation That Actually Works
Time Window Opening to Outdoor Humidity Dips
Opening windows when outdoor humidity exceeds indoor levels backfires. Use a free weather app to check real-time humidity before ventilating. The sweet spot? Early morning (5-8 AM) or late evening (8-10 PM) when outdoor levels typically drop 15-20% below indoor readings. Crack windows on opposite walls just 1-2 inches—this pressure differential pulls stagnant air out 3x faster than single-window ventilation. In winter, limit openings to 5-10 minutes to prevent heat loss while still reducing condensation.
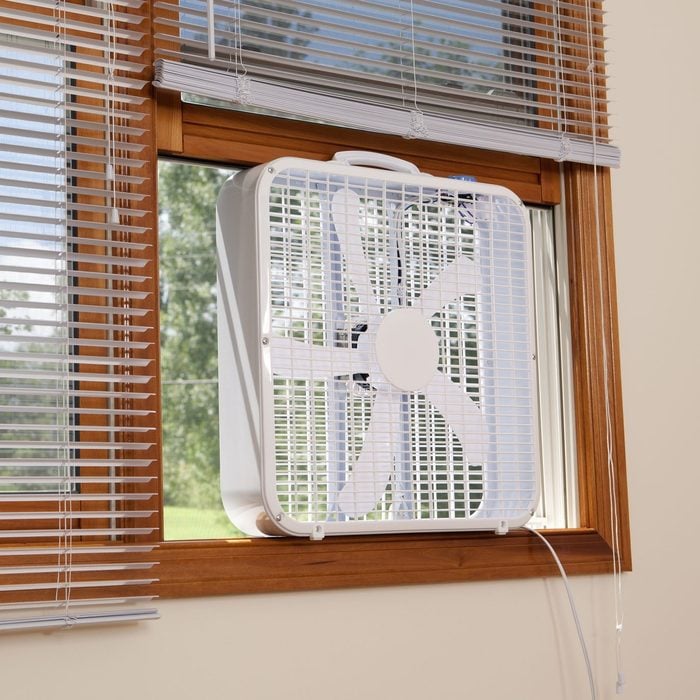
Transform Box Fans Into Exhaust Systems
Pointing fans inward just recirculates moist air. For true dehumidification, position box fans in window frames facing outward to actively push humid air outside. In windowless rooms, create a cross-breeze by placing one fan near the floor sucking in dry air and another near the ceiling exhausting moist air. Ceiling fans help too—run them counterclockwise in summer to force cool air downward, enhancing evaporation from surfaces.
DIY Moisture Absorbers That Cost Less Than $5
:max_bytes(150000):strip_icc()/diy-dehumidifier-5104638-8b877043001b45c8a1d19c450480e8e8.jpg)
Rock Salt Bowls for Basements and Large Rooms
Calcium chloride pulls moisture straight from the air. Fill wide, shallow containers (like cake pans) with 1-2 inches of rock salt—the same inexpensive ice-melting salt sold in hardware stores. Place these near cold exterior walls or in corners where condensation forms. As salt absorbs humidity, it dissolves into brine; dump the liquid every 7-10 days and refresh the salt. Keep away from pets and children, as ingestion causes stomach upset.
Baking Soda in High-Traffic Moisture Zones
The $1 odor-neutralizing hero doubles as a mild desiccant. Place open boxes or shallow bowls of baking soda under sinks, inside closets, and on bathroom counters. Stir the powder weekly to expose fresh surfaces, replacing it monthly when it clumps. For stubborn mustiness, sprinkle baking soda directly on carpets before vacuuming—it absorbs embedded moisture while deodorizing.
| Absorber Type | Best Application | Replacement Cycle | Cost |
|---|---|---|---|
| Rock Salt | Basements, garages, large rooms | Every 7-10 days | $3-$5 |
| Baking Soda | Closets, cabinets, bathrooms | Monthly | $1 |
| Activated Charcoal | Bedrooms, living areas | Sun-recharge every 2 weeks | $8 |
| Silica Gel | Drawers, toolboxes, electronics | Oven-dry when saturated | $10 |
Targeted Fixes for Winter Window Condensation
That icy film on your panes isn’t just cold—it’s liquid damage in waiting. Morning window condensation indicates indoor humidity hitting freezing glass surfaces. Combat this by placing rock salt bowls directly on sills overnight—the salt pulls moisture before it drips. Wipe frames daily with a microfiber cloth to prevent mold colonization in wood grain. Crucially, check window seals for gaps; apply temporary foam tape around jambs to eliminate cold air infiltration that causes thermal bridging. If condensation persists despite these steps, your home may need professional weatherstripping.
Basement-Specific Moisture Defense
Elevate Stored Items Off Concrete Floors
Concrete wicks ground moisture like a sponge. Never stack cardboard boxes directly on basement floors—they absorb dampness and transfer it to contents. Instead, place plastic storage bins on 2×4 lumber strips or metal shelving units elevated 4 inches minimum. This airflow gap prevents “moisture wicking” that ruins photos, documents, and seasonal clothing. For existing dampness, lay down a 6-mil polyethylene vapor barrier over dirt floors, overlapping seams by 6 inches and taping edges to walls.
Run Space Heaters Strategically
Warmer air holds more moisture, reducing surface condensation. Use a small ceramic space heater (set to 65°F) in damp basements for 2-3 hours daily. This gentle heating raises the dew point, causing moisture to evaporate from walls instead of beading. Never leave heaters unattended, and pair with outward-facing fans for active air exchange. Avoid kerosene heaters—they add combustion moisture that worsens humidity.
Track Progress With a $10 Digital Hygrometer
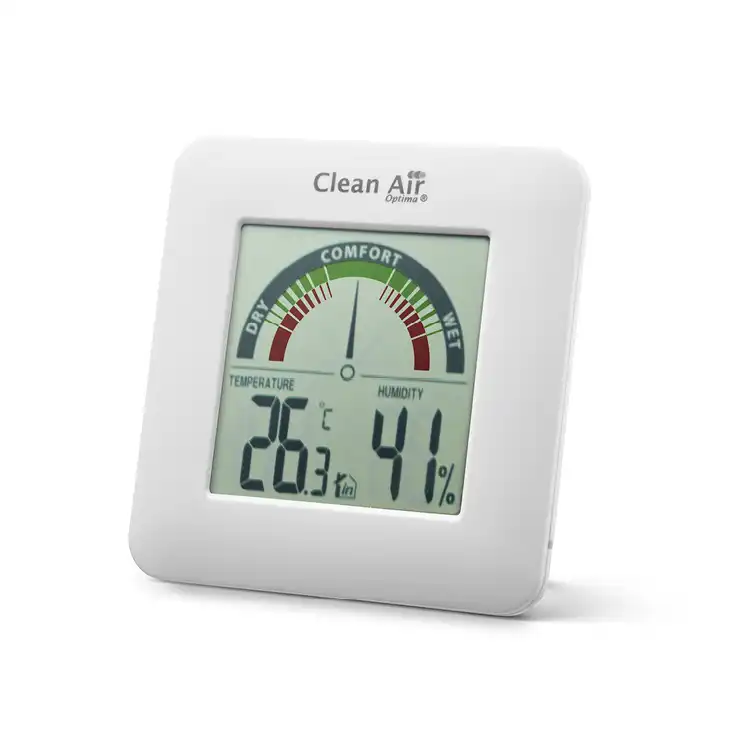
Calibrate Placement for Accurate Readings
One poorly placed sensor gives false security. Position digital hygrometers centrally in problem rooms, at least 2 feet from walls and windows where temperature fluctuations occur. Avoid closets or behind furniture—the goal is to monitor living-space humidity. Check readings daily during initial dehumidifying efforts; if levels stay above 50% after consistent action, hidden leaks likely persist.
Build Your Weekly Maintenance Routine
- Empty rock salt brine and refresh baking soda containers
- Vacuum exhaust fan grilles to maintain airflow
- Wipe window sills and cold-water pipes with dry cloths
- Inspect under sinks for new condensation
- Rotate houseplants to dry soil between waterings
Realistic Results Timeline
Expect visible improvement within 72 hours of implementing ventilation and absorbers—if windows clear faster and mustiness fades. Consistent efforts should reduce humidity by 10-20% within one week, stabilizing at healthy 30-50% levels within 10-14 days. If your hygrometer still reads above 60% after two weeks of diligent effort, structural issues like foundation cracks or missing vapor barriers require professional attention. Don’t get discouraged—each 5% humidity reduction noticeably improves air quality and comfort.
Your Immediate Action Plan:
1. Today: Place rock salt bowls in basement corners and baking soda in closets
2. Tomorrow: Run bathroom exhaust fan 30 minutes post-shower with door closed
3. Day 3: Inspect all plumbing for leaks; seal pipe condensation with foam sleeves
4. Day 4: Open opposite windows for 15 minutes during low-humidity evening hours
5. Day 5: Move moisture-absorbing plants (snake plant, peace lily) to humid rooms
6. Day 6: Buy a $10 hygrometer to track progress objectively
7. Day 7: Evaluate window condensation and adjust strategies
These methods work because they attack humidity at its source rather than masking symptoms. Within two weeks, you’ll breathe easier in a space that feels genuinely dry—not just temporarily cooled by appliances. Remember: daily 10-minute ventilation bursts and weekly absorber refreshes cost nothing but deliver lasting results. Your health and home’s structural integrity depend on keeping humidity in check, and now you know exactly how to dehumidify a room without a dehumidifier using what you already own.


