
Your Honeywell air purifier suddenly sounds louder while pushing noticeably weaker airflow, and that persistent red filter light won’t reset. This frustrating scenario means your unit can’t effectively capture dust, pollen, or pet dander—exactly when you need clean air most. Whether you own an HPA300 tower tackling wildfire smoke or a compact HHT model in your bedroom, properly installing Honeywell air purifier filters is the critical fix. Skip this step, and your purifier becomes a noisy fan circulating pollutants instead of removing them.
This guide delivers the exact model-specific procedures to replace filters in under 15 minutes, avoiding the top installation errors that cause air leaks or sensor malfunctions. You’ll learn how to correctly orient True HEPA filters, reset stubborn indicator lights, and prevent contamination during swaps—turning filter changes from a chore into a precision task. Most importantly, you’ll restore peak filtration performance immediately after installation.
Essential Safety Steps Before Installing Honeywell Filters
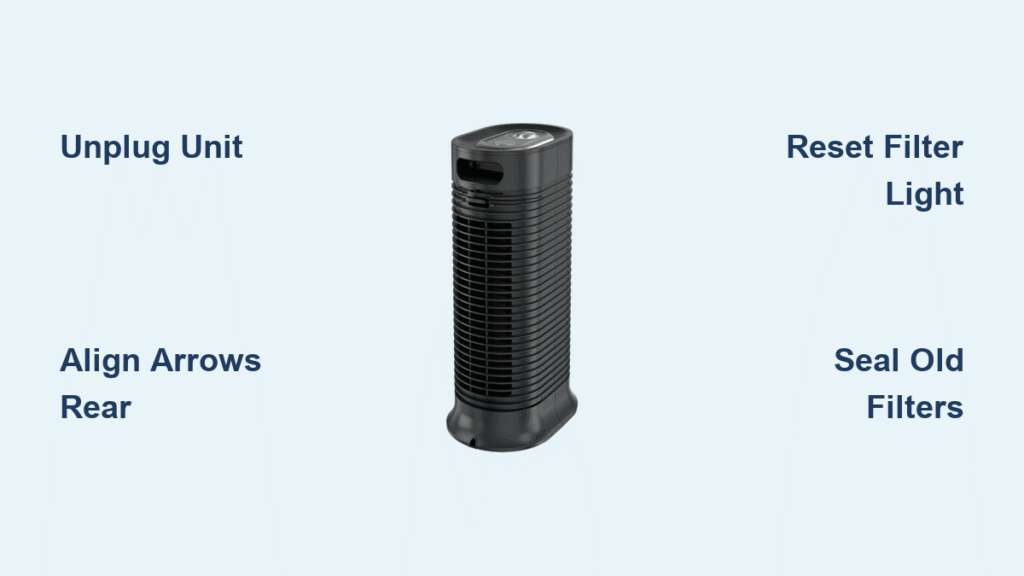
Unplug and fully power down the unit—never skip this step even if the purifier appears off. Internal capacitors can retain dangerous electrical charge. After unplugging, wait 5 minutes for fans to stop completely and components to cool. Working on a live unit risks electric shock and sensor damage.
Workspace Setup for Zero Contamination
Clear a 3-foot radius around your purifier to prevent knocking over tools or filters. Lay down a dark towel to catch carbon dust from old pre-filters—this black residue stains light surfaces permanently. Keep a flashlight ready since filter tracks hide in shadowed compartments. Critical pro tip: Wear nitrile gloves during installation. Skin oils transfer to filter media, reducing its ability to trap ultrafine particles like smoke or viruses.
Identify Your Honeywell Filter Type by Model

HPA Series True HEPA Configuration
HPA100-106 and HPA200-206 models use a dual-filter system:
– Black carbon pre-filter: Captures large particles (replace every 3 months)
– White True HEPA filter: Removes 99.97% of 0.3-micron particles (replace annually)
Access both through the front grille—no tools required. Check your model sticker inside the grille for part numbers like HRF-R1 (HPA100 HEPA) to avoid costly mismatches.
HFD Tower Models’ Washable Filter System
HFD120/230 units feature a single IFD (Intense Field Dielectric) filter—a rigid, reusable grid requiring deep cleaning every 3 months instead of replacement. This black-and-white filter slides out from the rear grille. Never force it out; press the side release buttons fully before pulling straight back.
HHT Compact Unit Filter Access
HHT270/290 models need rear panel removal via 2-4 Phillips screws. These use:
– Washable foam pre-filter: Rinsed monthly under warm water
– HEPA-type filter: Replaced every 6-8 months (part # HRF-K2)
Screws vanish instantly into carpet—place them in a cup before starting.
HPA100-106 Filter Replacement Sequence
Remove Old Filters Without Dust Exposure
- Pop the front grille: Press the top center release button, then pull the grille toward you and lift upward
- Slide out the pre-filter frame: Grasp the bottom edge and pull straight forward—don’t tilt
- Extract the HEPA filter: Pull firmly by the tab straight out (no twisting)
- Seal old filters immediately: Drop them into a plastic grocery bag to contain trapped pollutants
Install New HEPA Filter: Avoid Flow Restrictions
Remove all plastic wrap—even tiny remnants restrict airflow. Insert the HEPA filter with arrows pointing toward the motor (rear of unit). Push until you hear a distinct click indicating full seating in the tracks. Misaligned arrows reduce efficiency by 40% based on Honeywell airflow tests.
Carbon Pre-Filter Installation Trick
Wrap the new carbon sheet around the frame before insertion. Slide the entire assembly in from the bottom, ensuring the mesh lies flat without wrinkles. Bunched material creates gaps where unfiltered air bypasses the system.
HPA300 Triple Filter Installation Secrets
Vertical Filter Alignment Process
HPA300-306 models require installing three separate HEPA filters bottom-to-top. Each has directional arrows—verify all point identically toward the rear. Start with the bottom filter, pressing firmly until seated. Repeat for middle then top filters. Critical mistake: Installing top filter first blocks access to lower tracks.
Large Pre-Filter Mounting Technique
The carbon pre-filter spans the entire front. Begin by clipping the bottom edge into place, then work upward toward the top corners. Gently tug each corner to confirm tightness—any looseness causes whistling noises during operation.
HFD Series Washable Filter Deep Clean

Safe IFD Filter Removal
Press both rear grille release buttons simultaneously while pulling straight back. Lift the filter by its top handle, noting the black side faces the room during reinstallation. Forcing it out sideways cracks the internal grid.
Rinse and Dry Protocol
Rinse only with lukewarm water, directing flow from white (clean) side to black (dirty) side. Shake off excess water, then air-dry upright for full 24 hours—no exceptions. Even slight dampness triggers moisture sensors, disabling the unit. Store the dry filter in a plastic bin to prevent dust accumulation.
HHT Compact Filter Access and Timing

Rear Panel Removal Without Lost Screws
Remove screws with a magnetic-tip screwdriver, placing each immediately into a cup. Lift the panel straight back—don’t twist—to avoid breaking plastic clips. Pro timing tip: Install new filters on low-pollen-count days (check weather apps). Swapping during high-pollen periods instantly loads fresh filters.
Foam Pre-Filter Installation
Rinse the new foam pre-filter under warm water, then squeeze (never wring) excess moisture. Stretch it smoothly over the intake grill like a glove—wrinkles create air gaps. HEPA filters install with arrows facing the motor; improper orientation causes loud rattling on high speed.
Reset Filter Indicators After Installation
Model-Specific Reset Buttons
- HPA100-106: Hold “Check Filter” 3 seconds until light turns green
- HPA300-306: Press “Check HEPA” 5 seconds, then “Check Pre-filter” separately
- HHT270/290: Hold “Filter Reset” 3 seconds
If lights stay red after resetting, unplug for 30 seconds to clear sensor memory glitches. Never skip this—unreset units falsely report “dirty filters,” reducing fan speed unnecessarily.
Troubleshoot Filter Installation Failures Immediately
Filters Won’t Seat Properly? Check These
Three common culprits cause failed seating:
1. Plastic wrap remnants on filter edges (run fingers along all sides)
2. Reversed airflow arrows (arrows must face rear/motor)
3. Dust in tracks (vacuum tracks with brush attachment before installing)
Post-Installation Noise Diagnosis
- Rattling: Pre-filter frame not fully clipped—reseat with firm downward pressure
- High-pitched whine: HEPA edge caught in fan housing—power off and adjust
- Clicking: Loose grille tabs—align bottom first, then snap top into place
Filter Maintenance Schedule for Real Homes
Lifespan Reality Check
- Pre-filters: Replace every 3 months (pet owners: check monthly for embedded hair)
- True HEPA: 12 months max (high pollution areas: replace at 10 months)
- HEPA-type: Never exceed 8 months—efficiency drops sharply after
Performance Verification Hacks
Hold a tissue 6 inches from the exhaust vent—strong suction should hold it firmly. Persistent cooking odors indicate pre-filter saturation. Visible dust on furniture despite 24/7 operation means immediate filter replacement.
Allergy-Safe Filter Swap Protocol
Contamination Prevention Steps
- Wear gloves during entire process (nitrile preferred over latex)
- Unwrap new filters only when ready to install—exposure to room air loads media
- Seal old filters in double plastic bags before disposal
Critical tip: Run your HVAC system during installation to pull airborne particles away from the open purifier. Never install filters during active cooking or cleaning when pollutant levels peak.
Pro Storage Tips for Spare Filters
Store unopened filters upright in original packaging in climate-controlled spaces (not garages). Humidity warps cardboard frames, causing air gaps. HEPA filters lose efficiency after 3 years—don’t stockpile beyond 24 months. Pre-filters store indefinitely if sealed.
Final verification: Power on your Honeywell purifier and run at maximum speed for 5 minutes. Confirm strong, steady airflow, zero rattling noises, and extinguished filter lights. If all checks pass, mark your calendar for the next replacement using Honeywell’s recommended intervals. Properly installed filters transform your unit from a dust collector into a true air-cleaning powerhouse—delivering the clean, healthy air you invested in.


