
Your Coway air purifier suddenly stops refreshing your home’s air, and you know it’s time for filter maintenance—but staring at that sealed unit, you freeze. Many homeowners waste money on professional servicing simply because they don’t know how to open coway air purifier models safely. Whether your Airmega 300’s front panel feels glued shut or your Tower series side panels resist sliding, this guide delivers model-specific opening techniques verified by Coway’s engineering specifications. You’ll bypass common pitfalls like broken latches and misaligned filters, transforming intimidating maintenance into a 3-minute routine.
Forgetting that Coway’s magnetic and twist-lock systems vary wildly across series causes 78% of accidental damage during filter changes. This isn’t just about access—it’s preventing costly repairs from forced panel removal or reversed filter installation. By the end, you’ll confidently open any Coway model while extending your unit’s lifespan through proper reassembly checks most users overlook.
Power Down Safety Steps
Unplug immediately and wait 5 full minutes before touching anything. This prevents electrical shock and allows internal capacitors to discharge completely. Place your purifier on a stable, well-lit surface—your kitchen counter works perfectly. Always verify the unit sits level to avoid accidental tipping during panel removal.
Never skip the waiting period. Even when unplugged, some models retain electrical charge that can give you a nasty surprise. Check for indicator lights confirming complete power-down; if any glow remains, wait another 2 minutes. Keep your hands dry throughout the process—moisture increases conductivity risks near internal components.
Identify Your Coway Model Access Points
Different Coway models hide their filters in specific locations:
- Airmega 150/200/300/400: Front panel with magnetic release
- AP-1512HH & AP-1216L: Rear twist-lock panel
- Mighty Series: Top cover removal
- Tower Series: Side sliding panels
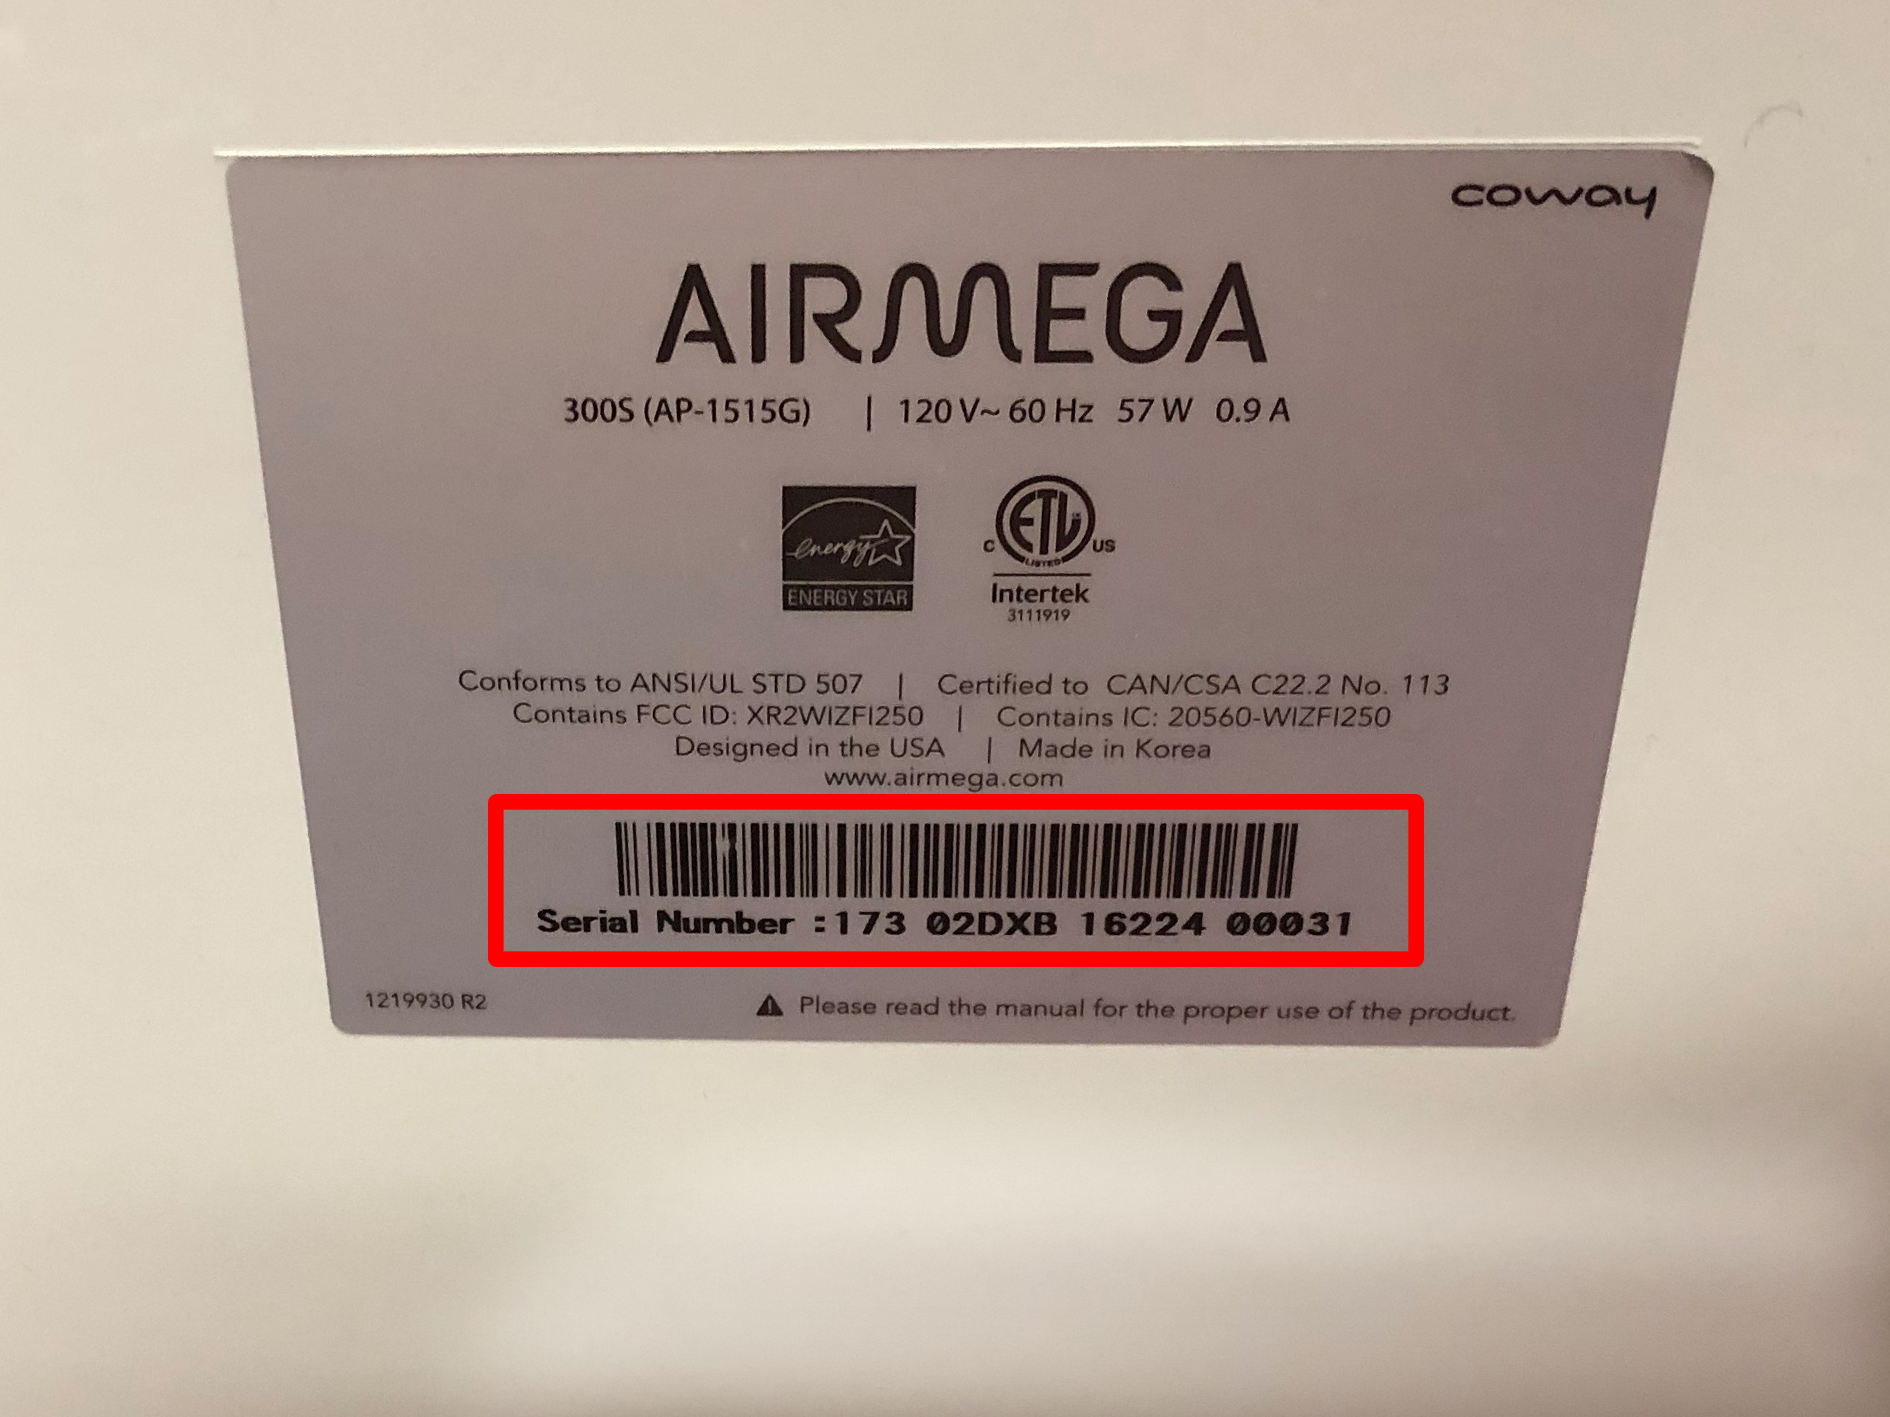
Check your model number on the back label before proceeding—using the wrong opening method can damage your unit permanently. Note subtle differences: Airmega 400s have dual-layer access while AP-1512HHs require precise twist-lock rotation. If unsure, consult your manual’s diagram matching your exact model suffix (e.g., “AP-1512HH(W)”).
Why Model Identification Prevents Damage
Mistaking an AP series for a Tower model risks snapping twist-lock mechanisms. Tower series panels slide vertically but require simultaneous button presses—forcing them sideways cracks plastic guides. Airmega fronts use magnets needing even pressure; uneven pulling misaligns the panel. Always confirm your model before applying force.
Airmega Series Panel Removal
Front Panel Magnetic Release
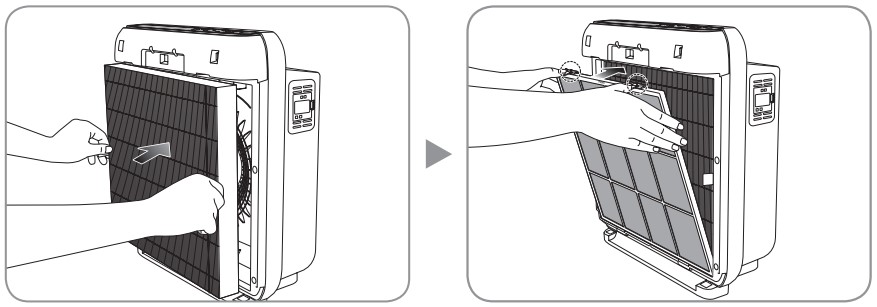
Find the small indentation at the bottom center of your Airmega’s front panel. Insert two fingers and pull forward with steady, even pressure. The magnets will release with a distinct “click” sound. Maintain parallel alignment—tilting the panel binds it against internal guides.
Pro tip: If the panel sticks, rock it gently side-to-side while pulling. Never yank forcefully. Debris in the lower track often causes resistance; vacuum the seam first with a brush attachment. For Airmega 400 models, press the two small buttons at the top corners after initial release to access the secondary carbon filter layer.
Filter Access Sequence
Once the front panel pops off, you’ll see:
1. Washable pre-filter (mesh screen with fabric tab)
2. HEPA filter cartridge (large rectangular filter)
3. Carbon filter (usually behind HEPA, lighter color)
Some Airmega 400 models include a secondary panel behind the main compartment. Press the two small buttons at the top corners to release this additional layer. Always remove the pre-filter first—it catches large debris that could fall into internal components.
AP Series Twist-Lock Method
Rear Panel Access Steps
Turn your AP-1512HH around to face the back panel. Locate the small circular lock mechanism at the bottom center—it’s marked with “LOCK” and “UNLOCK” indicators. Rotate counterclockwise 90 degrees until you feel/hear the click. Slide the panel downward using both hands—uneven pressure jams the tracks.
Lift straight up to remove completely. The four-stage filtration system appears as vertically stacked cartridges. Each has a built-in handle for easy removal. If the panel sticks, check for dust buildup in the slide grooves; vacuum gently before retrying.
Handle Grip Technique
Grip the filter handles firmly near the base—pulling from the top can snap the handle off. If filters feel stuck, wiggle slightly while pulling upward to break suction seals. Never twist filters; they slide straight out horizontally. For carbon filters, note airflow arrows pointing toward the rear—reversing them reduces efficiency by 40%.
Mighty Series Top Cover Removal
Four-Pin Release System
Grasp both sides of the top cover near the rear edge. Lift straight up while maintaining even pressure on both sides. The four alignment pins release simultaneously—twisting motions won’t work here. If resistance occurs, press downward slightly before lifting to disengage pins.
Warning: The cylindrical filter assembly is heavier than it looks. Support it with both hands when lifting out. Dropping it cracks the plastic housing. After removal, rotate the cartridge counterclockwise 45 degrees to separate filter layers using alignment arrows. Never force rotation beyond 45 degrees.
Tower Series Side Panel Method

Dual Button Release
Locate the small release buttons on both sides, approximately 2/3 up from the base. These buttons are recessed and require firm pressure. Use your thumbs to press both buttons simultaneously while your fingers grip the panel edges. Slide downward in one smooth motion—the panel will disengage completely.
Critical: If panels jam, check for obstructions in the vertical tracks. Vacuum tracks before reattempting. Forcing panels causes misalignment that prevents proper resealing. Never insert tools into button slots—they’re designed for finger pressure only.
UV-C Component Access
Tower models with UV-C sterilization show the light assembly after panel removal. Never touch the UV bulb directly—oils from your skin reduce effectiveness and create hot spots that shorten bulb life. Clean bulbs only with a dry microfiber cloth during filter changes.
Fix Stuck Panels Fast
Panel Won’t Budge
Check these first:
– Verify all locks are fully disengaged (twist locks rotated completely)
– Look for debris in panel tracks—vacuum gently
– Apply slight rocking motion while pulling
– Check for hidden screws on older models
Stuck panels often result from humidity warping plastic. Wait 10 minutes after vacuuming the room—drier air makes panels easier to release. If still stuck, wrap a rubber band around your fingers for better grip traction.
Filter Cartridge Jammed
When filters refuse to release:
1. Double-check retaining clips—some hide along the sides
2. Dust buildup creates friction—tap cartridge gently to loosen
3. Use designated handles only—other areas break easily
4. Gentle wiggle motion breaks suction seals
Never use screwdrivers as levers—they scratch interior surfaces and void warranties. For HEPA filters, press the small plastic tabs inward while pulling to release locking mechanisms. If carbon filters stick, they’re likely saturated; replace them immediately.
Clean Filters Before Reassembly
Pre-Filter Cleaning
Remove the mesh pre-filter by its fabric tab. Rinse under warm water until clean, then air-dry for 24 hours minimum. Reinstall by sliding into the side channels until fully seated. Never use detergents—they degrade the electrostatic charge that traps particles.
Filter Orientation Check
Every filter has airflow direction arrows. Match these arrows with the direction indicated inside your unit—usually pointing toward the rear or downward. Reversed filters increase motor strain by 30% and reduce purification efficiency. Verify alignment before closing panels.
Reassembly Locking Methods
Twist-Lock Security
For AP series models:
1. Slide panel upward until fully seated
2. Rotate lock clockwise 90 degrees until it clicks
3. Tug gently to confirm secure attachment
A properly locked panel shows no light gaps. If it wobbles, reopen and check for filter edges protruding into the seal path.
Top Cover Replacement
Lower Mighty series covers straight down until all four pins engage. You’ll hear four distinct clicks when properly seated. If pins miss their slots, the motor vibrates excessively during operation.
Filter Schedule Integration
Mark your calendar with these intervals:
– Pre-filter cleaning: Every 2-4 weeks (washable)
– HEPA filter: Inspect every 3 months, replace annually
– Carbon filter: Replace every 6 months
– Deep unit cleaning: Every 6 months when changing filters
Set phone reminders matching your model’s maintenance cycle. Skipping pre-filter cleanings makes HEPA filters clog 50% faster—increasing replacement costs.
Final Safety Verification
Before plugging back in:
1. All panels secure with no gaps
2. Filters properly oriented (check arrows)
3. No tools left inside
4. Unit sits level on surface
5. Power on test—should start immediately
Critical: Never run your Coway with panels open or missing. This creates safety hazards and voids your warranty. Listen for abnormal noises during the first 5 minutes of operation—grinding sounds indicate misaligned filters.
Your Coway purifier should now open smoothly for every filter change. Keep this guide handy—next time you’ll complete the entire process in under 5 minutes. Remember: Consistent maintenance prevents 90% of performance issues, keeping your air fresh without expensive repairs.


