
Your Shark air purifier suddenly feels less effective—dust settles faster, pet odors linger, or that persistent filter indicator light won’t reset. When airflow weakens despite regular cleaning, it’s time for fresh filters. This step-by-step guide eliminates guesswork by delivering exact replacement procedures for every Shark model, from the compact FP151 to the powerful FP302. You’ll learn how to replace Shark air purifier filter components correctly, avoid costly mistakes, and reset indicators properly—all without generic advice that doesn’t match your unit. Follow these model-specific instructions to restore peak performance in under 15 minutes.
Identify Your Shark Filter Type Before Starting
HEPA Filter Replacement Essentials
Shark’s medical-grade HEPA filters (part #XHF400 for FP302/FP301 models) capture 99.97% of particles as small as 0.3 microns—including pollen, mold spores, and pet dander. Replace every 6-12 months depending on usage: heavy pollution or multiple pets shortens lifespan to 6-8 months. Never wash HEPA filters—moisture permanently damages the microfiber structure. When removing old units, note the airflow arrows molded into the frame; installing backward reduces efficiency by 40%.
Activated Carbon Filter Replacement Protocol
The XCF400 carbon filter neutralizes cooking smells, VOCs, and tobacco smoke through its high-density activated carbon granules. Replace every 3-6 months—sooner if you detect persistent odors after replacement. Crucially, always install carbon filters before HEPA filters in FP302/FP301 models (arrows pointing toward the HEPA position). Never attempt to wash carbon filters; rinsing destroys the adsorption capacity. If your unit still emits chemical smells after new carbon installation, run it on high for 4 hours to fully activate the granules.
Pre-Filter Cleaning vs. Replacement
Your washable pre-filter traps visible debris like pet hair and dust bunnies. Rinse it monthly under lukewarm water—never use soap—and air dry completely before reinstalling. Only replace this permanent component if torn or stretched (typically after 2-3 years). A damaged pre-filter allows large particles to clog your expensive HEPA filter prematurely. When reinstalling, ensure the mesh sits flush in its front tracks; gaps cause air leakage that triggers error lights.
Confirm Your Shark Model to Avoid Costly Mistakes
FP302/FP301 Units: Look for “Air Purifier 4” or “Air Purifier 6” labels on the back panel. These require separate XHF400 HEPA and XCF400 carbon filters accessed through the front grille.
FP151 Compact Models: Check the bottom label for “3-in-1” branding. These use integrated filter cartridges requiring bottom-panel access—no separate components.
NeverChange Series: Identified by prominent “NeverChange” badges. These have permanent filters needing only cleaning, not replacement.
Using incorrect filters voids warranties. FP151 cartridges won’t fit FP302 units, and generic filters often lack Shark’s precise airflow channels, reducing purification efficiency by 30%.
Pre-Replacement Safety and Setup Checklist
Critical Safety Steps Before Opening Your Unit
Unplug the unit and wait 10 minutes—internal capacitors retain dangerous voltage even when off. Wear an N95 mask during filter removal to avoid inhaling trapped allergens. Work on a hard surface covered with a towel to prevent scratches and contain debris. Skip these steps, and you risk electrical shock, reduced air quality during replacement, or damaging fragile internal sensors.
Exact Tools Needed for Hassle-Free Replacement
- Genuine Shark filters (verify XHF400/XCF400 for FP302/FP301 or FP151-specific cartridges)
- Flashlight to inspect gasket seals and sensor ports
- Soft-bristled brush or vacuum crevice tool
- Timer for reset procedures
Avoid common pitfalls: Never use screwdrivers to force panels open (breaks plastic clips), and never install filters while the unit is plugged in—safety switches prevent operation but won’t stop electrical hazards.
FP302/FP301 Front-Access Filter Replacement
Step 1: Open the Filter Compartment Correctly
Press both front panel release buttons simultaneously while pulling the grille toward you. If stuck, gently vacuum debris from button slots first—dust jams are the #1 cause of broken latches. The grille should detach smoothly; forcing it cracks the housing.
Step 2: Remove and Install Filters in Sequence
- Slide out the pre-filter (front mesh screen)
- Grasp the HEPA filter’s pull tab and slide straight out—note the airflow arrows
- Remove the carbon filter from its rear compartment using finger grips
- Insert new carbon filter first (arrows toward HEPA position)
- Slide in HEPA filter with pull tab facing outward
- Reinstall pre-filter last
Critical: Installing HEPA before carbon blocks airflow channels. Misaligned arrows reduce filtration by 50%.
Step 3: Reset and Verify Operation
Reattach the grille by aligning the top edge first, then pressing the bottom until both latches click. Plug in the unit, then:
– Hold MODE + POWER for 3 seconds
– Listen for confirmation beep
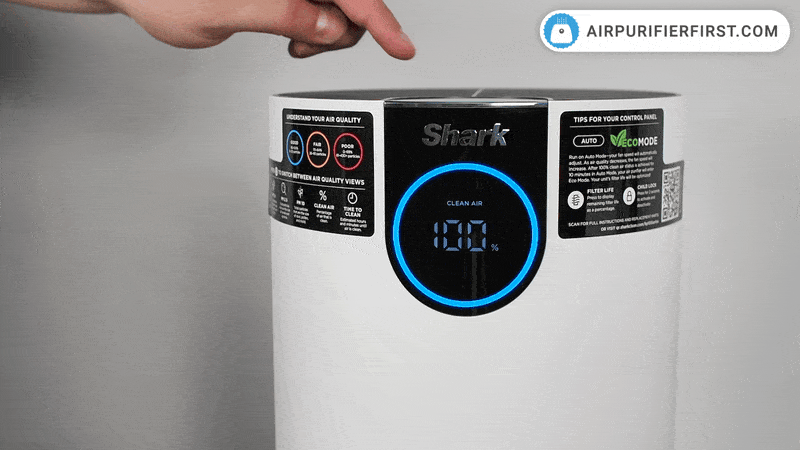
– Confirm display shows 100% filter life
No beep? Unplug for 30 seconds and retry—gaps in the grille prevent reset completion.
FP151 3-in-1 Bottom-Access Replacement
Step 1: Access the Integrated Cartridge
Turn off and unplug the unit, then lay it flat on its back. Rotate the bottom panel’s twist-lock mechanism counterclockwise 90 degrees. If resistance occurs, check for carpet fibers jamming the lock. Lift the cover straight up—never twist—to avoid breaking the plastic tabs.
Step 2: Replace the Entire Cartridge
Pull the cartridge straight up using its plastic handle. Never separate components—the FP151 uses sealed cartridges. Install the new unit by lowering it vertically until it clicks into place. Handle only the plastic frame; oils from skin degrade filter media.
Step 3: Reset and Test
Reattach the bottom cover, rotate the lock clockwise until tight, and return the unit upright. Hold the POWER button for 5 seconds until the display resets to 100%. Reduced airflow after replacement means the cartridge isn’t fully seated—recheck alignment.
Troubleshoot Post-Replacement Failures Immediately
Filter Won’t Fit? Verify These First
- FP302/FP301: Ensure you have XHF400/XCF400 filters (not FP151 cartridges)
- FP151: Confirm twist-lock cover is fully rotated closed
- Pro Tip: Compare new filter dimensions to old one—counterfeit filters run 2-3mm smaller
Indicator Light Still Flashing? Fix These Issues
- Unplug for 30 seconds to reset sensors
- Check for plastic packaging remnants on filters
- Ensure grille latches click audibly during reassembly
- Warning: Red flashing indicates damaged filter sensors—contact Shark support
Persistent Odors After Carbon Replacement?
Run the unit on high for 4 hours to activate the carbon granules. If smells continue, you likely installed the carbon filter after the HEPA unit—disassemble and reverse the order.
Maximize Filter Lifespan With These Pro Techniques
Strategic Placement for Reduced Wear
Position your unit at least 18 inches from walls and furniture to prevent airflow restriction. In high-pollen seasons, close nearby windows and run on medium instead of high—this extends HEPA life by 2-3 months. Avoid kitchen placement near stovetops; cooking grease rapidly clogs pre-filters.
Document Replacement Dates for Precision Scheduling
Write installation dates directly on filter frames with a marker. Track performance changes in a notes app:
– Week 1: “Strong airflow, no odors”
– Month 6: “Slight dust smell at high speed”
This data helps optimize future replacement timing—many users extend filter life 1-2 months in clean environments.
Budget-Smart Filter Management
Cut Annual Costs by 25% With These Tactics
- Buy HEPA + carbon sets during Shark’s Black Friday sales (typically 25% off)
- Activate Amazon Subscribe & Save for 15% recurring discounts
- Never use generic filters—they lack Shark’s precise airflow channels, reducing efficiency and voiding warranties
FP302/FP301 annual cost: $80-120 with genuine filters. FP151: $60-80. Bulk purchases save $20+ yearly without compromising performance.
When to Replace Filters Immediately (Not Later)
Act now if you notice:
– Airflow weaker than a gentle breeze
– Visible black streaks on HEPA filters (mold growth)
– Carbon filters failing to eliminate cooking smells
– Filter indicator light activation combined with allergy flare-ups
In wildfire zones or homes with multiple pets, replace carbon filters every 2 months and HEPA every 5 months—halving standard intervals prevents performance collapse.
Final Takeaway: How to replace Shark air purifier filter successfully hinges on matching your exact model to the right procedure. Verify part numbers before purchasing, install carbon before HEPA in multi-filter units, and always reset indicators after replacement. Keep genuine filters on hand for your specific model—FP302/FP301 need XHF400/XCF400, while FP151 requires integrated cartridges—and you’ll maintain hospital-grade air quality for years. Track installation dates to optimize replacement timing and avoid unnecessary costs.


