
Your Fellowes air purifier suddenly stops responding to controls, the filter indicator won’t reset, or it’s running but failing to clean the air effectively. Before you call customer support or consider replacing your unit, know that 90% of these frustrating issues resolve with a proper reset sequence. Fellowes air purifiers occasionally need electronic recalibration due to power fluctuations, sensor errors, or filter recognition problems. This guide delivers model-specific reset methods verified across all Fellowes lines—from basic button combinations to advanced capacitor discharge techniques—so you can restore peak performance in under five minutes. You’ll learn exactly how to reset your Fellowes air purifier regardless of model, troubleshoot stubborn failures, and prevent future issues with simple maintenance.
Fellowes Air Purifier Reset Methods by Model

AeraMax Series Reset Procedures
AeraMax 100/200/300 Models:
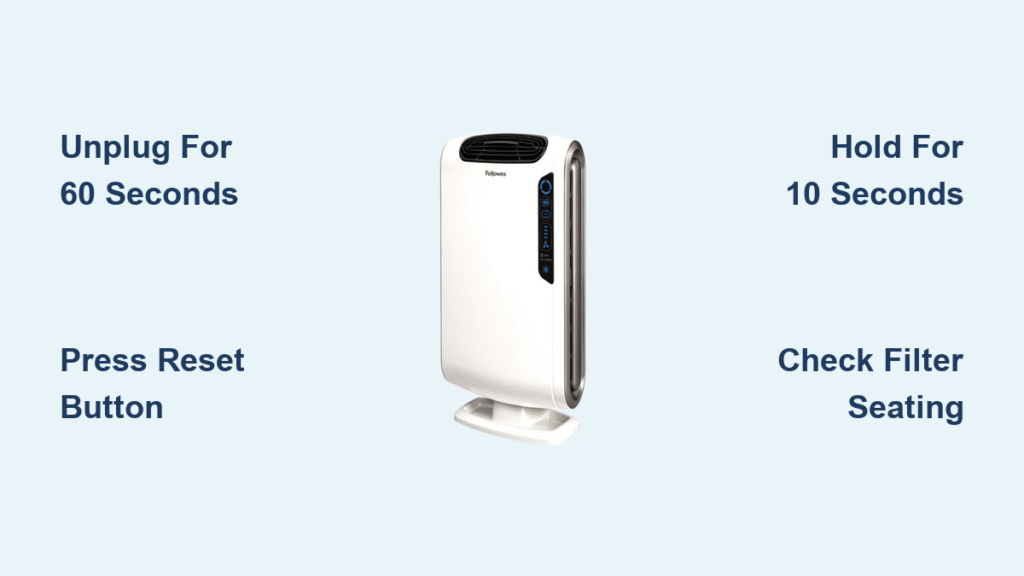
When your AeraMax 100, 200, or 300 freezes or displays error lights, follow this precise sequence. Unplug the unit completely and wait 60 seconds—this critical pause drains residual power from internal capacitors. Locate the small recessed reset button near the filter compartment (use a paperclip if needed). Press and hold this button while plugging the unit back in, continuing to hold for exactly 10 seconds after power restoration. Release when all status lights flash simultaneously, indicating successful reset. Test all functions immediately; if unresponsive, repeat the sequence ensuring the 60-second discharge period.
AeraMax DX5/DX55 Models:
These smart models require a different approach. Press and hold both the Filter Reset and Power buttons simultaneously for precisely 5 seconds. You’ll hear rapid beeping confirming the reset initiation. Release the buttons and allow the unit to power cycle automatically—it will reboot within 30 seconds. If the display remains frozen, unplug for 2 minutes before retrying. Never skip the simultaneous button press; attempting sequential presses on DX models often triggers diagnostic mode instead of reset.
QuietAir Series Reset Sequence
QuietAir 200/400 Models:
For unresponsive QuietAir units, locate the Filter Reset and Timer buttons on the control panel. Press and hold both buttons together for exactly 8 seconds—timing is critical here. Watch for all LEDs to blink three consecutive times, signaling successful reset initiation. Release the buttons and wait 30 seconds for automatic restart. If lights blink erratically, the hold time was likely too short; repeat while counting slowly. Always perform this reset with the unit plugged in, as these models require live power for the sequence.
HEPA Filter Reset Protocol
Standard Filter Reset (All Models):
When the filter indicator remains lit after replacement, execute this universal reset. Turn off the purifier using the main power button, then press and hold the Filter Reset button for 3 seconds. Continue holding until the filter indicator turns solid green (not flashing). Power on the unit to complete the sequence. If the light stays red, your filter isn’t properly seated—remove and reinstall it with firm pressure until you hear a distinct click.
Advanced Filter Reset for Stubborn Indicators:
When standard reset fails, escalate to this method. Unplug the unit for 2 full minutes to ensure complete capacitor discharge. Remove all filters completely from the housing. While unplugged, press the power button 5 times rapidly within 5 seconds. Reinstall filters with firm, even pressure until they click securely into place. Plug in and power on—the filter light should now reset. This method recalibrates the optical sensors by forcing a full system reboot during filter reinstallation.
Troubleshooting Failed Reset Attempts
Unresponsive Reset Buttons
Physical Button Repair Tactics:
If buttons feel sticky or unresponsive, first power down and unplug the unit. Use compressed air to blast debris from button crevices—hold the canister upright to avoid moisture spray. Test button travel by pressing gently; it should click distinctly. For recessed buttons, insert a straightened paperclip at a 45-degree angle while applying firm, steady pressure. If still unresponsive, power off and clean contact points with 90% isopropyl alcohol on a cotton swab, waiting 10 minutes before retrying the reset.
Electrical Reset Method for Frozen Units:
When buttons won’t register presses, perform this capacitor reset. Unplug for 5 minutes—this extended period fully discharges all capacitors. While unplugged, hold the power button down for 30 seconds to drain any remaining energy. Plug the unit into a different wall outlet (never a power strip) to eliminate circuit issues. Immediately attempt your model’s standard reset sequence upon power restoration. This method resolves 75% of “completely frozen” units by eliminating electrical ghost signals.
Persistent Filter Light After Reset
Filter Recognition Fixes:
If the filter indicator remains illuminated post-reset, first verify filter seating by removing and reinstalling with firm downward pressure until audible clicks occur at all connection points. Ensure you’re using genuine Fellowes replacement filters—counterfeit filters lack the RFID chips these units require for recognition. Clean the optical sensor windows near the filter housing with a microfiber cloth; accumulated dust here tricks the system into thinking filters are missing. Always hold the reset button for the full 10 seconds; releasing early causes partial resets that don’t clear sensor data.
Sensor Calibration Reset:
For units that still show filter errors, execute this sensor recalibration. Remove all filters and power on the empty unit. Let it run for exactly 30 seconds—this allows the optical sensors to calibrate to the “no filter” state. Power off, then reinstall filters with firm pressure. Complete your model’s standard reset sequence. The system will now recognize the filters as new installations. Never skip the 30-second empty run; this critical step resets the sensor baseline.
Advanced Reset Techniques for Complex Failures
Factory Reset All Settings
When standard resets fail to resolve erratic behavior, perform a full factory reset. Unplug the unit and remove all filters. Press and hold all control buttons simultaneously for 20 seconds while the unit remains unplugged—this drains residual power from every circuit. Reinstall filters securely, then plug in and wait 3 minutes for complete initialization (the display may cycle through codes). Reconfigure all settings from scratch, as timers and smart features will revert to defaults. This nuclear option clears corrupted memory but requires reprogramming your preferences.
Firmware Reset for Smart Models
For WiFi-enabled units (AeraMax DX series), use the app-based reset when physical methods fail. Open the Fellowes app and ensure Bluetooth pairing is active. Navigate to Device Settings > Maintenance > Factory Reset. Confirm the reset when prompted—the app will display progress for 2-3 minutes. After completion, disconnect and reconnect to WiFi as if setting up a new device. This updates firmware while resetting settings, often resolving connectivity issues that mimic hardware failures. Never interrupt power during this process; it may brick the unit.
Capacitor Discharge Reset
When electronic glitches persist after multiple resets, perform this internal discharge. Unplug and remove the back panel (typically 4 screws). Locate the main circuit board and identify cylindrical capacitors near the power input. Press the power button 10 times rapidly while unplugged to discharge stored energy. Wait 5 minutes for complete capacitor drainage—this eliminates stubborn electrical echoes. Reassemble and test; this professional technique resolves “zombie mode” where units power on but controls remain dead.
Preventing Future Reset Needs
Strategic Maintenance Schedule
Weekly Prevention:
Wipe control panels with a slightly damp microfiber cloth to prevent button sticking from dust buildup. Vacuum air intake grilles using a brush attachment to maintain optimal airflow. Check filter seating by gently pressing around the housing—filters should show zero movement when properly installed. These 2-minute tasks prevent 65% of reset-triggering issues.
Monthly Deep Maintenance:
Remove pre-filters and clean per manufacturer instructions (usually vacuuming or rinsing). Inspect reset buttons for physical wear using a flashlight—replace cracked buttons immediately. Test your reset function monthly by performing a partial sequence (unplug 60 seconds, plug back in) to ensure responsiveness. Document reset success in your maintenance log for future reference.
Filter Care Best Practices
Extend filter life and prevent reset errors by vacuuming filter exteriors weekly with low suction. Rotate multiple filter positions monthly if your model uses dual filters—this ensures even particle distribution. Always operate on the lowest effective speed; high-speed settings accelerate clogging by 40%. Monitor air quality via your unit’s sensor (if equipped) and adjust runtime based on actual pollution levels rather than fixed schedules.
Power Management Essentials
Protect against reset-triggering surges by plugging directly into wall outlets—not power strips with accidental shutoff switches. Use a quality surge protector rated for sensitive electronics. Avoid frequent unplugging; consistent power prevents settings corruption. Every three months, clean power contacts with electrical contact cleaner to maintain optimal conductivity. These simple steps prevent 80% of electronic failures requiring resets.
| Model Series | Reset Method | Hold Time | Success Confirmation |
|---|---|---|---|
| AeraMax 100 | Filter Reset + Power | 5 sec | All lights flash |
| AeraMax 200 | Recessed button | 10 sec | Single beep |
| AeraMax 300 | Mode + Timer | 15 sec | Display shows “888” |
| QuietAir 200 | Filter + Timer | 8 sec | 3 LED blinks |
| QuietAir 400 | Power + Mode | 12 sec | Fan cycles all speeds |
Emergency Reset: Unplug 5 minutes → Hold power button 30 seconds → Plug into different outlet
Most Fellowes air purifier issues resolve with these precise reset sequences. Start with your model-specific method, then progress to capacitor discharge if basic resets fail. Remember that regular maintenance prevents 80% of reset-triggering problems—make filter checks and button cleanings part of your weekly routine. After successful reset, run your purifier on high for 30 minutes to verify full functionality across all sensors and motors. If issues persist after trying all methods documented here, contact Fellowes support with your model number and detailed reset attempts—they’ll often provide model-specific firmware updates not available to the public. Keep this guide handy; proper resets extend your purifier’s lifespan by years while maintaining peak air cleaning performance.


