Your new Winix air purifier sits in the box, promising cleaner air and easier breathing, but where do you start? Many new owners feel overwhelmed by buttons, filters, and settings they don’t understand. The good news: mastering your Winix takes less than 15 minutes, and once set up correctly, it runs automatically while you enjoy noticeably fresher air. This guide walks through every step from unboxing to daily operation, ensuring you avoid common mistakes that reduce effectiveness or damage the unit.
Unlike cheaper models that require constant adjustment, your Winix uses smart sensors to automatically respond to changing air quality conditions. Within minutes of proper setup, you’ll notice reduced dust, fewer allergy triggers, and elimination of cooking odors. The key is understanding how to position it correctly and maintain the filters—two areas where most users make critical errors that cut performance by up to 50%.
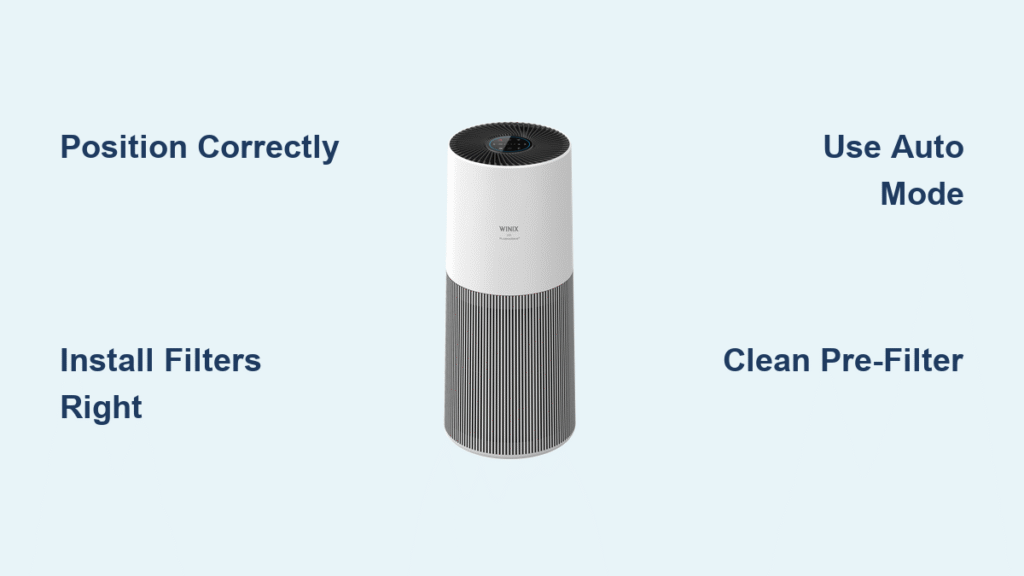
Position Your Winix Air Purifier for Maximum Effectiveness
Place your Winix on a flat, stable surface with at least 15 inches clearance on all sides. This critical spacing allows proper air intake and output circulation—blocking either side reduces cleaning efficiency dramatically. Many users make the mistake of tucking their unit against walls or behind furniture, essentially crippling its performance before it even starts.
Find Your Room’s Optimal Placement Strategy
Position your Winix in the central area of the room for maximum air circulation. Avoid corners where air stagnates and pollutants accumulate. Keep at least 3 feet from electronics like TVs and computers to prevent electromagnetic interference with the air quality sensors. If you have specific pollution sources like pet bedding or cooking areas, place the unit 4-6 feet away for targeted cleaning—close enough to capture contaminants but far enough to avoid overwhelming the filters with concentrated particles.
For multi-story homes, prioritize bedrooms where you spend 8+ hours breathing the same air. During wildfire season or high pollen days, temporarily position units near entryways to capture outdoor pollutants before they spread through your home. Remember that air purifiers work best in closed environments—keep doors closed while running to prevent clean air from escaping and polluted air from entering.
Verify Complete Filter Packaging Removal
Before powering on, carefully inspect each filter for hidden plastic wrapping. The pre-filter often has a nearly invisible clear sleeve that’s easy to miss during unboxing. Run your fingers along the edges of each filter to detect any remaining adhesive strips or protective films. Many customer service calls stem from this simple oversight—plastic wrapping blocks airflow and causes the unit to work harder while delivering minimal cleaning. If you notice reduced airflow immediately after setup, check for missed packaging before assuming a mechanical issue.
Install Winix Filters in the Correct Sequence

Winix units require a specific filter sequence: pre-filter first, followed by carbon filter, then HEPA filter. Installing in the wrong order reduces efficiency by up to 40% and can strain the motor over time. Each filter has directional arrows molded into the frame—always orient these arrows toward the inside of the unit to ensure proper airflow through the filtration system.
Identify Each Filter’s Critical Function
Your Winix employs a three-stage filtration system where each component plays a distinct role. The pre-filter is a washable mesh that captures large particles like dust, hair, and pet dander—preventing them from clogging the more expensive internal filters. The carbon filter is a thin black sheet that adsorbs odors, smoke, and VOCs from cooking, pets, or cleaning products. The HEPA filter is the white pleated paper element that captures 99.97% of particles as small as 0.3 microns, including pollen, mold spores, and bacteria.
Complete Filter Installation Process
- Open the front panel by pressing the side latches firmly while pulling outward—listen for the click indicating full release
- Insert the pre-filter with the mesh side facing outward toward the room
- Slide the carbon filter directly behind the pre-filter, ensuring it lies flat without wrinkles
- Place the HEPA filter last with directional arrows pointing inward toward the fan
- Close the panel until you hear two distinct clicks confirming secure installation
Take a moment to verify all filters are seated properly by gently pressing on each one through the closed panel. Loose filters create air gaps that allow unfiltered air to bypass the system. If the panel doesn’t close smoothly, recheck filter alignment—forcing it closed can damage the housing.
Power On and Configure Essential Settings
Plug your Winix directly into a wall outlet—avoid extension cords or power strips which can cause voltage fluctuations that disrupt sensor accuracy. Upon first power-up, the unit performs a 30-second self-test: all indicator lights illuminate briefly, then cycle through colors as sensors calibrate. This initial calibration is crucial for accurate air quality readings, so avoid moving the unit during this phase.
Select the Most Effective Operating Mode
Press the Mode button to cycle through five performance settings. For most households, Auto mode delivers the best balance of performance and energy efficiency—it automatically adjusts fan speed based on real-time air quality readings. Low mode operates at near-silent levels (25 dB) ideal for bedrooms during sleep. Medium mode provides steady cleaning for living areas with normal activity. High mode tackles moderate pollution from cooking or cleaning. Turbo mode delivers maximum airflow for emergency situations but generates significant noise (55 dB).
Pro Tip: Run Turbo mode for 15 minutes after smoking indoors or burning food, then switch back to Auto for maintenance cleaning. This approach clears severe contamination quickly without subjecting you to constant loud operation.
Optimize Plasmawave Technology Settings
The Plasmawave button activates Winix’s signature ionization technology that breaks down airborne pollutants at a molecular level. While highly effective against viruses, bacteria, and stubborn odors, some sensitive individuals prefer to disable this feature. If you notice a faint metallic smell or experience respiratory irritation, try operating without Plasmawave for a few days to determine if it’s the cause. Most users find they can safely use Plasmawave during daytime hours and disable it for sleeping.
Decode Indicator Lights and Reset Maintenance Alerts
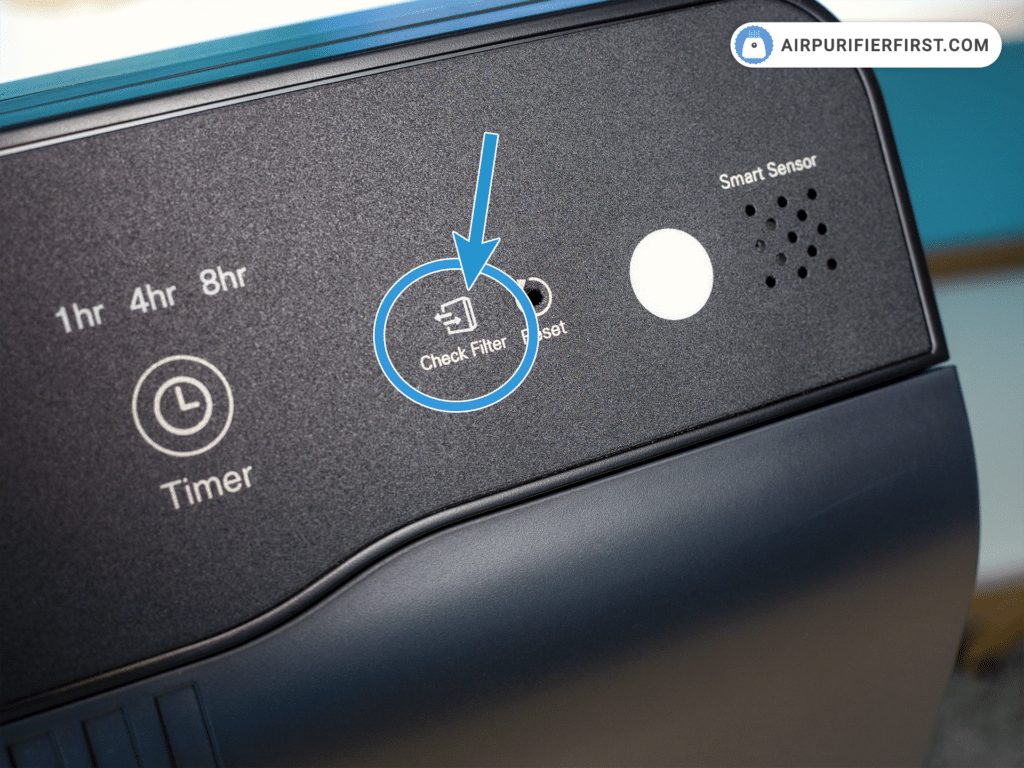
Your Winix communicates its status through a sophisticated LED system that indicates both air quality and maintenance needs. Solid blue means excellent air quality with the unit in maintenance mode. Blinking blue signals the sensors are calibrating—wait two minutes before making adjustments. Solid amber indicates moderate pollution with the fan actively working to improve conditions. Red or blinking red means poor air quality requiring attention or signaling a maintenance issue.
Reset Filter Replacement Indicators Properly
After replacing any filter, hold the Reset button for exactly 5 seconds until the indicator light turns off. Many users hold it too briefly, resulting in persistent filter warnings. If the light remains on after proper reset, check that you’ve installed the correct filter model for your specific Winix unit—some models require different filter configurations.
Daily Operation Best Practices
Run your Winix continuously on Auto mode for optimal results—air pollution is constant, not intermittent. The unit consumes less energy than a standard light bulb (5-90 watts depending on conditions) making 24/7 operation cost-effective. Close windows and doors while operating to prevent outdoor pollutants from overwhelming the filters. During high pollen seasons, run the unit an hour before bedtime to create a clean breathing zone while you sleep.
Strategic Placement Adjustments for Special Situations
When cooking, temporarily move your Winix closer to the kitchen (but not within 3 feet of heat sources) to capture油烟 and cooking odors at their source. For pet owners, position the unit near favorite sleeping areas to reduce dander concentration. If someone in your household is sick, place the purifier 4-6 feet from their bed to create a localized clean air zone that supports recovery.
Monthly Pre-Filter Maintenance Routine
The washable pre-filter captures 80% of airborne particles before they reach expensive internal filters. Vacuum both sides with a brush attachment every two weeks in homes with pets or during high pollen seasons. For regular maintenance, rinse under warm water monthly with mild soap for stubborn buildup. Always allow 24 hours for complete drying before reinstalling—moisture trapped in the filter promotes mold growth inside the unit.
Warning: Never use harsh chemicals or submerge the pre-filter completely—this damages the electrostatic charge that enhances particle capture. If the mesh becomes bent or distorted during cleaning, replace it immediately as damaged pre-filters allow large particles to reach and clog the HEPA filter.
Track and Replace Filters on Schedule
HEPA filters typically last 12 months with normal use, but households with multiple pets or smokers should replace them every 8-10 months. Carbon filters require replacement every 3 months, or monthly during wildfire season when they work overtime capturing smoke particles. Never attempt to wash HEPA filters—water destroys the delicate fiber matrix and releases trapped pollutants back into your air.
Pro Tip: Mark filter replacement dates on your calendar and set phone reminders two weeks in advance. Many users wait until the filter indicator turns red, but by then, filtration efficiency has dropped significantly. Buying filter bundles saves 15-20% and ensures you always have replacements on hand.
Troubleshoot Common Winix Issues Quickly
If your unit won’t power on, check the child safety lock located below the power button—this feature accidentally activates during handling. Strange noises often indicate improperly seated filters or debris in the fan housing. Always unplug the unit for 30 seconds before troubleshooting electrical issues, as this resets the internal circuitry.
For persistent red indicator lights after filter replacement, clean the air quality sensor window with a microfiber cloth—dust buildup here causes false readings. If the unit runs constantly on high speed despite clean air, move it away from potential interference sources like humidifiers or strong air currents that confuse the sensors.
Final Maintenance Tip: Every six months, perform a deep clean by vacuuming interior surfaces and wiping sensor windows. This simple maintenance extends your Winix’s lifespan by years and maintains peak performance. With proper setup and regular care, your Winix air purifier will deliver noticeably cleaner air for 5-7 years—making it one of the smartest investments you’ll make for your household’s health. The secret to success lies not in complicated procedures, but in consistent, proper filter maintenance and strategic placement—two factors entirely within your control from day one.