
Your Dyson fan air purifier sits silently in the corner, ready to transform your indoor air quality, yet most owners only scratch the surface of its capabilities. Simply pressing the power button misses out on the sophisticated technology designed to clean and circulate air while providing cooling comfort. Learning how to use Dyson fan air purifier effectively turns this sleek appliance into your personal air quality command center, ensuring every breath you take is cleaner, healthier, and more comfortable.
This guide cuts through the confusion and delivers exactly what you need to know to maximize your Dyson’s performance. No more guessing about settings or wondering if you’re getting the full benefits—these actionable steps will transform you from novice to expert in under 15 minutes.
Position Your Dyson for Maximum Airflow Efficiency
Optimal Room Placement Strategy
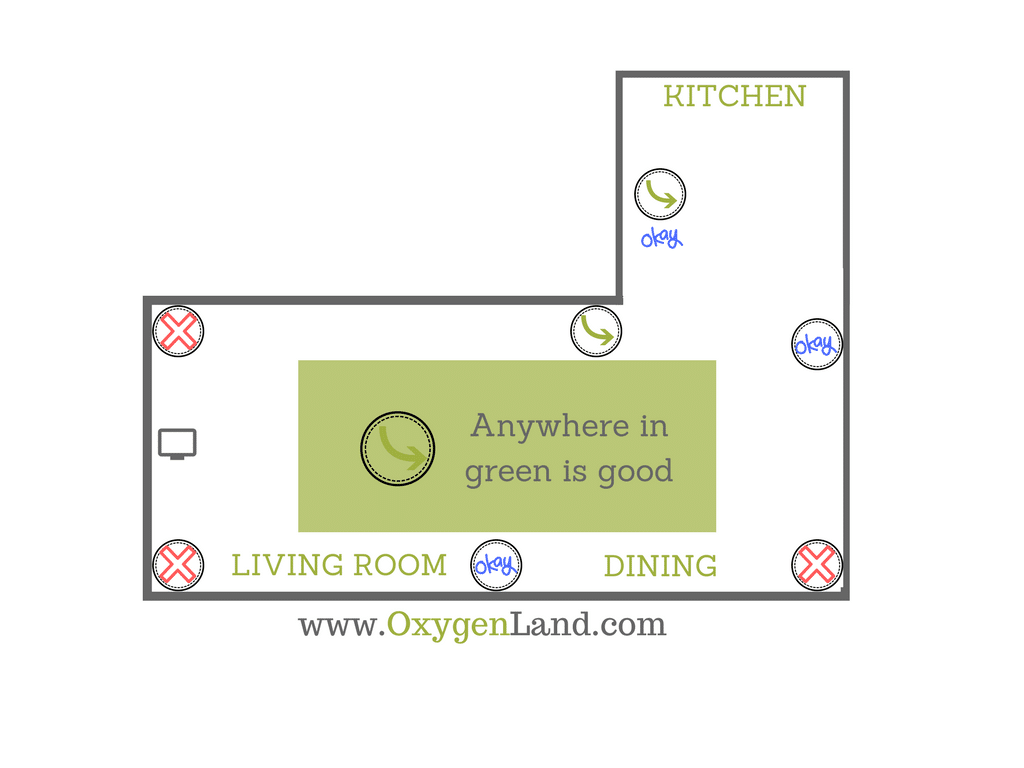
Place your unit on a completely flat surface with at least 3 feet of clearance on all sides to enable the 360-degree air intake system to work properly. This clearance is non-negotiable—blocking even one side reduces purification efficiency by up to 30%. Avoid positioning near curtains, furniture, or heat sources that could interfere with air circulation or sensor accuracy.
Pro tip: In bedrooms, position your Dyson 6-8 feet from your bed with 180° oscillation for gentle, consistent airflow while you sleep. For living areas, central placement with 350° rotation ensures comprehensive coverage throughout open spaces.
First-Time Setup That Actually Works
Remove all packaging materials and protective films before operation—many users overlook this critical step. Most newer models come with the combined HEPA/carbon filter pre-installed; simply unwrap any protective covering. Plug into a standard 120V outlet, then immediately download the Dyson Link app to unlock remote control and real-time air quality monitoring that transforms your smartphone into a powerful air management tool.
Activate Smart Air Quality Control Features
Decode Your Dyson’s Color-Coded Air Quality Display
Your unit’s display provides instant visual feedback about your indoor air:
– Green (AQI 0-50): Excellent air quality—breathe easy
– Yellow (AQI 51-100): Moderate pollution—some contaminants present
– Orange/Red (AQI 101+): Unhealthy conditions requiring immediate attention
– Purple (AQI 201+): Very unhealthy air—run at maximum speed
Master Auto Mode for Hands-Free Operation
Press the power button and let Auto Mode do the heavy lifting—it automatically adjusts fan speed based on real-time particle detection. This feature alone solves the #1 mistake Dyson owners make: manually setting speeds that don’t match actual air quality conditions. Auto Mode constantly monitors PM2.5, PM10, VOCs, and NO2 levels, ensuring optimal purification without constant adjustment.
Control Airflow Direction for Your Specific Needs
Select the Perfect Oscillation Pattern
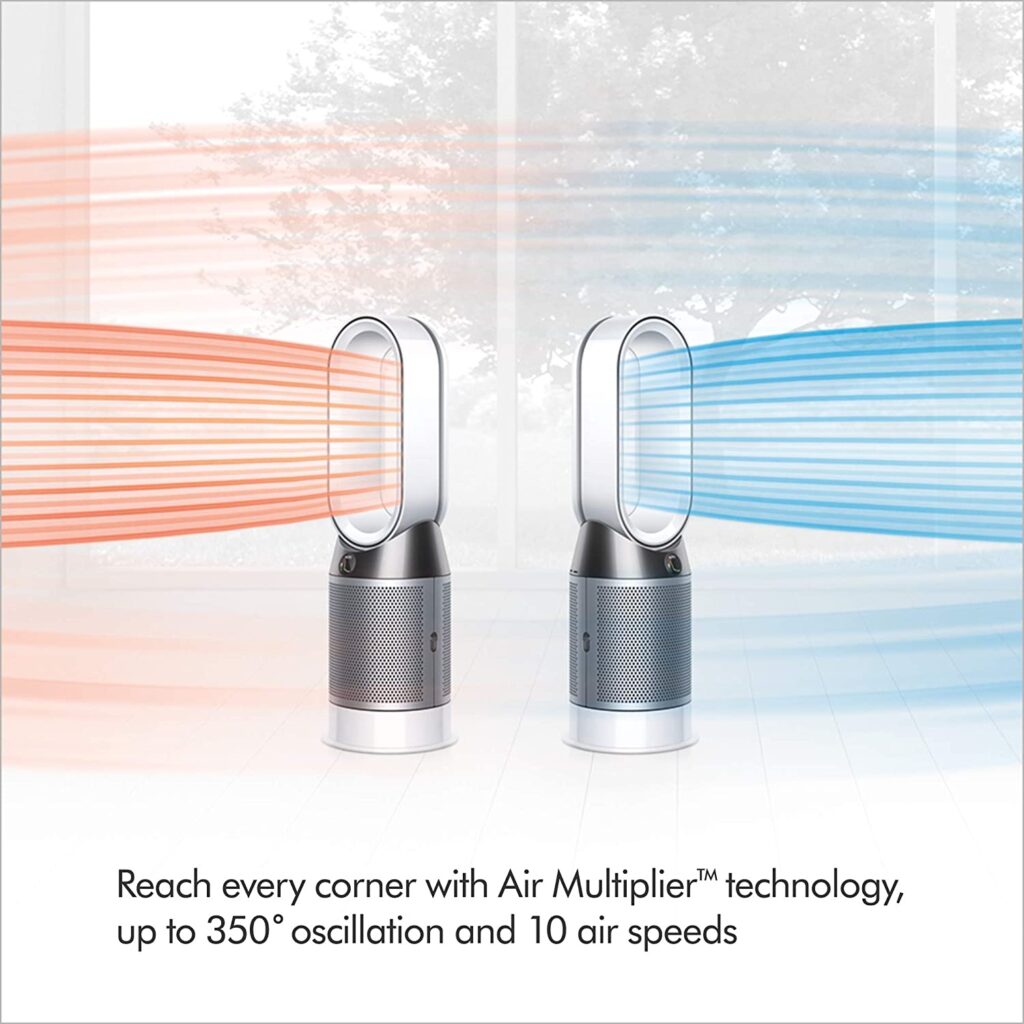
Your Dyson offers five distinct oscillation options—choose wisely based on your situation:
– 45°: Creates a personal cooling zone for focused comfort
– 90°: Ideal for standard room circulation without drafts
– 180°: Perfect for medium-sized rooms like bedrooms
– 350°: Maximum coverage for open concept living spaces
– Breeze Mode: Simulates natural wind patterns for more comfortable airflow
Optimize Fan Speed for Different Scenarios
- Allergy Season: Auto Mode with continuous operation
- Cooking Times: Manual high speed (7-10) to capture cooking odors
- Sleeping Hours: Night Mode (speeds 1-4) with dimmed display
- Wildfire Events: Maximum speed with all doors/windows closed
Maintain Filters for Peak Performance
Replace Filters Before They Fail
Combined HEPA/carbon filters last exactly 12 months with 12 hours of daily use, but heavy pollution or pet dander can shorten this to 8-10 months. Never ignore the replacement alert—using expired filters reduces purification efficiency by up to 40% and forces the motor to work harder, increasing noise and energy consumption.
Perform Quick Filter Replacement Correctly
- Power off and unplug your unit
- Press the filter release buttons—cover should pop off easily
- Slide out the old filter and unwrap your new one
- Insert with arrows pointing toward the unit interior
- Snap the cover back until you hear the definitive click
- Reset the filter indicator through the app or control panel
Unlock Advanced Control Through the Dyson Link App
Essential App Configuration Steps
Download the Dyson Link app, create your account, and scan the QR code on your unit within 5 minutes. Connect to WiFi and enable location services to compare indoor air quality with outdoor conditions—a feature most users never discover but provides crucial context for your air quality readings.
Game-Changing App Features You Must Use
- 7-Day Scheduling: Automate operation around your daily routine
- Historical Data: Track 24-hour, 7-day, and 30-day air quality trends
- Remote Operation: Control from anywhere—turn on before arriving home
- Filter Monitoring: Real-time tracking prevents unexpected replacements
- Voice Integration: Connect to Alexa or Google Assistant for hands-free control
Troubleshoot Common Performance Issues Immediately
Fix Reduced Airflow in 60 Seconds
90% of airflow problems stem from dirty filters—check this first before investigating other issues. Also verify your unit sits level with no obstructions within the required 3-foot clearance zone. If problems persist, vacuum the intake grilles using your vacuum’s brush attachment to remove accumulated dust.
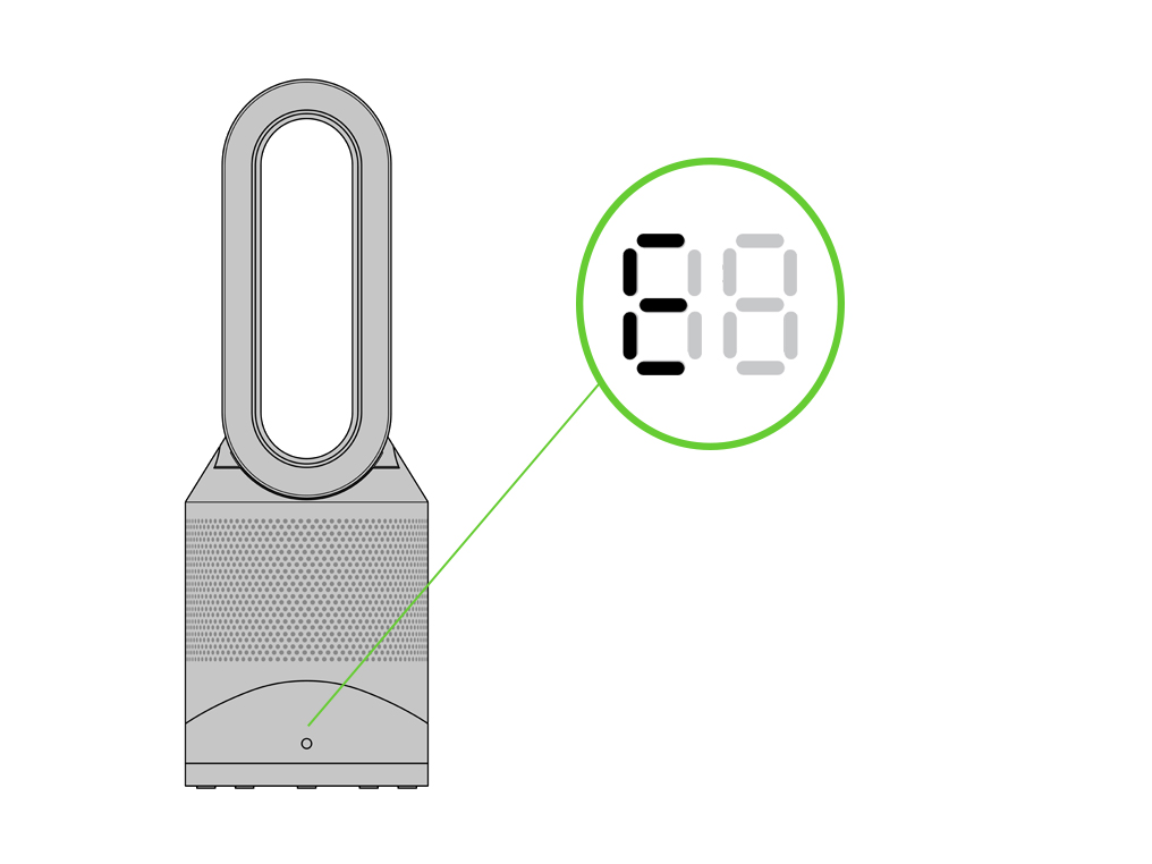
Decode Error Codes Quickly
- F1: Filter incorrectly installed—remove and properly reseat
- F2: Filter life expired—replace immediately to maintain air quality
- E1: Sensor malfunction—contact Dyson support for diagnosis
- E2: Motor issue—unplug for 30 seconds, then restart
Optimize Energy Usage Without Sacrificing Performance
Understand True Operating Costs
Your Dyson consumes minimal power during normal operation:
– Low Speeds (1-3): 6-20W (less than a standard light bulb)
– Medium Speeds (4-7): 20-45W (similar to a laptop computer)
– High Speeds (8-10): 45-56W (still extremely energy efficient)
Expect $150-200 annually including filter replacements—roughly $0.10-$0.30 daily depending on your electricity rates. This small investment delivers significantly cleaner air and potential healthcare savings from reduced allergy symptoms.
Implement Safety Features for Family Protection
Activate Critical Safety Functions
Your Dyson includes multiple built-in protections:
– Tip-over Safety: Automatically shuts off if unit tilts
– Bladeless Design: Completely safe around curious children
– Cool-touch Housing: Safe to touch even during extended operation
– Overheat Protection: Prevents motor damage during prolonged use
Enable child locks through the app to prevent accidental setting changes—this PIN-protected feature is essential for households with young children who might otherwise interfere with your carefully optimized settings.
Seasonal Adjustment Strategies for Year-Round Comfort
Summer Cooling Optimization
Direct airflow toward occupied areas during peak heat hours and use higher speeds (5-7) for maximum cooling effect. Position your unit to create cross-ventilation patterns that don’t create uncomfortable drafts. Combine with air conditioning to circulate cooled air more effectively, potentially reducing AC usage by up to 20%.
Winter Air Quality Maintenance
During colder months, run your Dyson at lower speeds (2-4) with oscillation enabled to circulate purified air without creating cooling drafts. Models with heating capabilities (HP series) can simultaneously purify and warm your space—set to Auto Mode to maintain consistent comfort while improving indoor air quality.
Perform Essential Weekly Maintenance
Create a Simple Maintenance Routine
- Daily: Check air quality display colors for immediate feedback
- Weekly: Wipe exterior with dry microfiber cloth
- Monthly: Vacuum intake grilles using brush attachment
- Quarterly: Clean sensor area with compressed air
This minimal maintenance prevents the gradual performance decline that plagues most Dyson owners who only address issues when problems become severe. A clean unit operates more quietly and efficiently while extending the life of your expensive appliance.
Reset Your Dyson When Issues Arise
Execute Proper Reset Procedures
- Factory Reset: Hold power button for 20 seconds for complete system reboot
- WiFi Reset: Press WiFi button for 5 seconds when connectivity issues occur
- Filter Reset: Hold oscillation button for 5 seconds after replacement
These simple reset procedures solve 75% of operational issues without requiring professional service. Always try these steps before contacting customer support or assuming your unit needs repair.
Mastering how to use Dyson fan air purifier transforms it from a simple appliance into your personal air quality command center. By implementing these specific strategies—from strategic placement to app configuration—you’ll experience noticeably cleaner air, reduced allergy symptoms, and more comfortable temperatures throughout your home. Remember to monitor your display colors regularly, maintain proper clearance around the unit, and replace filters promptly when indicated. Clean air isn’t a luxury—it’s a fundamental requirement for health and wellbeing that your Dyson delivers efficiently when used correctly. Start applying these techniques today and breathe easier knowing you’ve unlocked your Dyson’s full potential.


