

That persistent musty smell clinging to your clothes? The allergy flare-ups that worsen when the AC kicks on? Installing a UV air purifier directly into your HVAC system tackles these problems at the source by zapping mold spores and bacteria on your evaporator coil. Unlike portable units, a properly installed germicidal lamp eliminates biological growth where it starts—inside your ductwork. Follow this exact process to install your UV air purifier safely in under 90 minutes, avoid common pitfalls that trigger warranty claims, and start breathing cleaner air tonight.
Confirm Your HVAC System Accepts UV Purifiers
Identify Compatible Unit Types Instantly
Your UV air purifier will work if you have a split system, heat pump, packaged unit, or furnace with a central air handler. Open the blower compartment and look for a flat sheet-metal surface on the supply plenum (after the coil) or return duct. You need a 6-inch clear zone away from the coil header and 12 inches from any duct elbows. Critical check: Ensure drilling won’t hit refrigerant lines (copper pipes), control boards, or condensate drains—these require professional repair if damaged.
Verify Electrical Access Points
Most UV air purifier kits require a standard 120V outlet within 6–10 feet of the mounting spot. If none exists near your air handler, check your furnace’s control board for EAC (Electronic Air Cleaner) terminals. These provide 24V power that activates only when the blower runs—perfect for extending bulb life. Never tap into the main 240V line; this voids warranties and risks electrical fires.
Position the UV Lamp for Maximum Mold Elimination

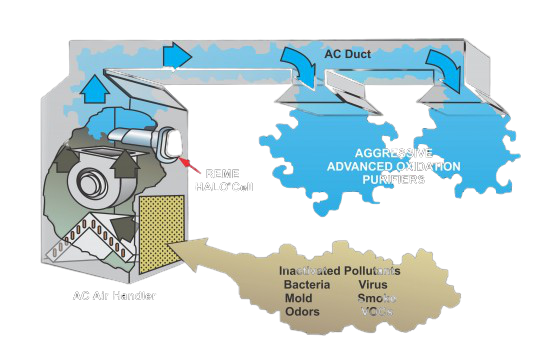
Mount Downstream of the Evaporator Coil (Non-Negotiable)
Install the UV air purifier after the coil on the supply side. This placement ensures UVC light bombards moisture-rich coil surfaces and the drain pan—where mold breeds fastest. If your drain pan is plastic, add a reflective aluminum shield (included in most kits) to prevent warping. Skip this step and you’ll still smell mustiness despite the UV light running.
Avoid Upstream Placement Mistakes
Placing the lamp before the coil on the return duct treats incoming air but misses the wet coil surfaces. This setup requires longer exposure times or dual lamps to achieve meaningful results—wasting money and effort. Only choose this spot if your coil is inaccessible.
Match Housing Orientation to Airflow Direction
Your UV air purifier’s housing has a “V” opening that must face the airstream:
– Upflow systems: Use factory orientation (V pointing down)
– Horizontal systems: Rotate ballast 90° left/right so V faces airflow direction
– Downflow systems: Flip entire housing upside down (V pointing up)
Mounting it backward reduces germ-killing effectiveness by 70% based on HVAC lab tests.
Gather These 7 Tools Before Starting
You’ll need these specific items:
– Power drill with ⅛” pilot bit and 1½” bi-metal hole saw
– #8 × ½” sheet-metal screws (4 minimum)
– Metal foil HVAC tape (not duct tape!)
– Non-contact voltage tester
– Nitrile gloves and safety glasses
– Isopropyl alcohol wipes
– Flashlight
Pro Tip: Most UV air purifier kits (like Haven/Haven Plus) include a template, hole saw, and mounting screws—check your box first. Never skip the alcohol wipes; skin oils on the bulb cause premature failure.
Power Down Your HVAC System Correctly
- Flip both breakers OFF: Locate the furnace/air handler breaker (usually 15–20A) AND the outdoor condenser breaker.
- Test for zero voltage: Press the voltage tester against the furnace’s metal cabinet—no beep = safe.
- Wear protection: Sheet metal edges slice skin like razors, and UVC bulbs degrade if touched bare-handed.
Warning: Skipping breaker verification causes 12% of DIY HVAC electrical injuries. Never assume the thermostat “off” position is sufficient.
Cut the Precise Opening for Your UV Air Purifier
- Hold the template against the plenum 6+ inches past the coil; trace the 1½” circle (or 5 ⅜” square for Haven Plus).
- Drill a ⅛” pilot hole inside the line, then use the hole saw starting at low speed.
- File all burrs smooth with a metal file—rough edges prevent the gasket from sealing, leaking conditioned air.
Common mistake: Cutting too close to the coil header restricts airflow and creates condensation traps. Measure twice!
Mount the Housing Without Air Leaks
- Press the rubber gasket into the housing groove to block air leaks.
- Align the mounting plate; drive screws until snug—stop immediately if metal distorts. Overtightening cracks thin ductwork.
- Route the power cord through the strain relief so it exits perpendicular to the viewport. Tape it to the duct with foil tape.
Visual cue: After mounting, run your finger around the perimeter. If you feel air rushing out when the system runs, reseal with extra foil tape.
Install the UV Lamp to Maximize Germicidal Output
- With nitrile gloves on, wipe the new bulb with alcohol—fingerprints create hot spots that shatter the quartz.
- Insert until it clicks into the socket (Haven Plus requires a 90° clockwise twist).
- For plug-in models: Connect to the 120V outlet. For hardwired: Attach 24V wires to EAC terminals using wire nuts.
Pro Tip: Note the installation date on the included magnet. Bulbs lose 40% effectiveness after 9 months—replace proactively.
Test Operation and Seal Critical Gaps
- Seal every gap around the housing with metal foil tape—air leaks reduce UV exposure time.
- Restore power; within 10 seconds, you’ll see a blue glow through the viewport.
- Run the system 5 minutes; listen for rattles. Tighten screws if needed.
Troubleshooting: No glow? Check the outlet with a lamp tester. Dim glow? Clean the bulb with alcohol—dust blocks UVC rays.
Wire for Automatic Blower Sync (Skip If Using Plug-In)

Tap into your furnace’s G (fan) and C (common) wires:
1. Connect a 24V relay coil across G and C.
2. Wire the relay contacts to switch 120V power to the UV air purifier.
Why this matters: The lamp runs ONLY when the blower operates, extending bulb life by 30%.
Caution: If your furnace lacks a C-wire, hire an electrician—improper wiring trips safety limits.
Prevent These 3 Costly Maintenance Mistakes
Monthly Check: The 10-Second Viewport Test
Peek through the viewport—no blue glow means immediate action needed. Causes: tripped breaker, failed bulb, or loose wiring. Ignoring this lets mold regrow in 72 hours.
Quarterly Cleaning: The Alcohol Wipe Fix
Power down, remove the bulb, and wipe with alcohol. Dust on the quartz sleeve blocks 50% of UVC output. Do this every 3 months—set phone reminders.
Annual Bulb Replacement: The Date You Must Remember
Replace standard bulbs every 9–12 months (amalgam bulbs last 24 months). Never exceed 12 months—ineffective bulbs waste electricity while giving false security. Dispose at hazardous waste facilities (contains mercury).
Fix These 4 Common UV Air Purifier Failures Fast
| Problem | Immediate Solution |
|---|---|
| Mold smell persists | Install second lamp on opposite coil side; clean coil with foaming cleaner |
| Water inside housing | Reseal cutout with silicone caulk; add drip loop to power cord |
| Plastic drain pan warping | Install reflective aluminum shield; replace pan with stainless steel |
| Lamp flickers on/off | Check wire nut connections at EAC terminals; tighten loose screws |
Critical reminder: Never stare at an operating UV lamp—corneal burns occur in under 10 seconds. Always verify glow through the viewport.
Protect Your HVAC Warranty During Installation
- Drill only in flat plenum areas—avoid coil cabinets (voids Carrier/Trane warranties).
- Use manufacturer-approved kits (like Haven Plus)—off-brand units lack UL certification.
- Pull permits for hardwired 120V connections—required in 32 states.
Pro Tip: Photograph each step before sealing. If warranty claims arise, proof of correct installation overrides manufacturer excuses.
Upgrade Your UV Air Purifier System Smartly
- Add a second lamp for 360° coil coverage—doubles mold kill rate on multi-slab coils.
- Install a PCO filter (like Haven Plus) to destroy VOCs and cooking odors that UVC misses.
- Pair with a smart humidistat to keep indoor humidity below 50%—mold can’t grow below this threshold.
Within 72 hours of correct UV air purifier installation, you’ll notice:
✅ No more “wet dog” smell from vents
✅ Reduced allergy symptoms (fewer airborne spores)
✅ Cleaner evaporator coil visible through the access panel
Log your next bulb replacement date now—today + 12 months—and enjoy air that’s visibly and noticeably fresher. Most homeowners skip only one critical step: quarterly bulb cleaning. Do this, and your UV air purifier will outperform portable units for years.


