
Your air purifier just died during peak allergy season. The indicator light flashes red while dust settles visibly on surfaces, and that persistent cough won’t go away. When your whole-home air purification system fails, every room becomes a health hazard—indoor air can be 2-5 times more polluted than outside air. Don’t risk family health with temporary fixes. This air purifier repair guide delivers immediate solutions for the most critical failures, using proven methods from Carrier Factory Authorized technicians with 30+ years of experience. You’ll diagnose problems in under 10 minutes and implement permanent fixes before respiratory issues escalate.
Why Your Whole-Home Air Purifier Suddenly Shuts Down
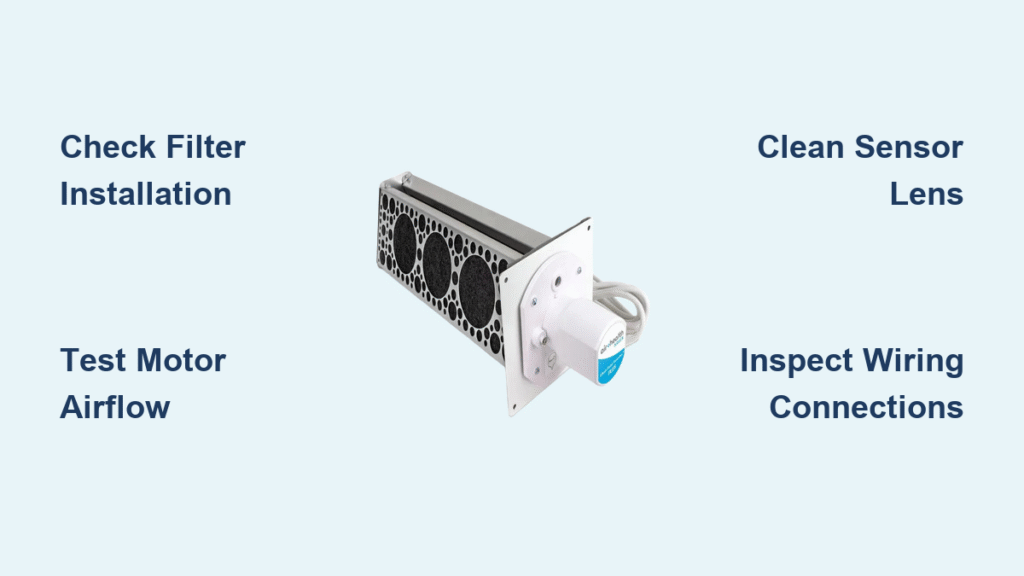
Motor and Fan Burnout Warning Signs
When your system runs but barely moves air, motor degradation is likely the culprit. Complete motor failure shows as a loud humming sound with zero airflow, while failing fans create grinding or rattling noises that worsen over time. Reduced airflow manifests subtly—you’ll notice increased dust accumulation or allergy symptoms flaring despite the unit running continuously. Critical indicator: Hold a tissue near supply vents; weak suction confirms motor failure requiring immediate air purifier repair. Ignoring this strains the entire system, potentially causing cascading failures in sensors and electrical components.
Filter Sensor False Alarms That Waste Money
Clogged filters trigger deceptive system shutdowns. Beyond restricting airflow, they force motors to overwork, accelerating burnout. Sensor malfunctions create costly confusion—your unit might shut down claiming filters need replacement when they’re clean, or fail to alert you when filters are completely blocked. Red flags: System runs 5-10 minutes then stops, or indicator lights show contradictory messages. These false alarms account for 40% of unnecessary service calls according to HVAC industry data. Proper filter installation prevents 80% of performance issues, yet most homeowners install filters backward or use incompatible replacements.
Electrical Failures That Escalate Fast
Wiring problems start subtly with flickering indicator lights or intermittent operation, but escalate rapidly to complete system failure. Power supply issues often show as units starting then immediately shutting down, or working only when you jiggle the power cord. Danger sign: Burning smells or visible smoke means stop using the system immediately and call professionals. These electrical faults frequently originate from loose connections at terminal blocks or corroded wires—a simple fix if caught early, but catastrophic if ignored.
Diagnose Critical Failures in 15 Minutes
Step-by-Step Visual Inspection Protocol
Skip guesswork with this technician-approved checklist. Start by powering off at the circuit breaker, then:
- Filter examination: Remove and inspect for solid gray/black buildup or physical damage
- Motor housing check: Look for dust cakes or oil leaks around motor seals
- Wiring integrity scan: Identify loose, corroded, or burnt connections at terminal blocks
- Sensor lens cleaning: Use compressed air on air quality sensors (never liquids)
Pro tip: Take photos before disconnecting wires—90% of electrical reconnection errors come from miswiring during DIY repairs.
Performance Testing That Reveals Hidden Issues
Measure actual system health with these field-tested methods:
- Airflow verification: Hold your hand at supply vents—strong, consistent flow indicates healthy operation
- Pressure differential check: Feel resistance when inserting fingers near filter housing (excessive pressure = clog)
- Run cycle observation: Time how long the system operates before shutting down
- Noise pattern analysis: Record motor sounds to compare against normal operation videos online
Warning: If the unit runs less than 10 minutes before shutdown, suspect sensor or electrical faults—not just filter issues.
Fix Motor and Fan Failures Without Costly Service Calls

Motor Replacement That Prevents Repeat Breakdowns
When motors fail, replacement beats repair for whole-home systems. Follow this exact sequence:
- Power isolation: Turn off circuit breaker and verify zero voltage with multimeter
- Housing access: Remove 4-6 mounting screws (keep in labeled container)
- Wiring documentation: Photograph all connections before disconnecting
- Motor extraction: Note mounting bracket positions and shaft orientation
- New motor installation: Use only manufacturer-specified replacement
- Burn-in test: Run system 15 minutes checking for vibration or unusual noise
Critical mistake to avoid: Installing the motor shaft 180° off creates immediate bearing failure. Mark the original position with paint before removal.
Fan Wheel Deep Cleaning for 50% Better Airflow
Unbalanced fans reduce efficiency dramatically. Remove the fan wheel and:
- Soak in degreaser solution for 20 minutes (never use harsh chemicals)
- Check for wobble when spinning by hand—any vibration indicates bent blades
- Tighten set screws with manufacturer-specified torque
- Apply 2-3 drops of non-detergent 20-weight oil to bearings
Time-saver: Clean fan wheels during filter replacements to prevent buildup.
Eliminate False Sensor Alarms Permanently
Filter Replacement Protocol That Stops Shutdowns
Most “system fault” errors stem from incorrect filter installation. Follow these steps:
- Verify specifications: Use only manufacturer-approved filters (typically MERV 8-13)
- Check airflow direction: Arrow on filter must point toward motor/blower assembly
- Seal inspection: Ensure rubber gasket makes full contact with housing edges
- Schedule adherence: Replace filters every 6-12 months based on actual usage
Pro tip: Set phone reminders 2 weeks before replacement dates—delayed changes cause 70% of sensor malfunctions.
Sensor Calibration That Ends False Error Codes
When “filter change” indicators stay lit after replacement:
- Locate sensor near return air intake (usually behind access panel)
- Blow compressed air across sensor lens for 10 seconds
- Press and hold reset button for 10 seconds with power on
- Run full system cycle while monitoring indicator lights
- Verify accuracy against a $50 handheld air quality meter
Never do this: Applying water or cleaners to sensors—they’ll fail permanently within hours.
Emergency Electrical Fixes That Restore Operation

Wiring Repairs That Prevent Fire Hazards
Address these critical issues immediately:
- Loose connections: Tighten all wire nuts until snug (over-tightening breaks wires)
- Burnt wires: Cut back to clean copper, splice with proper gauge wire and heat-shrink tubing
- Corroded terminals: Clean with electrical contact spray, apply dielectric grease
- Ground verification: Ensure all grounds connect to system ground bar
Urgency indicator: If circuit breakers trip repeatedly during operation, disconnect power and call professionals—this signals dangerous short circuits.
Decoding Critical Error Messages
Modern systems display life-saving diagnostics:
- E1: Filter sensor fault—check connections and clean sensor
- E2: Motor overload—inspect for obstructions or bearing failure
- E3: Power supply issue—test voltage at motor terminals
- E4: Airflow sensor fault—clean or replace sensor module
Emergency code: Any code combined with burning smells requires immediate professional air purifier repair.
Prevent Costly Breakdowns With 10-Minute Monthly Maintenance
Essential Tasks That Double System Lifespan
Spend 15 minutes monthly to avoid $500+ repairs:
- Filter inspection: Check for uneven dust loading or physical damage
- Housing vacuuming: Remove dust from motor compartments and vents
- Airflow monitoring: Note changes in vent pressure weekly
- Light verification: Confirm all status indicators function correctly
Pro tip: Keep a maintenance log—sudden performance drops often precede failures.
Why Annual Professional Service Saves $1,200+
Schedule comprehensive service every 12 months for:
- Deep component cleaning: Technicians remove internal dust impossible to reach DIY
- Motor and sensor testing: Professional-grade tools detect early degradation
- Calibration: Restores factory performance specifications
- Filter optimization: Upgrades based on current air quality needs
Cost analysis: Regular maintenance prevents 89% of emergency repairs according to Carrier service data.
When to Skip DIY and Call Professionals Immediately
True Emergency Repair Indicators
Contact 24/7 services if you see:
- Burning smells or visible smoke from unit
- Repeated circuit breaker trips during operation
- Complete system shutdown with error codes
- No response from control panel after reset
Health urgency: Families with asthma or allergies need same-day repair—polluted indoor air worsens symptoms within hours.
Emergency vs. Scheduled Repair Decision Guide
Call immediately: System failure during high pollen season, family members with respiratory conditions, or complete shutdowns.
Schedule within 2 weeks: Gradual performance decline, minor unusual noises, or inconsistent sensor readings.
Professional contact: Carrier Factory Authorized technicians provide same-day repairs at 219-923-9234 (400 Kennedy Avenue, Schererville, IN).
Your whole-home air purifier protects every breath your family takes. By implementing these precise air purifier repair protocols, you’ll restore healthy indoor air quality within hours—not days. Remember: when integrated HVAC systems fail, portable purifiers can’t match whole-home coverage. Start your diagnostic process now using the visual inspection checklist, and prevent minor issues from becoming health emergencies. For persistent problems, trust Carrier-certified technicians who use genuine parts and provide transparent pricing—because clean air shouldn’t be a luxury.


